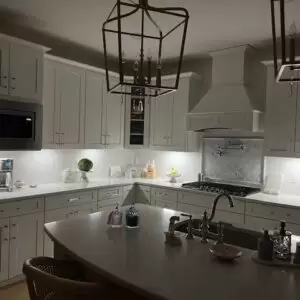
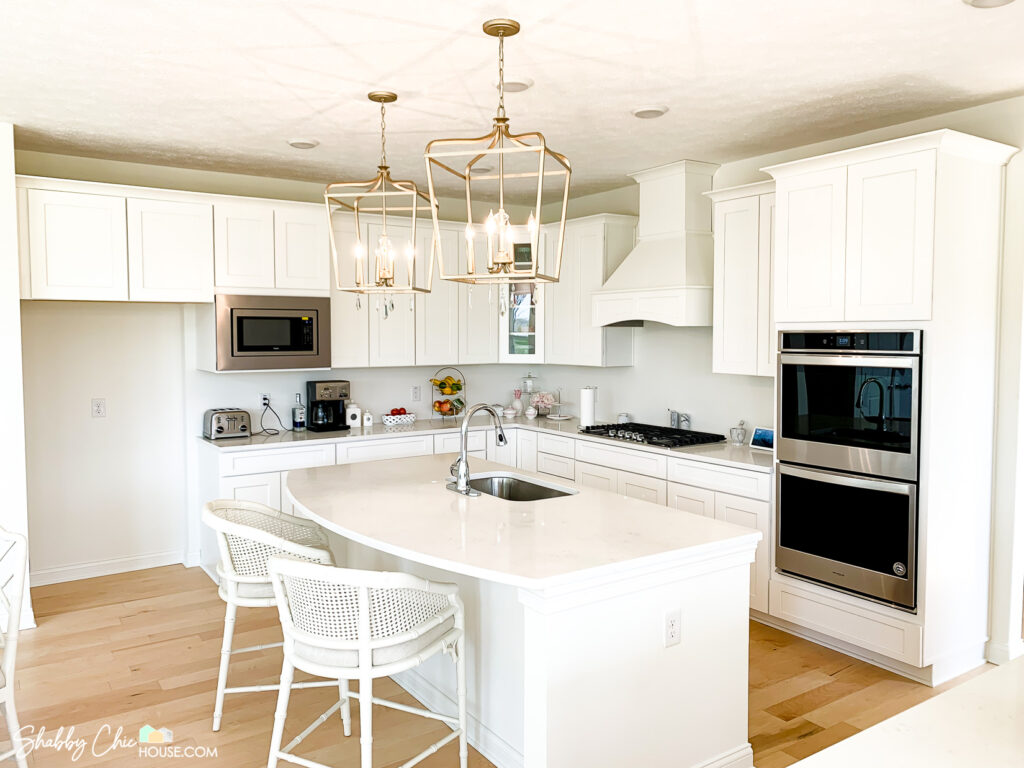
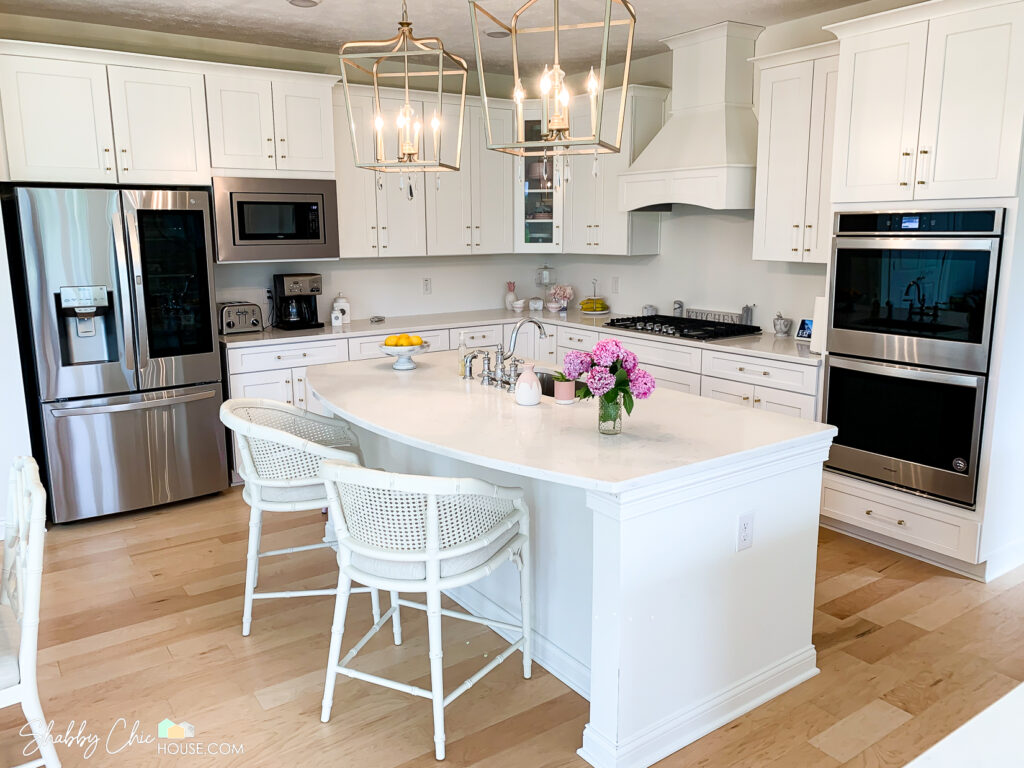
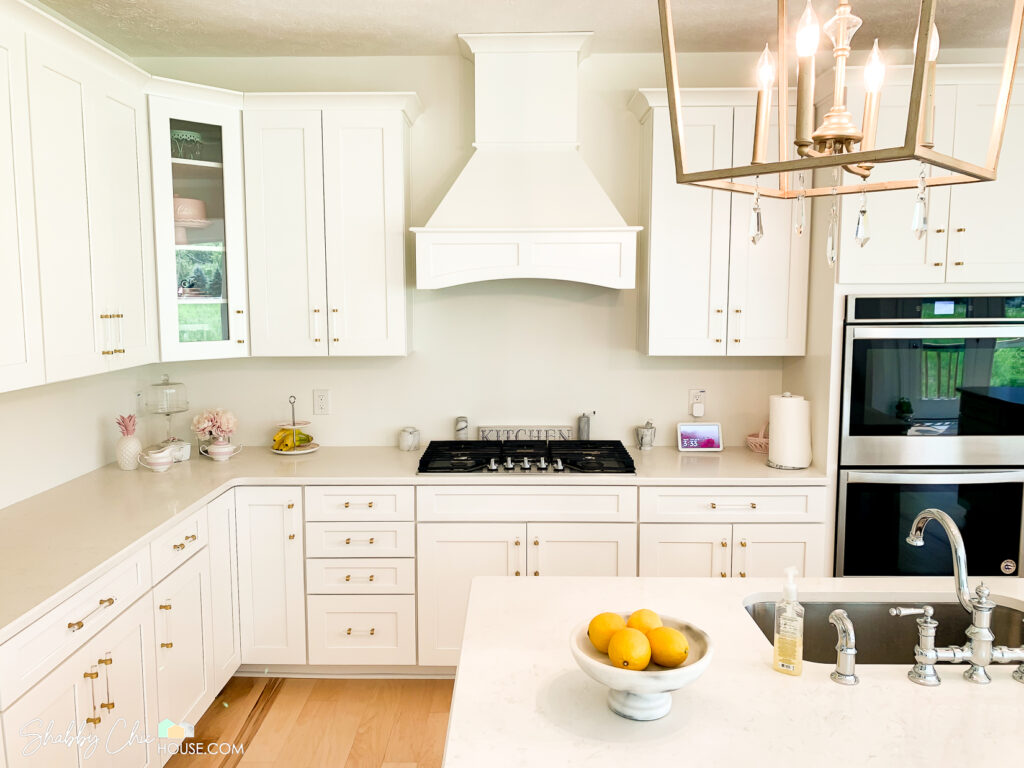
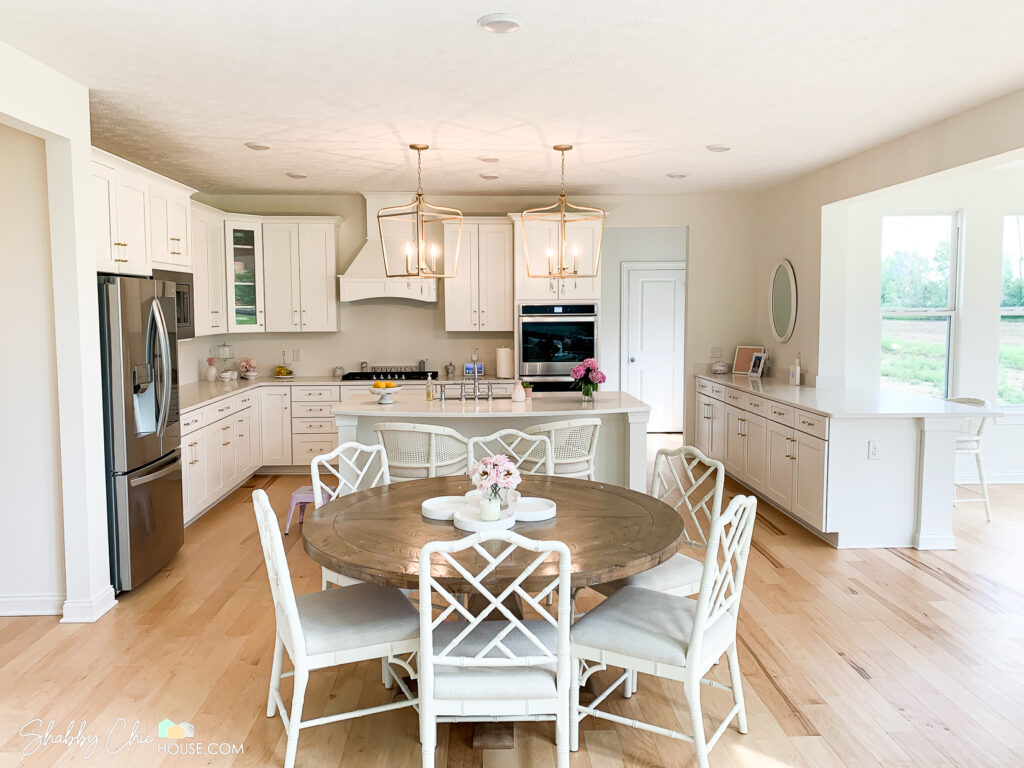
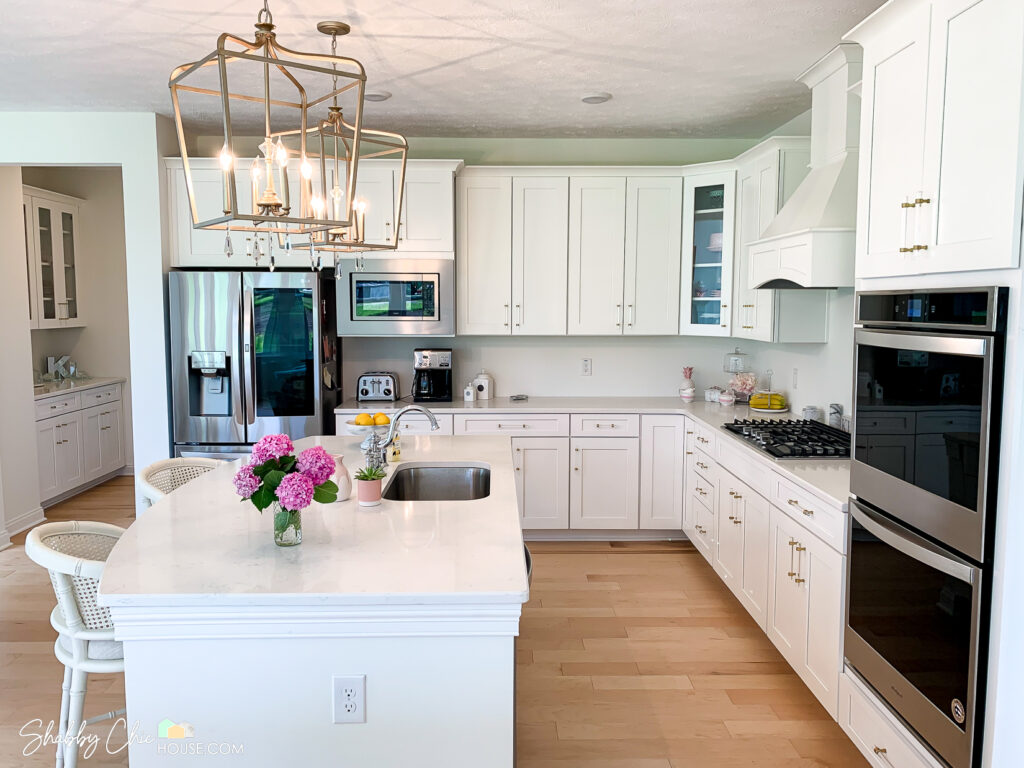
We went all out in the kitchen of the new ShabbyChicHouse. We purchased beautiful white shaker cabinets, a matching decorative range hood, quartz countertops, a double oven and even a special fridge that makes craft ice cubes just for cocktails. The only problem was, our builder didn’t have a single cabinet pull that matched our vision and style, so we had to purchase and install our own.
Installing cabinet hardware can be pretty intimidating. Cabinets are not cheap, so it’s pretty scary to think about possibly putting a hole in the wrong place and believe it or not…it’s fairly easy to do!
In this article I’m going to walk you through all the tips, tricks and tools I used when installing my cabinet hardware and even what to do if you do drill a hole in the wrong place.

Selecting Cabinet Handles
Your first step is to pick out and plan your handle style, size(s) and placement. We wanted to go with a two-hole cabinet pull and were looking at a few modern gold options. We found three that we liked and purchased one of each. This allowed us to hold each handle up to our cabinets and see how they looked in real-life.
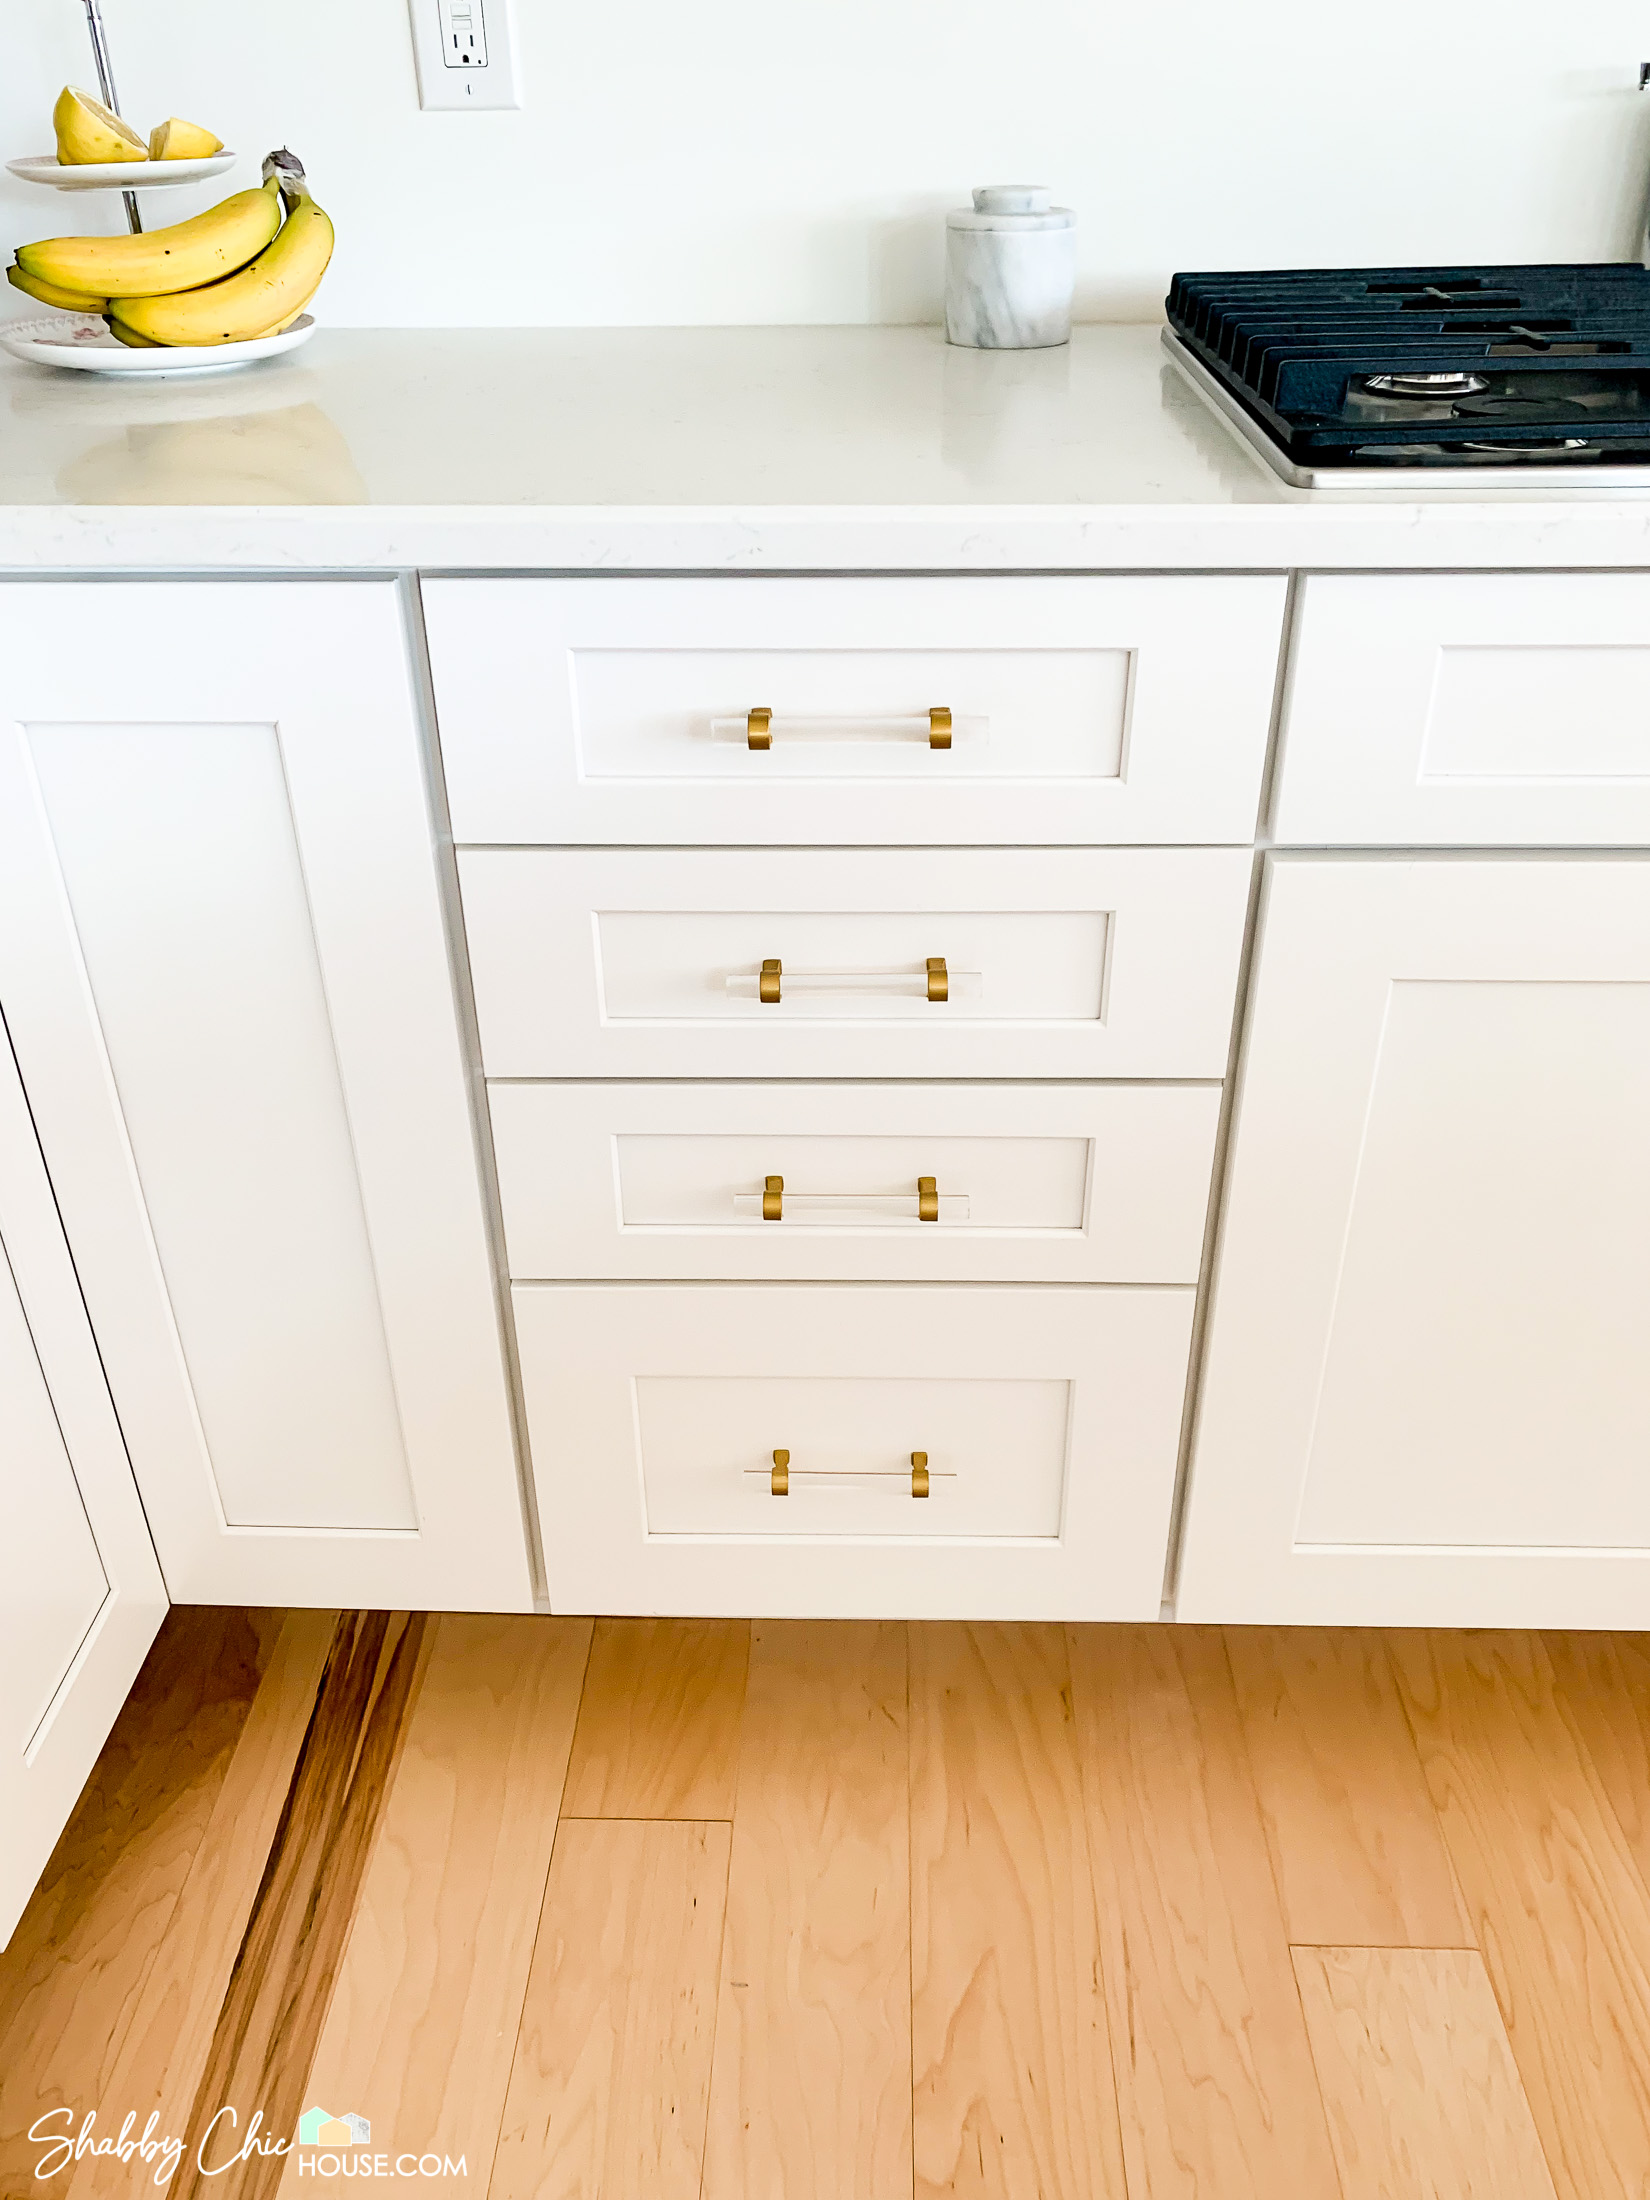
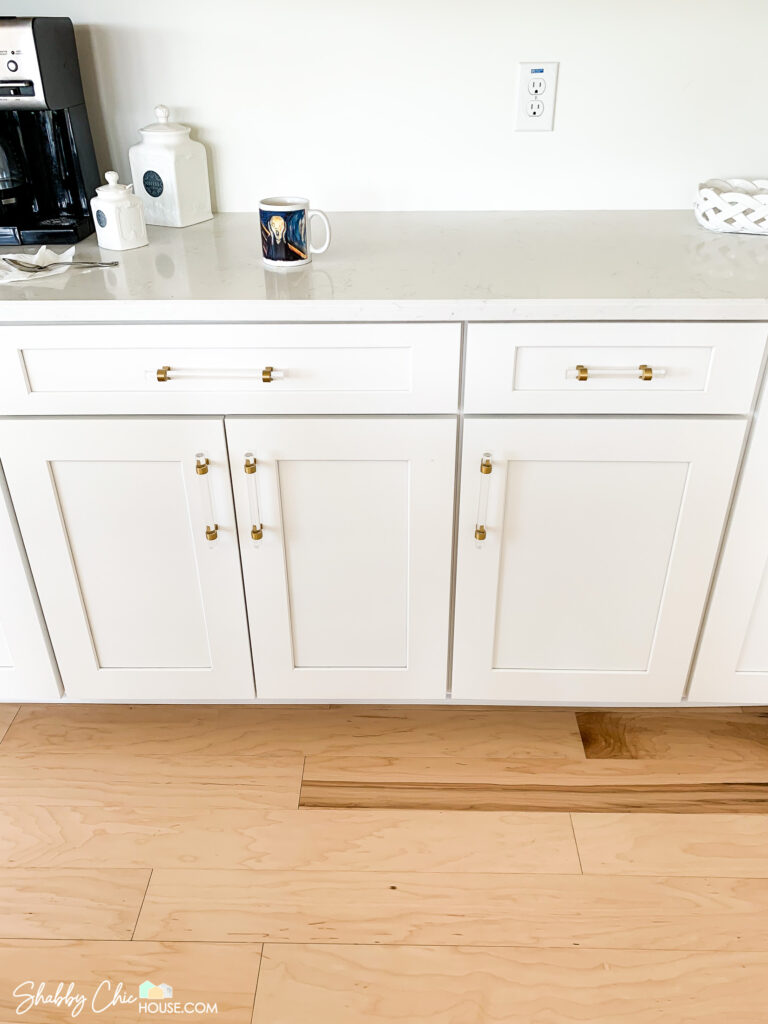
In the end we ended up going with the awesome acrylic and gold cabinet pulls at the bottom of the photo below. The great thing is that cabinet handles come in some common sizes, so if we ever get tired of gold, we can swap them out to almost any color with minimal effort (and even get the exact acrylic handles, but in oil rubbed bronze or polished chrome!)
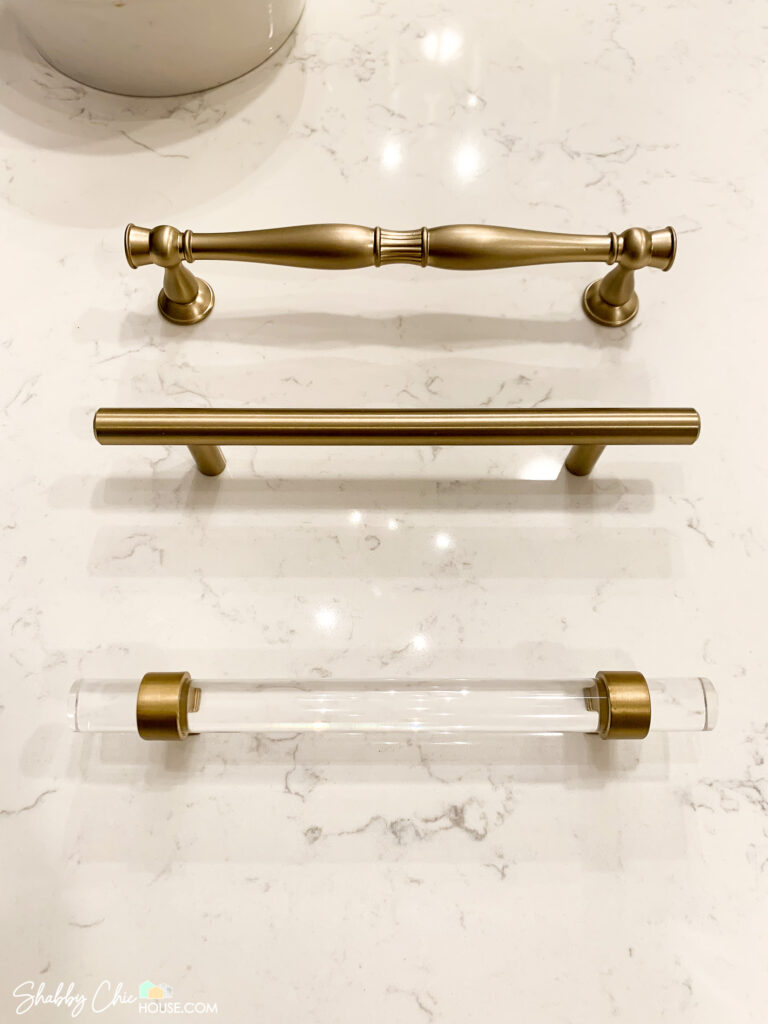
In our kitchen and butler’s pantry we have several different size cabinets doors as well as several different size cabinet drawers. With such a large variations in size for both doors and cabinets, we chose to utilize three different size handles (.96mm, 128mm and 160mm).
The .96mm handles work best for your smallest overhead cabinets and smaller drawers that measured 7-12 inches on the inside panel of the shaker drawers. The .128mm handles work great for most of your medium to large cabinets. And we only used a few of the 160mm handles on the cabinet drawers that measured greater than 24″ on the inside panel.
Write down your plan and notate which cabinets will get what handles. More importantly, be very conscious to check your plan before you drill each and every cabinet door and drawer. It is extremely easy to get in a groove and drill a hole in the wrong place.
Tools/Supplies Needed
- Cabinet Hardware Template
- Power Drill
- Phillips Head Screwdriver
- Measuring Tape
- Pencil
- Level
- Hack Saw
Cabinet Hardware Template Set
I found this cabinet hardware template fairly helpful and easier than worrying about trying to create some sort of homemade template. At only $9.98 for a drawer template, a door template and drill bit I figured it was worth a try.
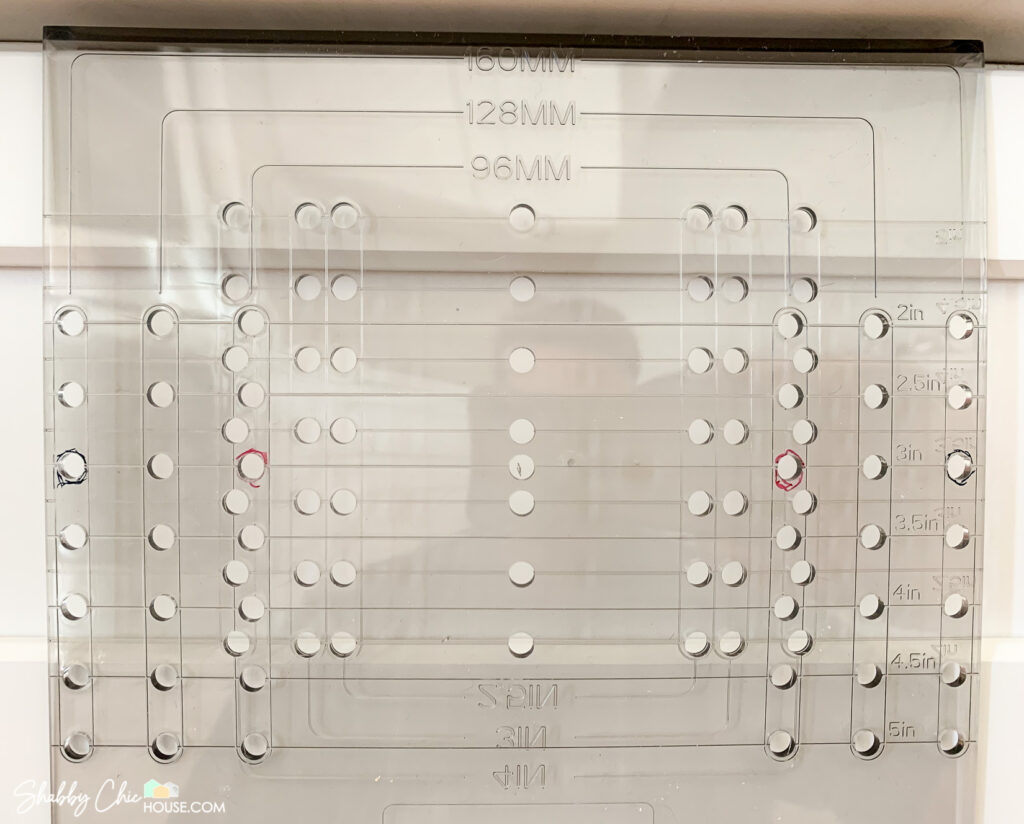
The cabinet drawer template that came in this bundle included the 96MM, 128MM and 160MM size template options I needed as well as other template holes for 2″, 2.5″, 3″, 3.5″, 4″, 4.5″ and 5″.
At the same time, while the drawer template worked well for me, the door template did not. This issue was when I placed the template on the door, it did not have template holes that match up with where I wanted to drill my two holes on the door. While I could make my own hole(s) in the plastic template to suit my needs, I went a different route, which I’ll dive into later on in this article.
Installing Drawer Pulls
Before you can use your cabinet drawer template you need to measure and mark the very center of each drawer faceplate. Use a pencil as you’ll need to erase this mark later.
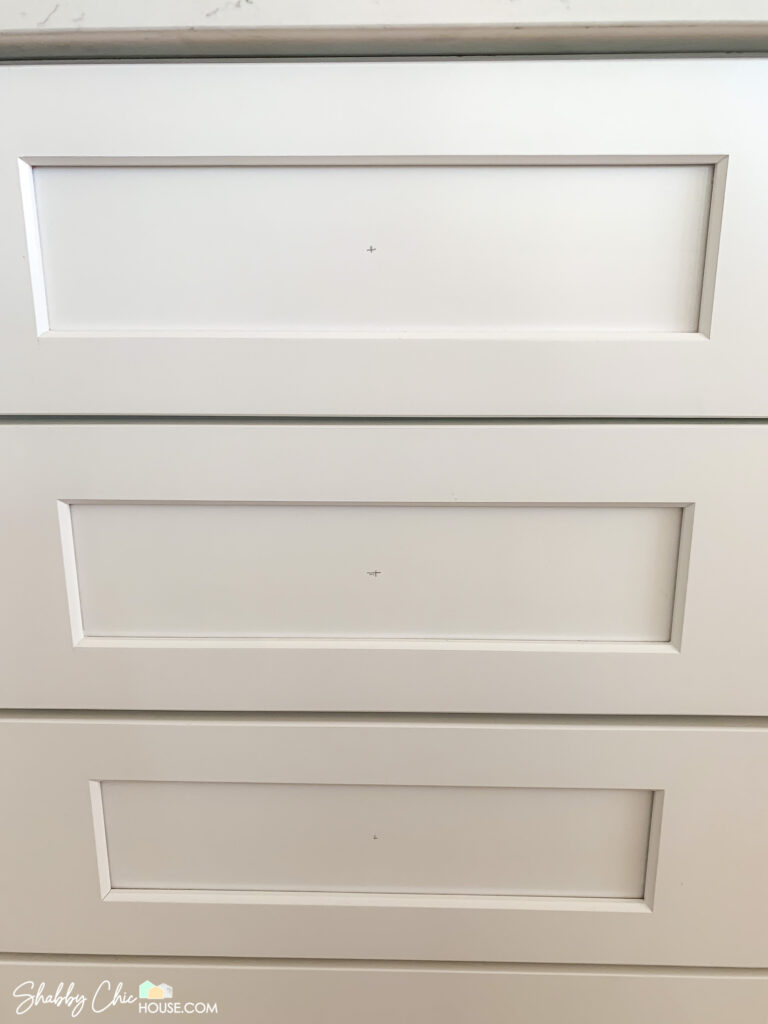
First, measure the width of your drawer and divide by 2 to find the length to the exact center. Then, make a vertical line that is roughly 1/8″ long.
Next, measure from the top to the bottom of the drawer faceplate (or inner recessed area if a shaker style) and make a horizontal hash mark.
Once you’ve made both hash marks, you should have a crosshair in the very center of the drawer. Next, take a step back and observe your crosshair. Does it look centered on the drawer? Is too far right or left? Is it too high or too low?
To be safe, follow this process for each and every drawer to ensure your crosshair is in the dead center of each and every time. I share this bit as some side-by-side cabinets may appear to be the same size to the naked eye, but may actually differ in size. For example – I have six cabinets in a row that all look to be the same size, but four of the drawers are 21.5″ and two are 19″.
You may have heard the old adage “Measure Twice, Cut Once.” That applies here!
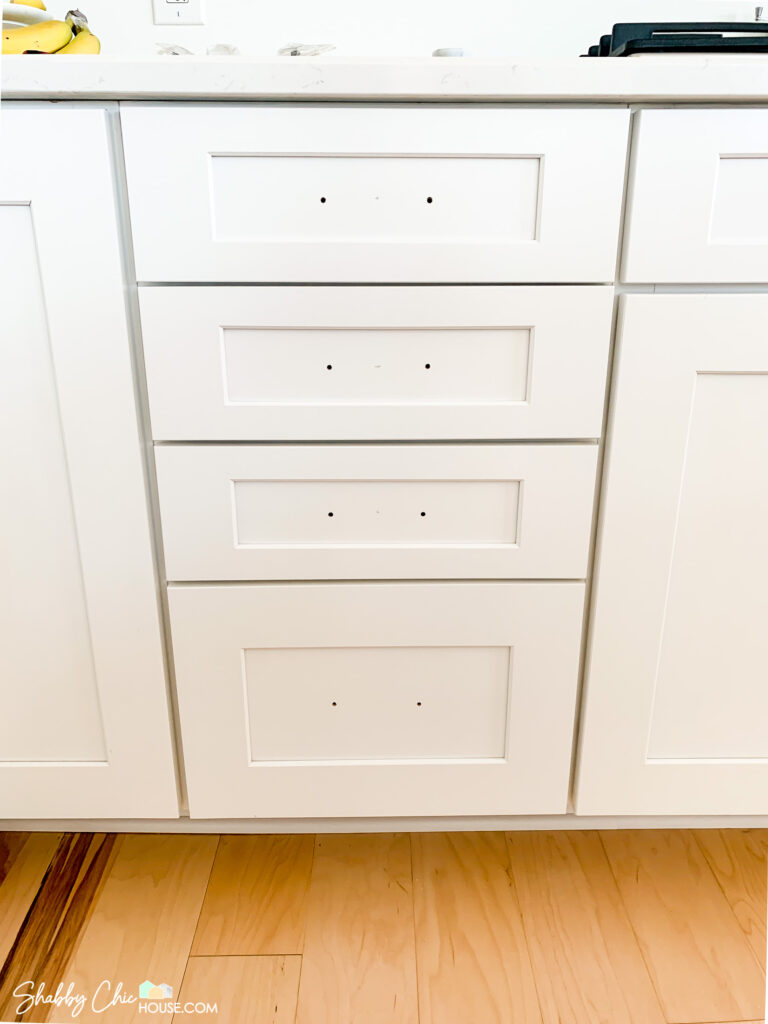
Using a Cabinet Hardware Template
Now that you have the center of your drawers marked, you’re ready to mark the two spots where you’ll actually be drilling. Rest your cabinet drawer template tool on the top of the drawer and line it up, so your crosshair mark appears in the center circle.
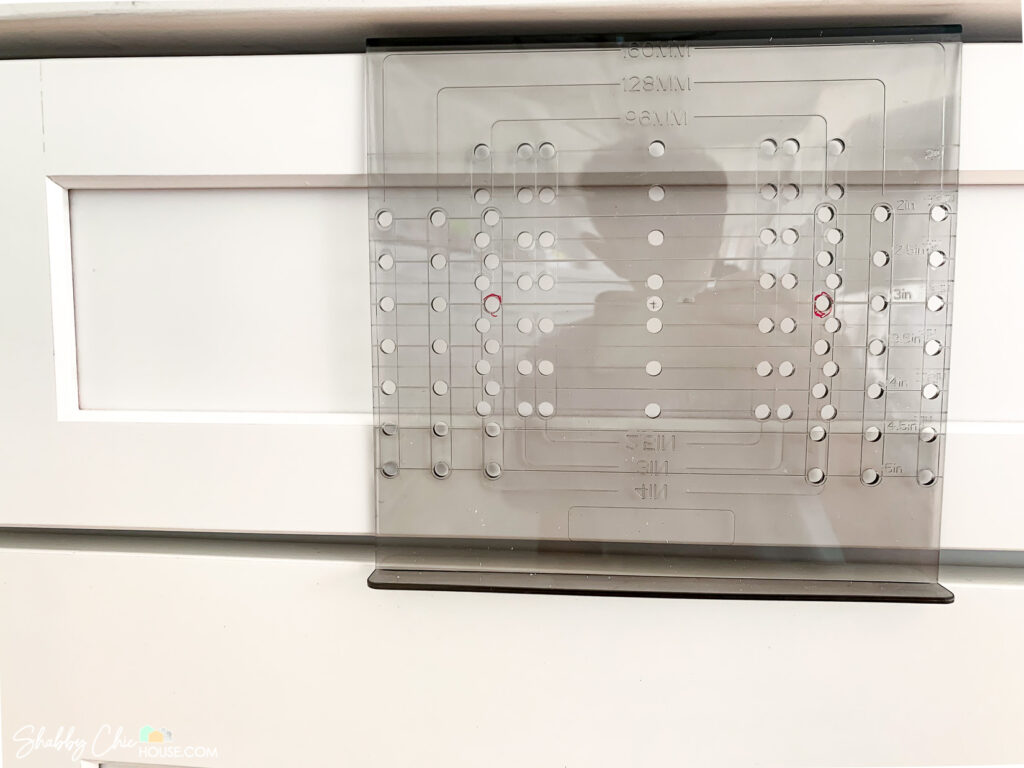
Next, find the template size/option that matches up with your handles. For example, on this drawer I installed 96MM handles.
Locate the 96MM mark and then follow those lines down to the holes that are level with your center hashmark. Then make your two drill marks.
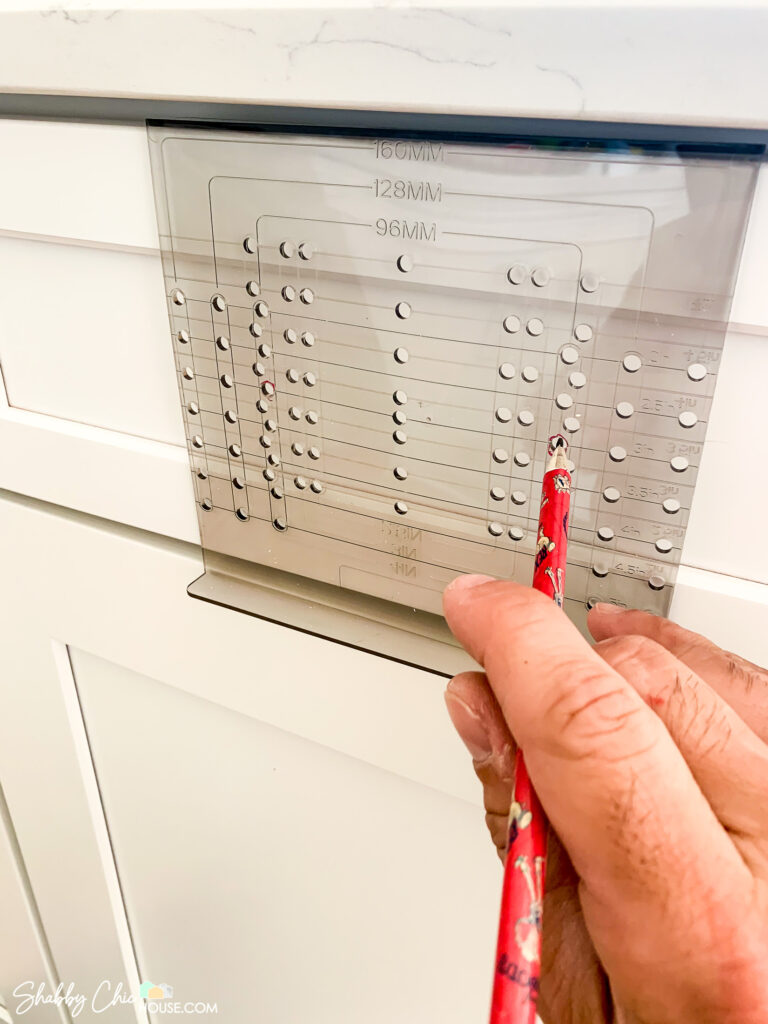
With there being so many holes on this template, I marked mine with a red sharpie to ensure that I used the proper template holes for each and every drawer that got a 96MM handle.
Later, I used a blue sharpie to mark the template holes for my 128MM handles and a black sharpie for my 160MM handles.
After you’ve marked your two holes, take a step back again. Do they look centered? If you hold up your handle does it look right? Does it look centered?
If so, you’re finally ready to drill.
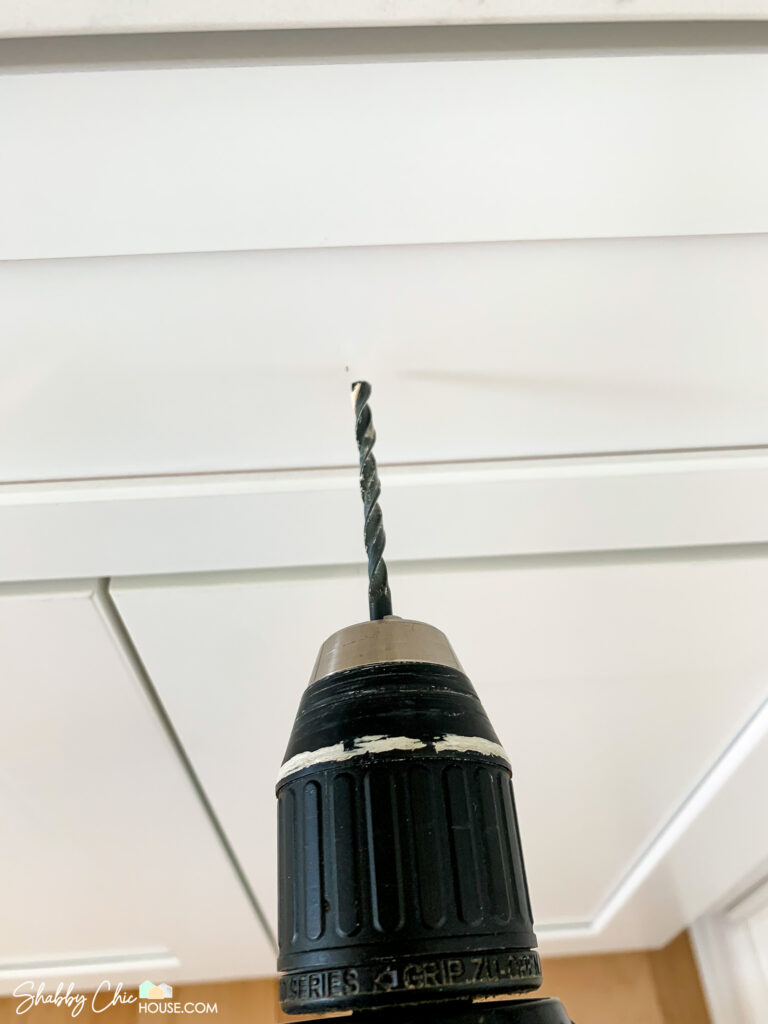
Drilling Holes for your Cabinet Hardware
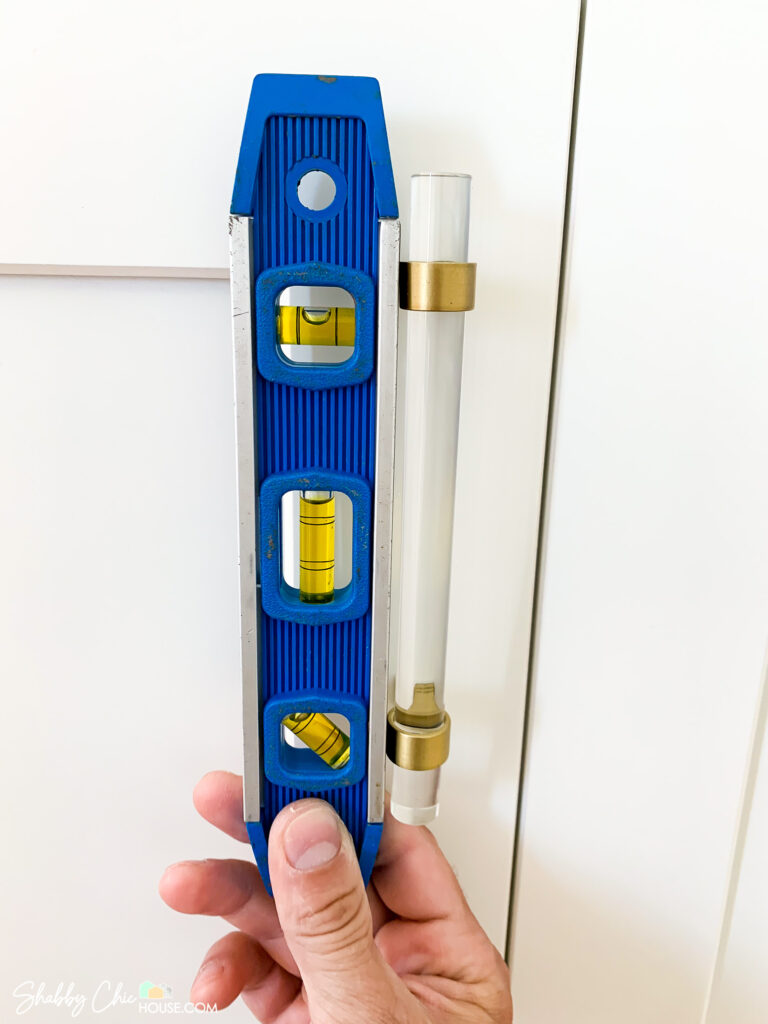
When drilling, be conscious to keep your drill bit as perpendicular to the ground as possible. The slightest tilt up, down, left or right can make the handle fit a bit funky.
After your holes are drilled, you’re ready to attach your handles.
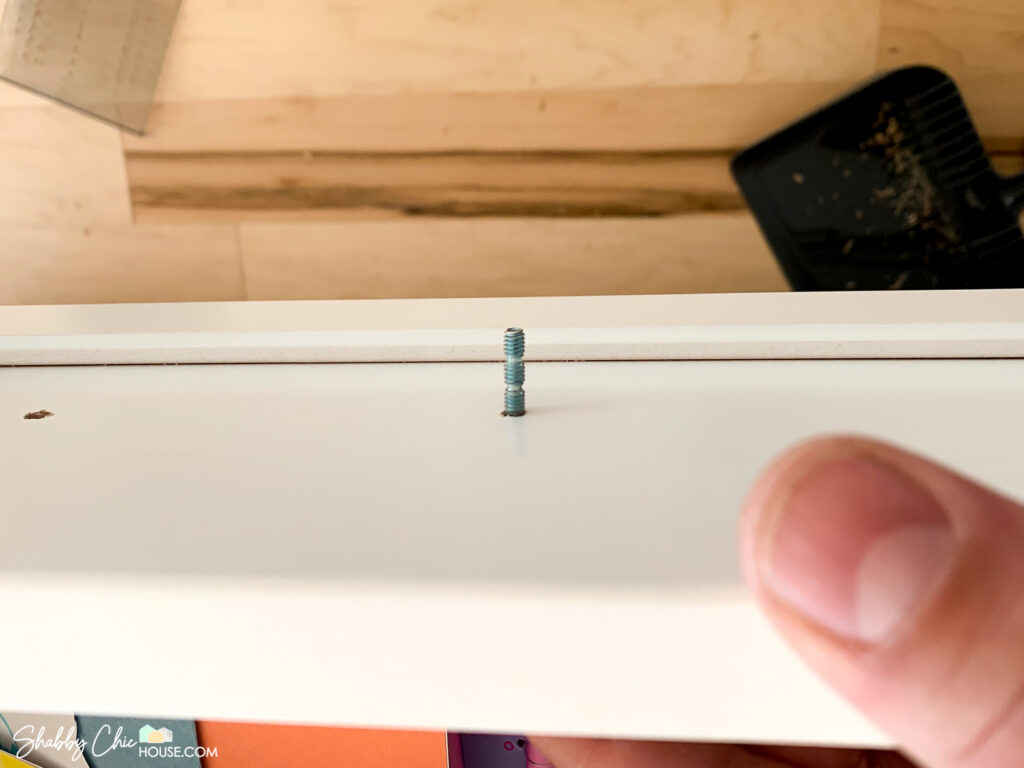
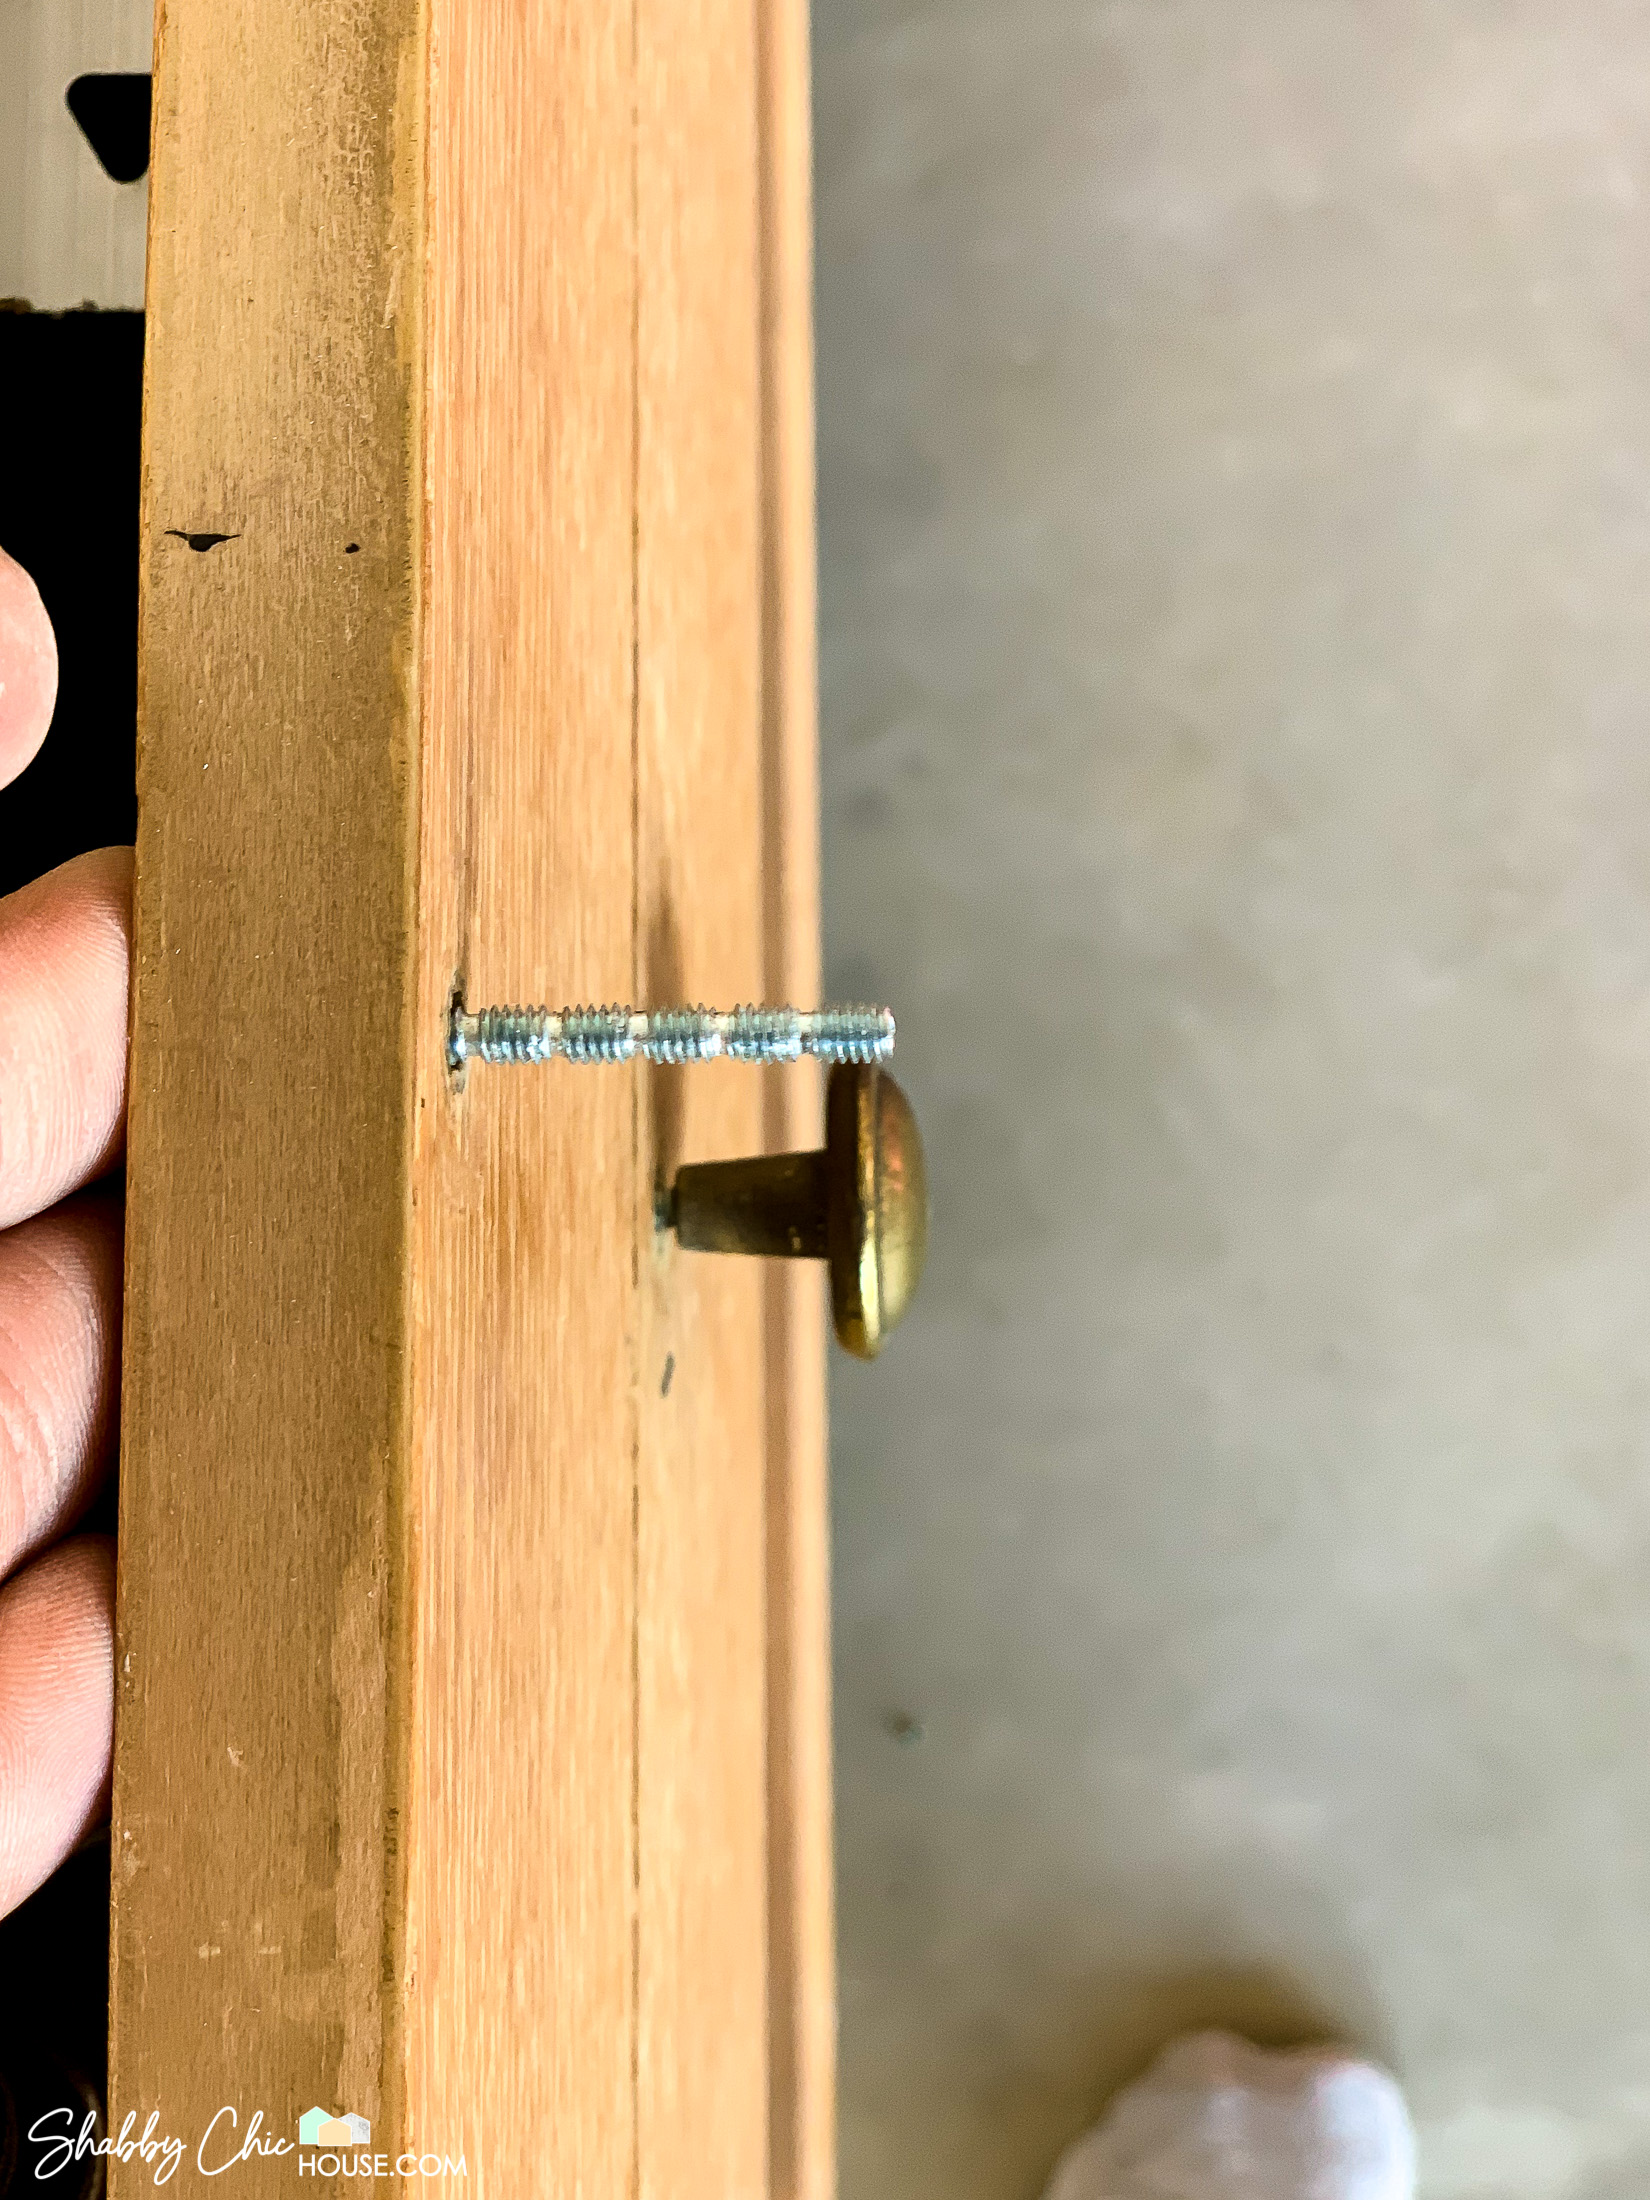
Most likely, your handles will come with two different length screws, like in the photo below. The shorter screws are for your cabinet doors. The longer screw are for drawer handles.
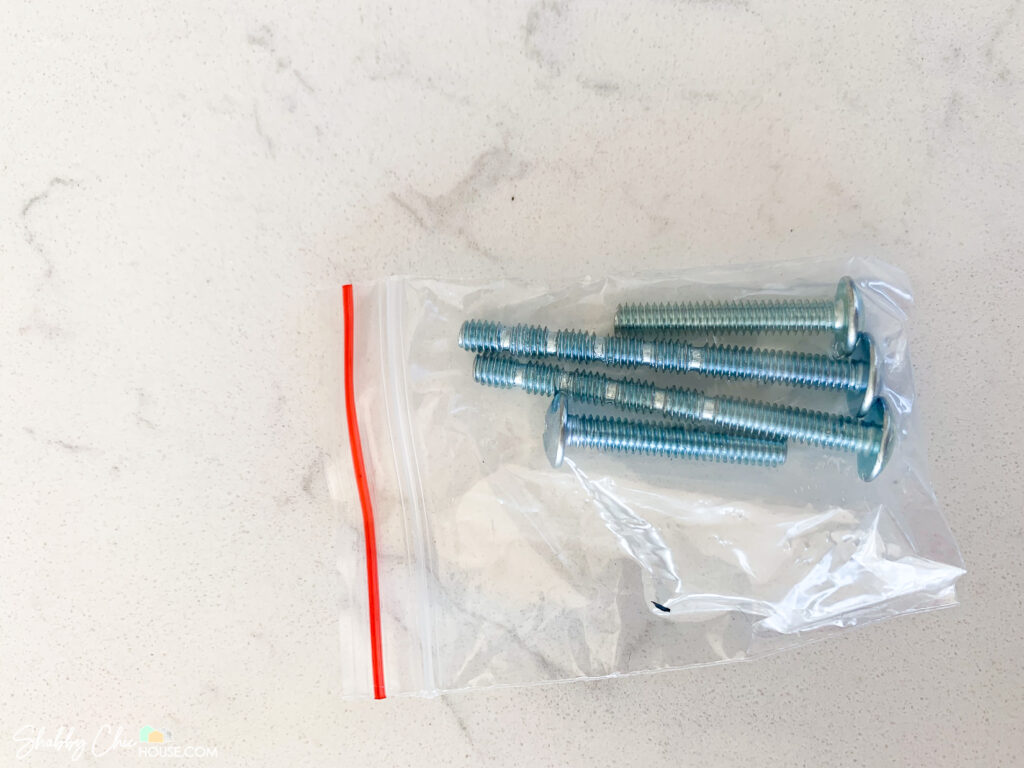
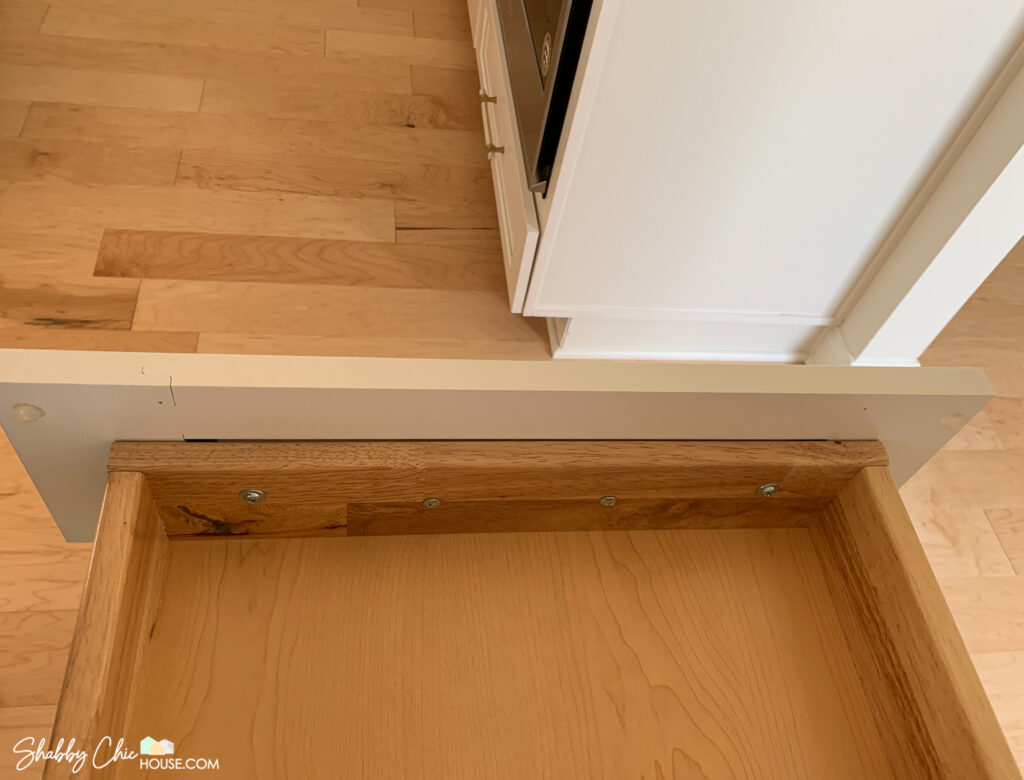
The reason you need a longer screw for your drawers is because you need to go through both the faceplate as well as the drawer itself (see photo below). These longer screws often have gaps in the threading allowing you to cut the screws to the proper length.
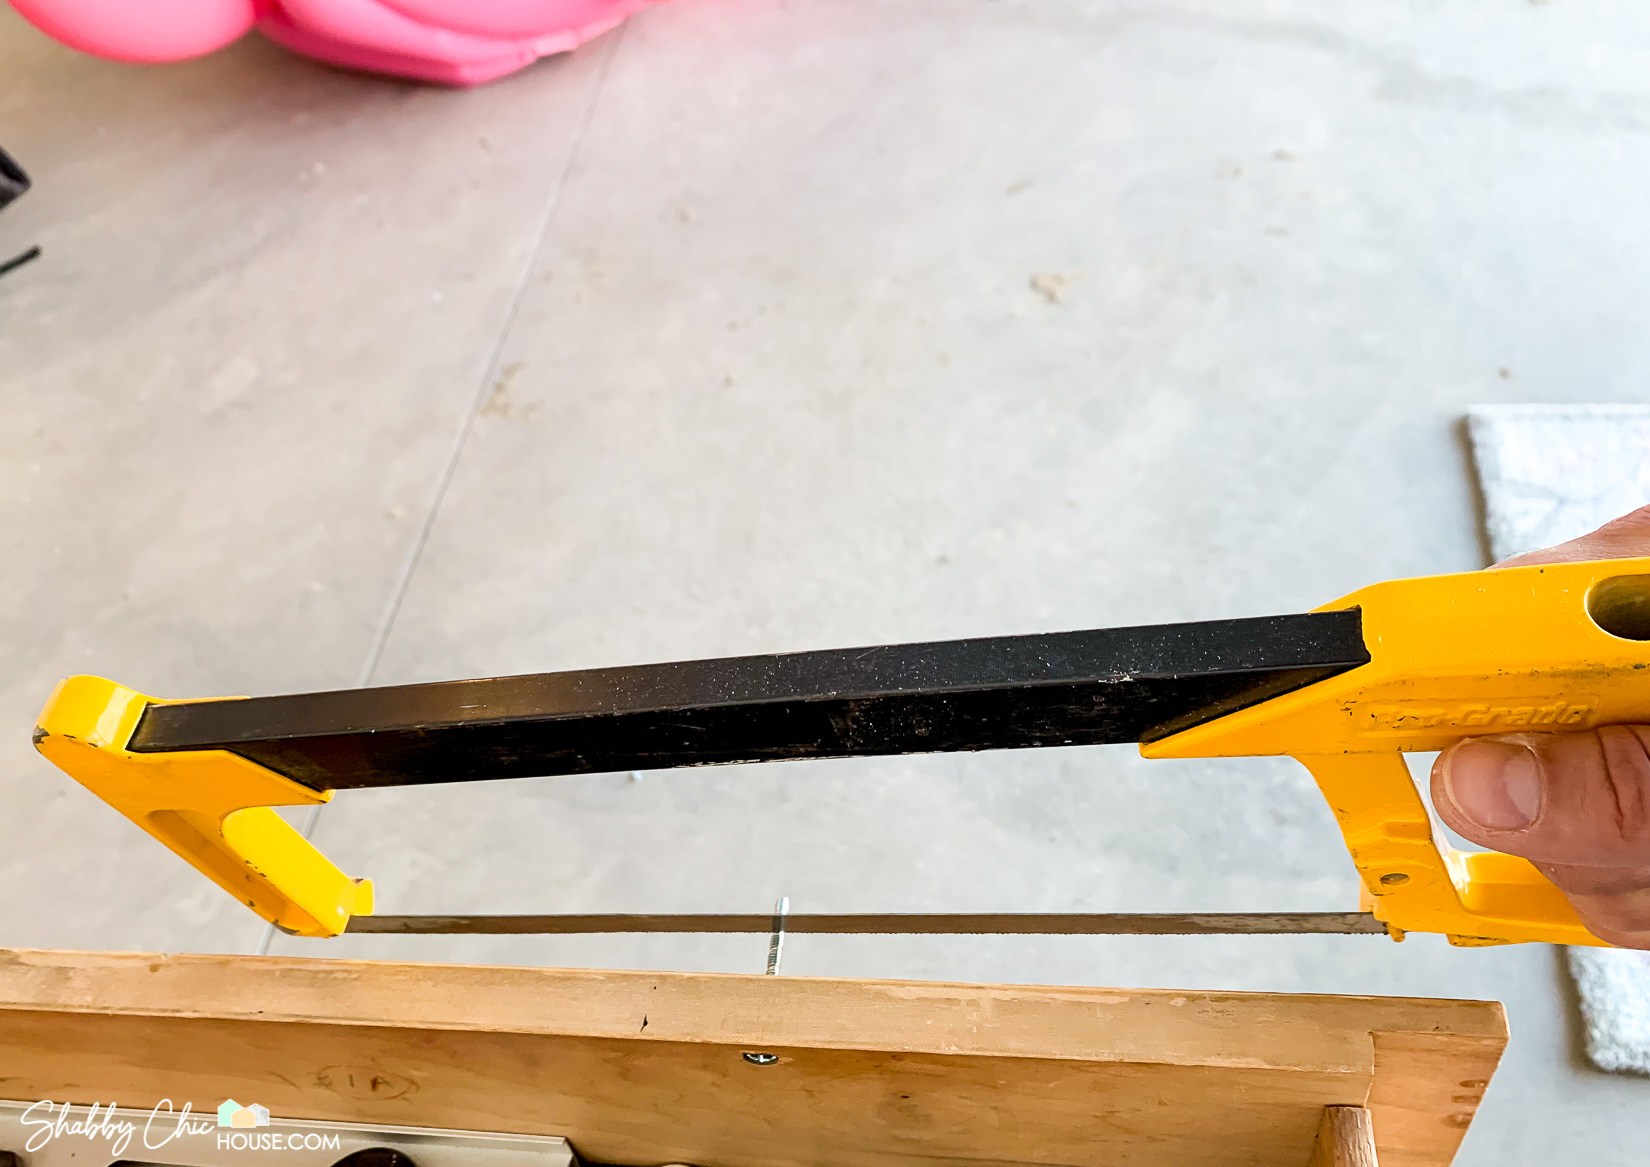
Cutting your Cabinet Hardware Screws to Size
If you take one of the longer screws and stick it in your drawer you can see exactly how much you need to cut off. So from the image below, I can tell that I need to cut the screw at the second thread gap down. That will allow me to get 6-7 turns to tighten the handle, before it butts up firmly against the faceplate.
Unfortunately, I didn’t have a vice on hand, so I just used an old cabinet I had out in the garage to hold the screw while I cut it. I simply removed the cabinet’s knob, inserted my screw and began cutting with my hacksaw.
Now that your holes are drilled and your screws are cut to size, you can screw on your handles. As you do, take note of how the screws feel in the holes you drilled. Do they feel angled in the wrong direction? Do they feel like they don’t match up with the handles at all? If so, you most likely did not drill your holes perfectly perpendicular. If that’s the case drill the holes out a TINY bit more and to give you handles a little room to play. The big thing here is to make sure that the screws sit comfortably and are not drilled in a way that puts unnecessary stress or your door or faceplate, which could potentially cause cracking or other issues over time.
Installing Cabinet Door Pulls
While the cabinet template tool worked perfectly for me, the door template tool did not. Unfortunately, it did not have a hole that matched up with where I wanted to drill/install my handles. So in this section, I’ll share a simple and easy way to measure and install your cabinet door handles without a template tool.
Deciding the placement of your Cabinet Door Hardware
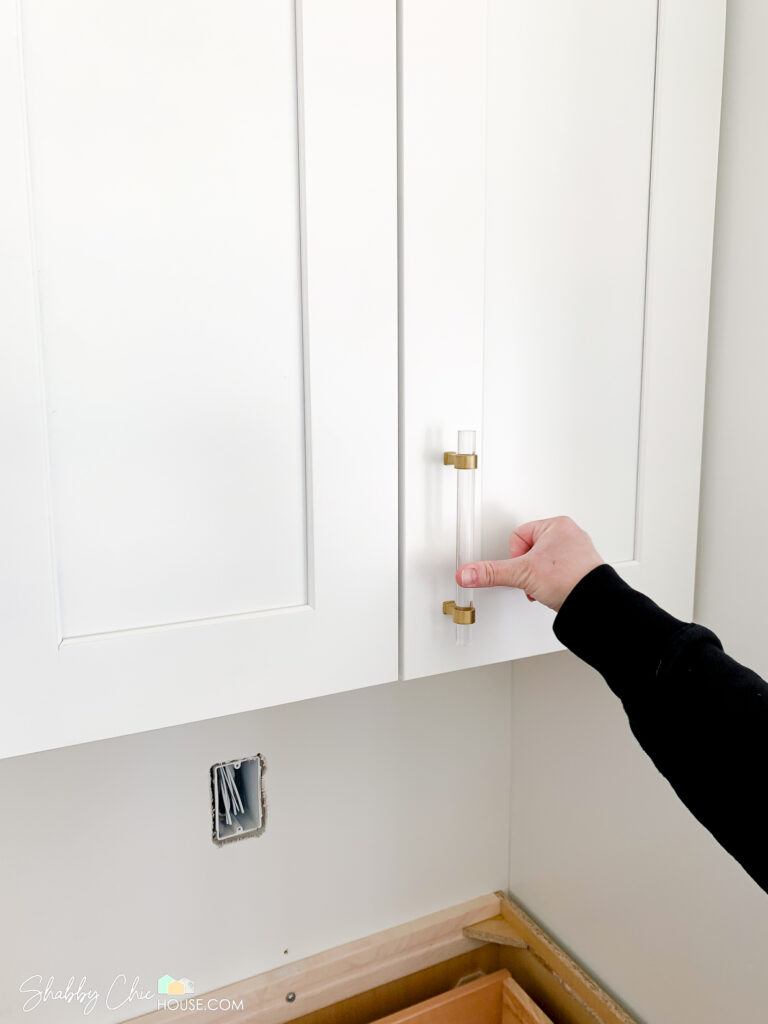
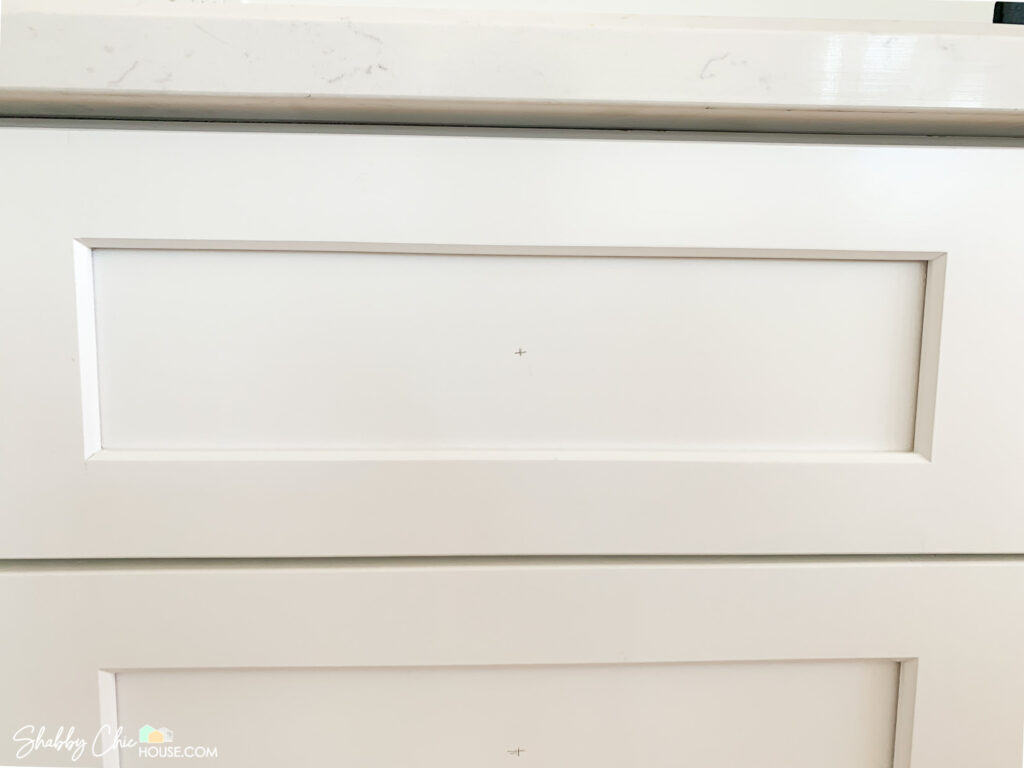
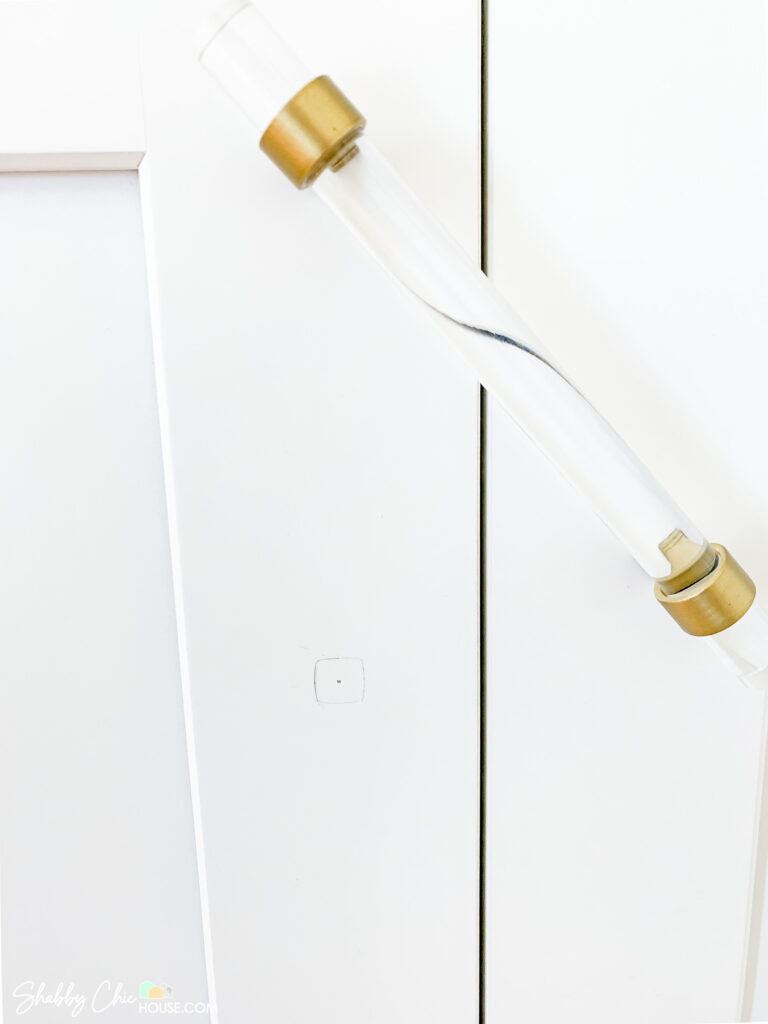
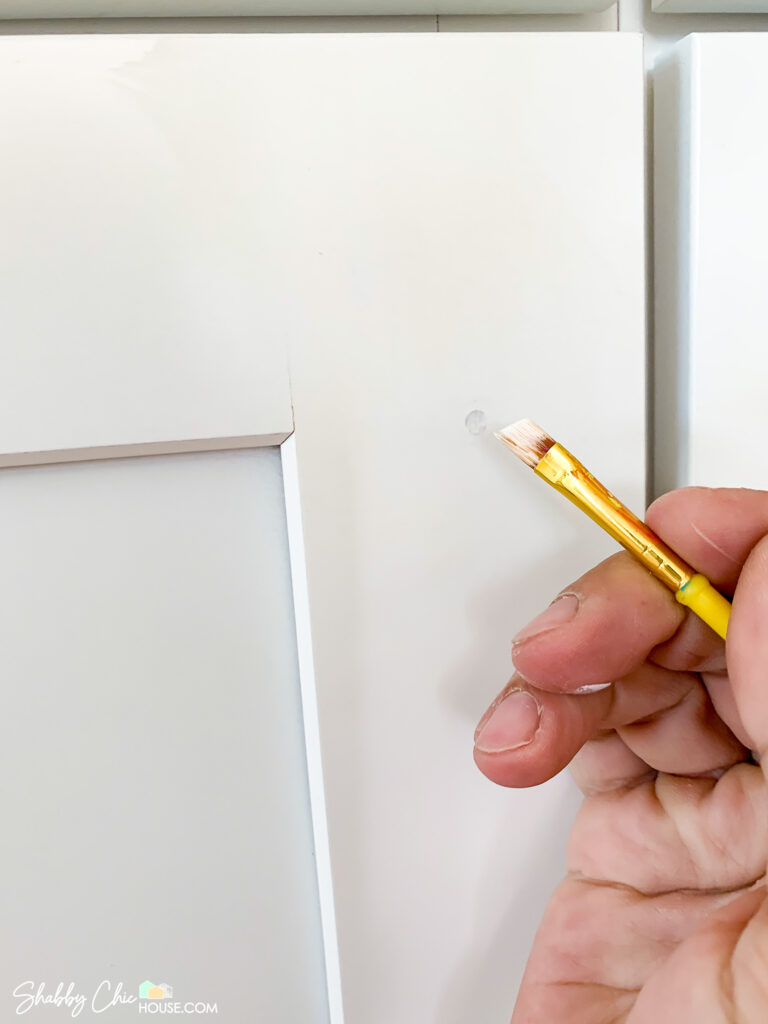
Start by deciding where you want you handles to sit on the cabinet door. I decided I like my handles centered on the outer part of my shaker door and also lined up with the corner of the inner recess.
I then measured the width of the raised shaker panel, divided by 2 and made my mark. As I was making this mark, I also made sure that it was level with top of the recessed area which you can see in the left side of this photo.
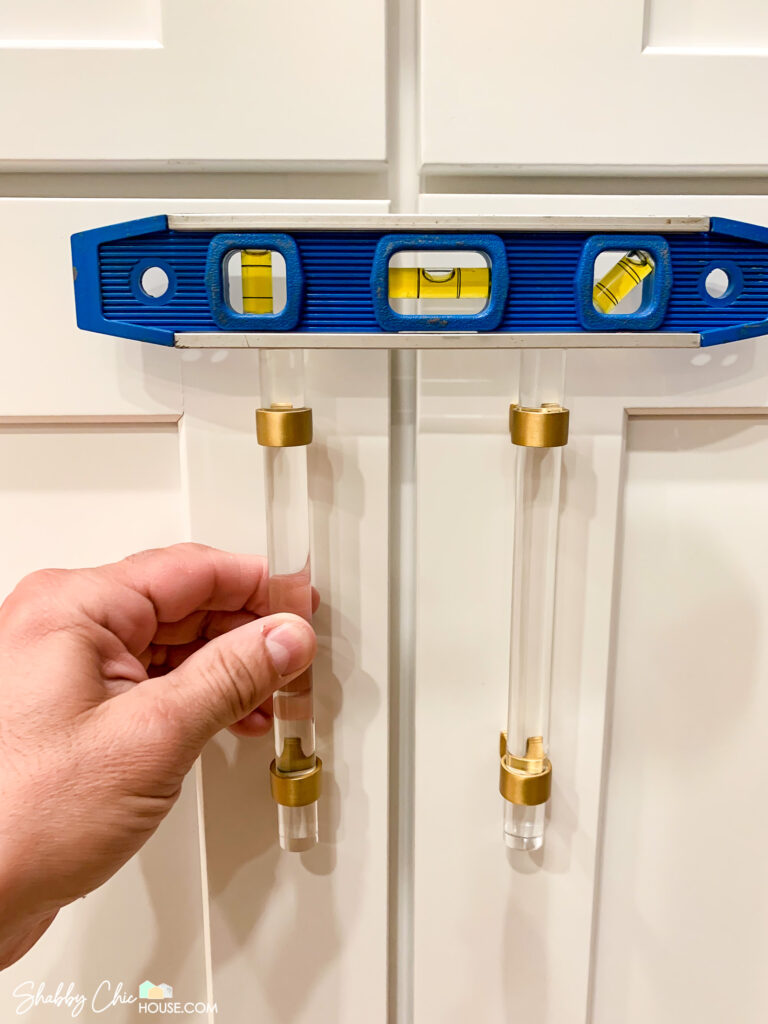
In my case, I found it easiest to drill ONLY the top hole and loosely attach my handle via that single top screw. From there I could swing the bottom of the handle around and use a level to help me find the proper placement for the lower screw.
Once level, just take a pencil and trace around the outside of your handle.
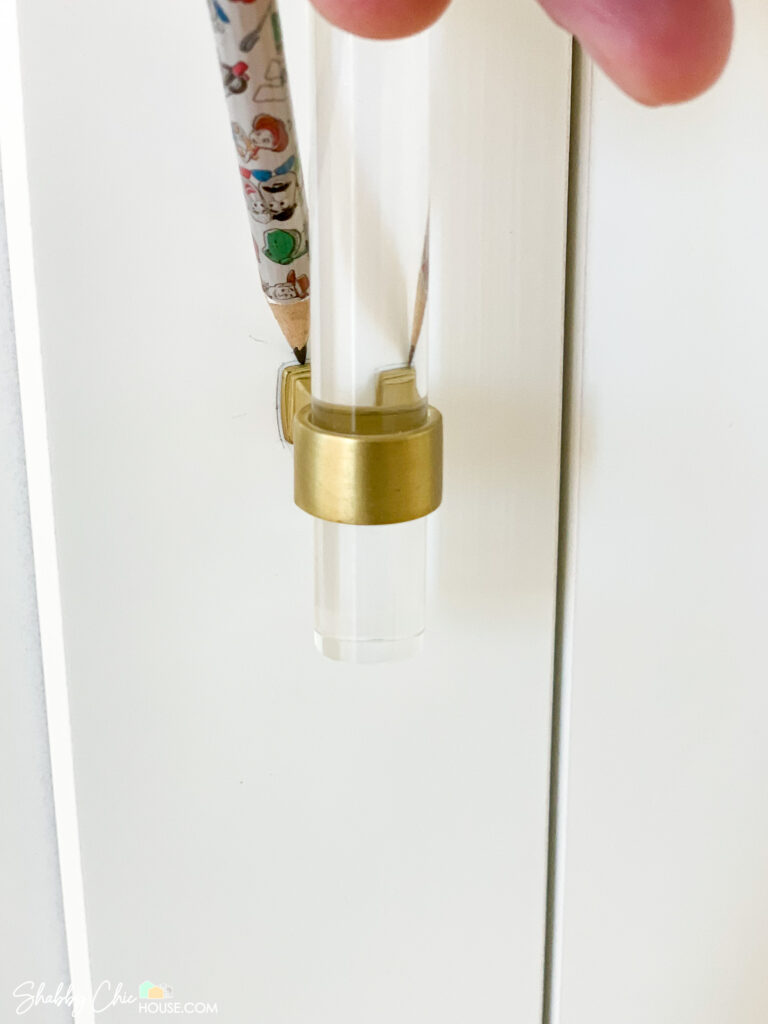
Next, twist lower part of your handle out of the way and you can just eyeball the center of the square. Last, mark, drill and attach the lower part of your handle with a screw.

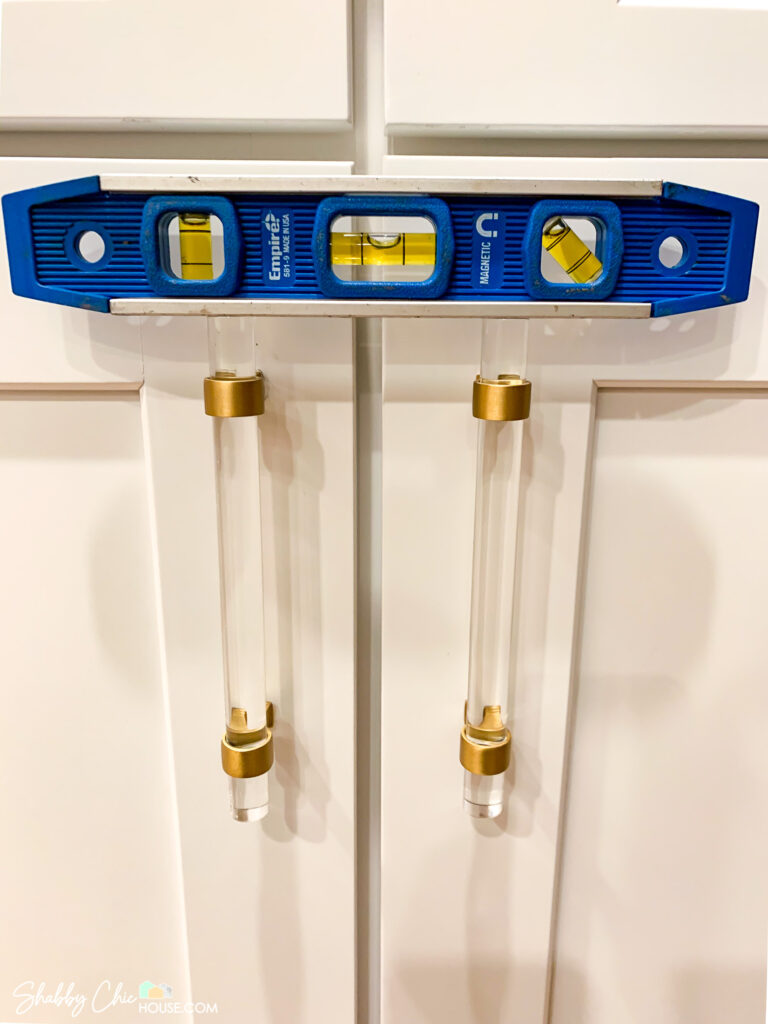
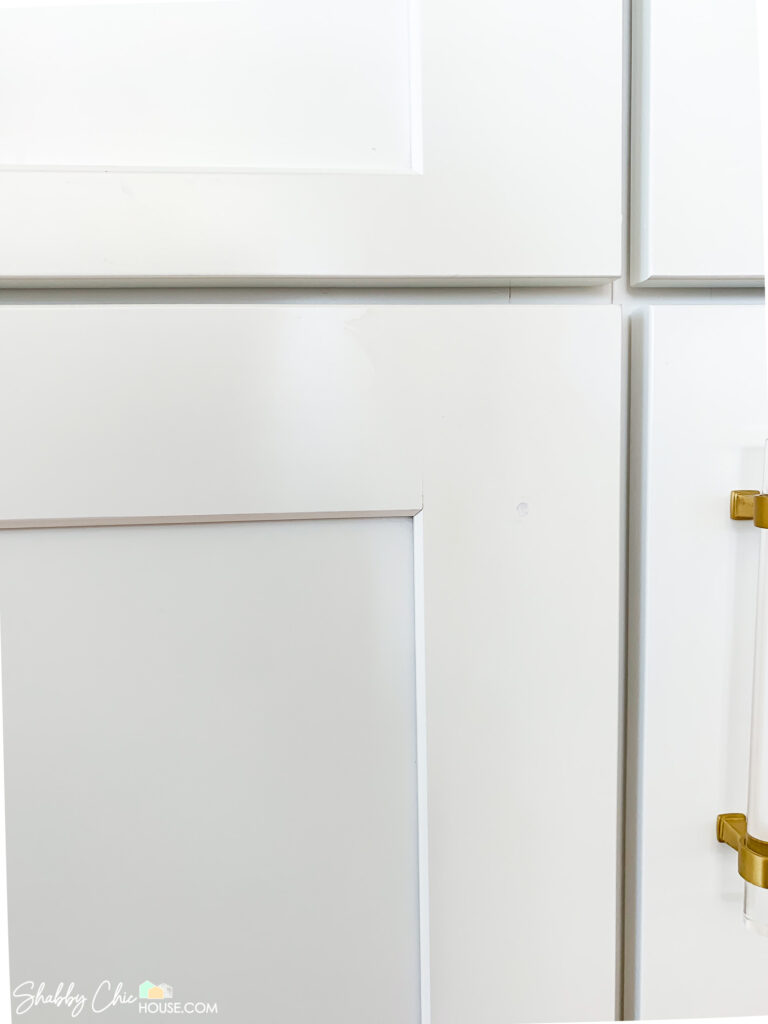
As I began to repeat this process on my cabinet doors I used a level to ensure that both handles sat perfectly together. In doing this, I found that many of the acrylic handles had very slight differences in their height.
With that being the case, I tested out different size handles (again the variation was very minimal) until my fit was perfectly level.
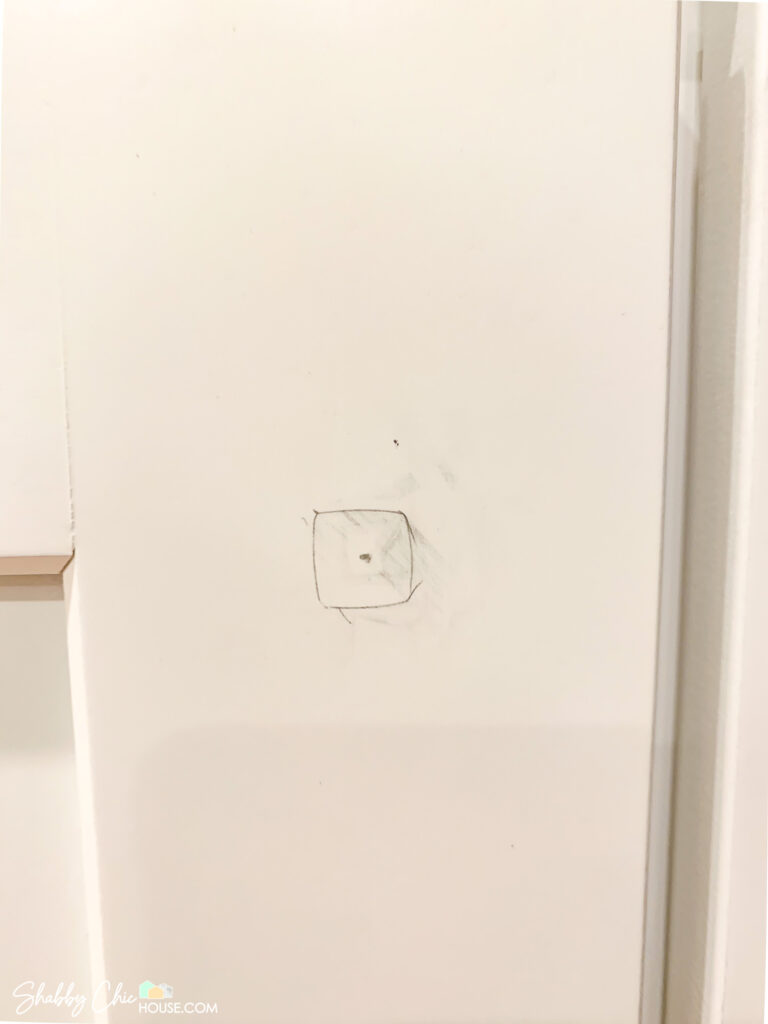
What to do if you drill a hole in the wrong spot…
With a variety of different cabinet sizes, handle sizes, drilling locations and dozens of handles to install, it is amazingly easy to accidentally drill a hole in the wrong place.
The biggest take aways here are:
- Take your time
- Measure each cabinet door and drawer twice
- Step back and look before you drill
- Open each cabinet door before you drill
- And most importantly – realize that if you do make a mistake, it can be fixed.
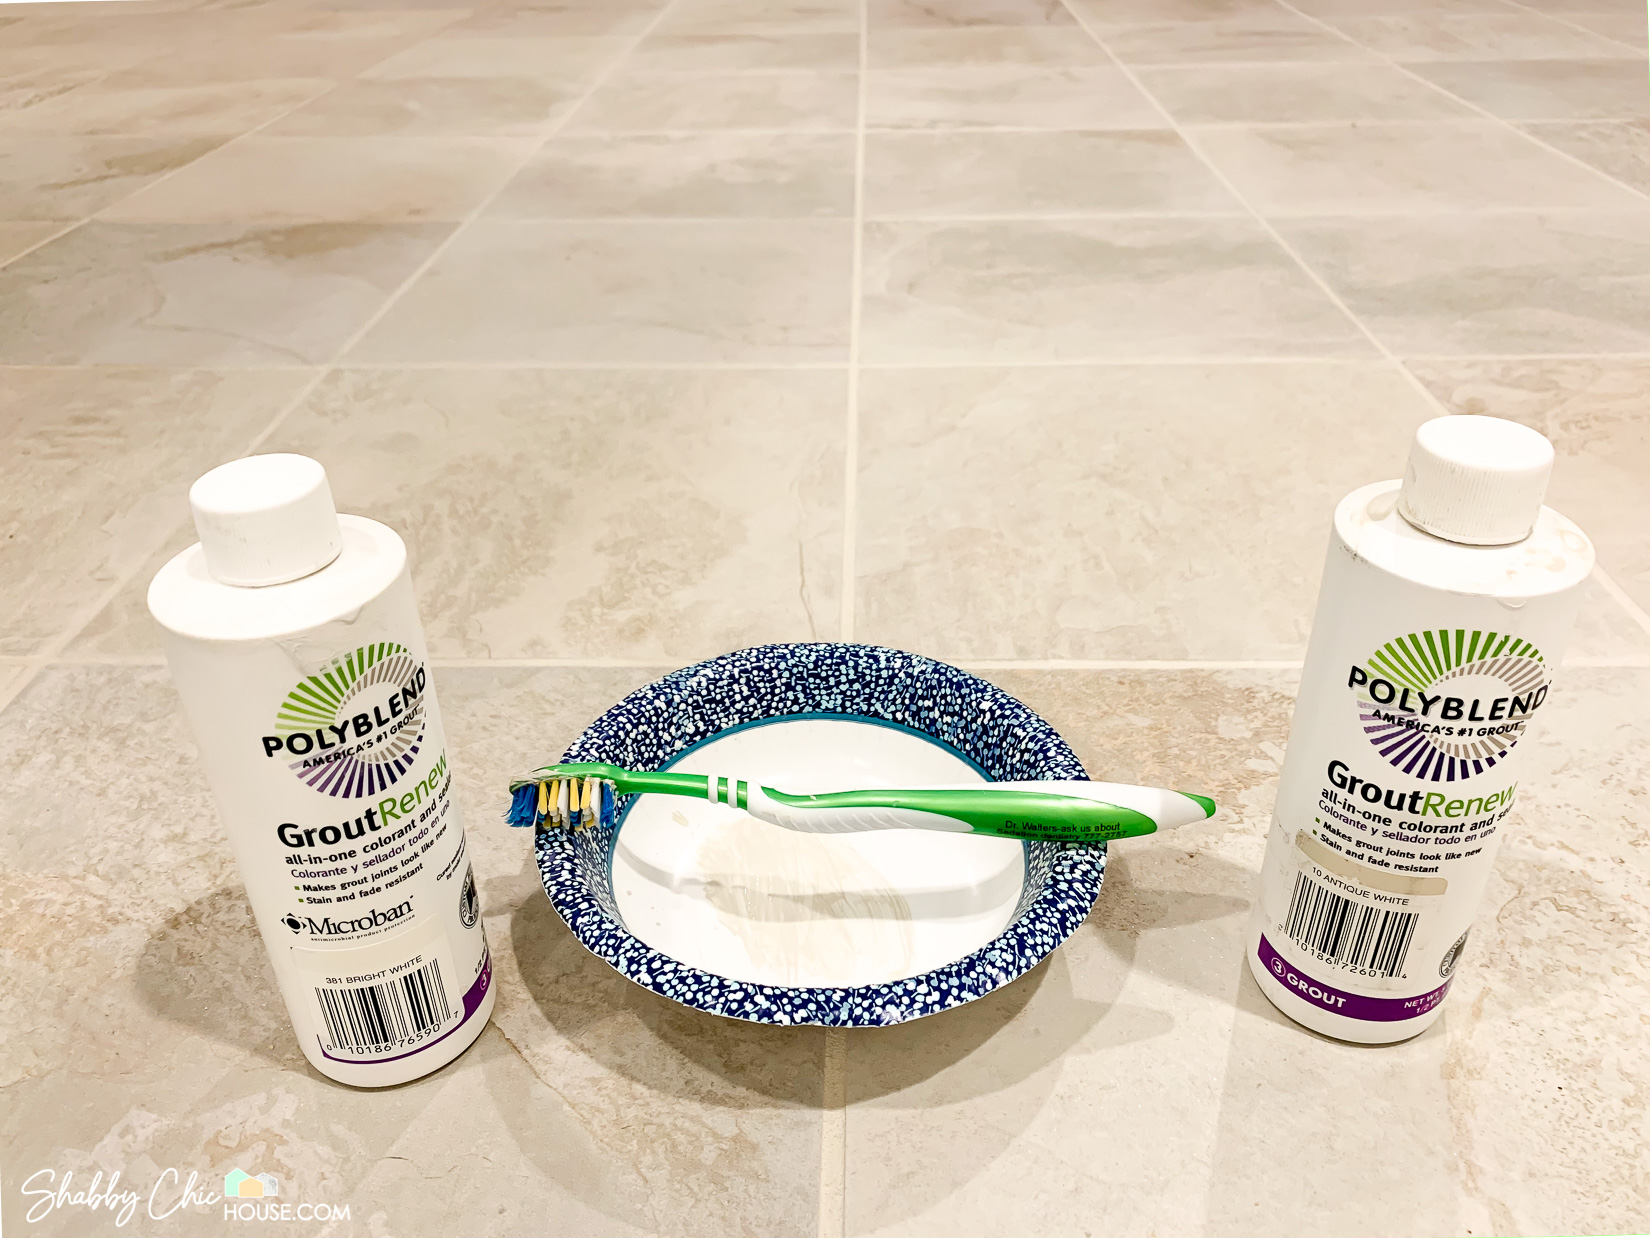
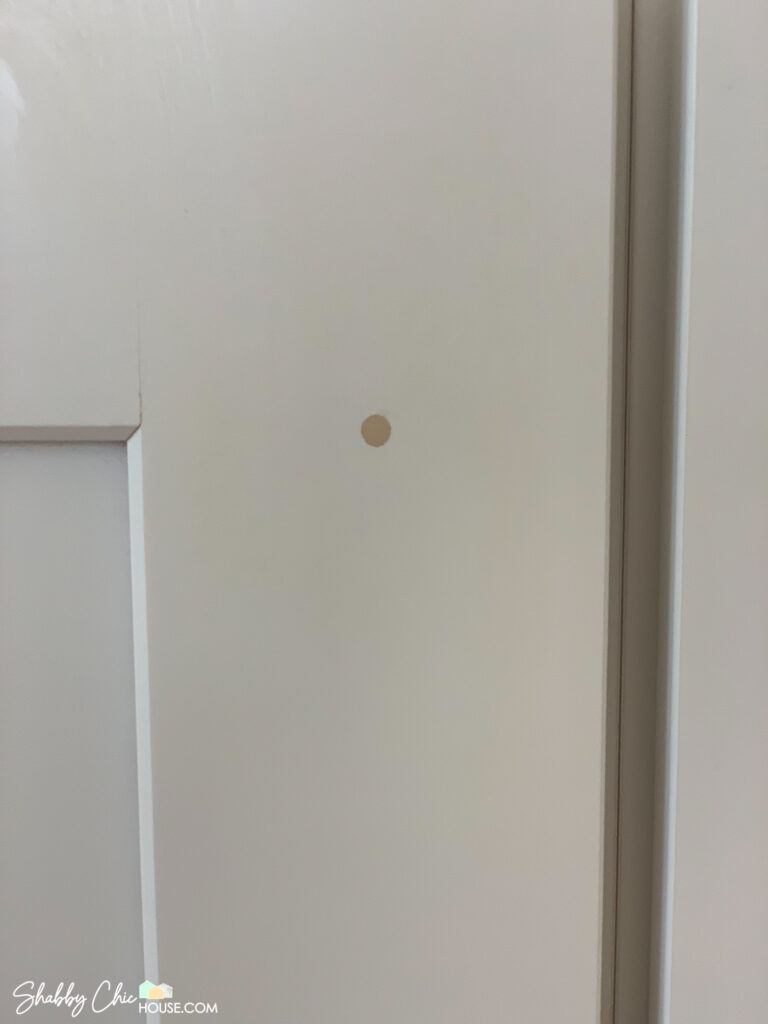
If you do end up drilling a hole in the wrong place, all you need is a spackling blade and some wood filler.
Wood filler comes in a variety of shades/colors, so it’s best to purchase a color that is the closest match to your cabinets.
Apply your wood filler and for best measure, give it a day to thoroughly dry. Once dry, use a very low grit sand paper to level out the hole. Automotive sandpaper with a very extremely light grit (2,000 for example) works well as it give you a super smooth finish and also helps avoid marring the face of your cabinets.
Lastly, you might have received a can of touch-up paint with your cabinets. If so, hit your wood-filled spots with a few very light coats and your cabinets will look as good as new

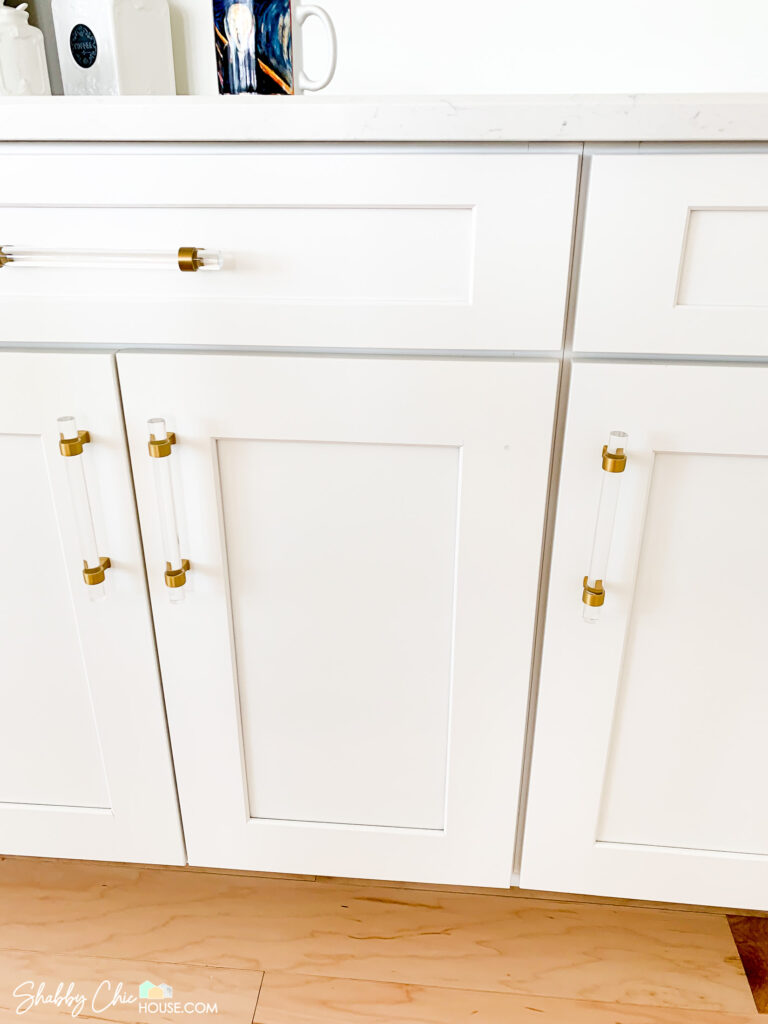
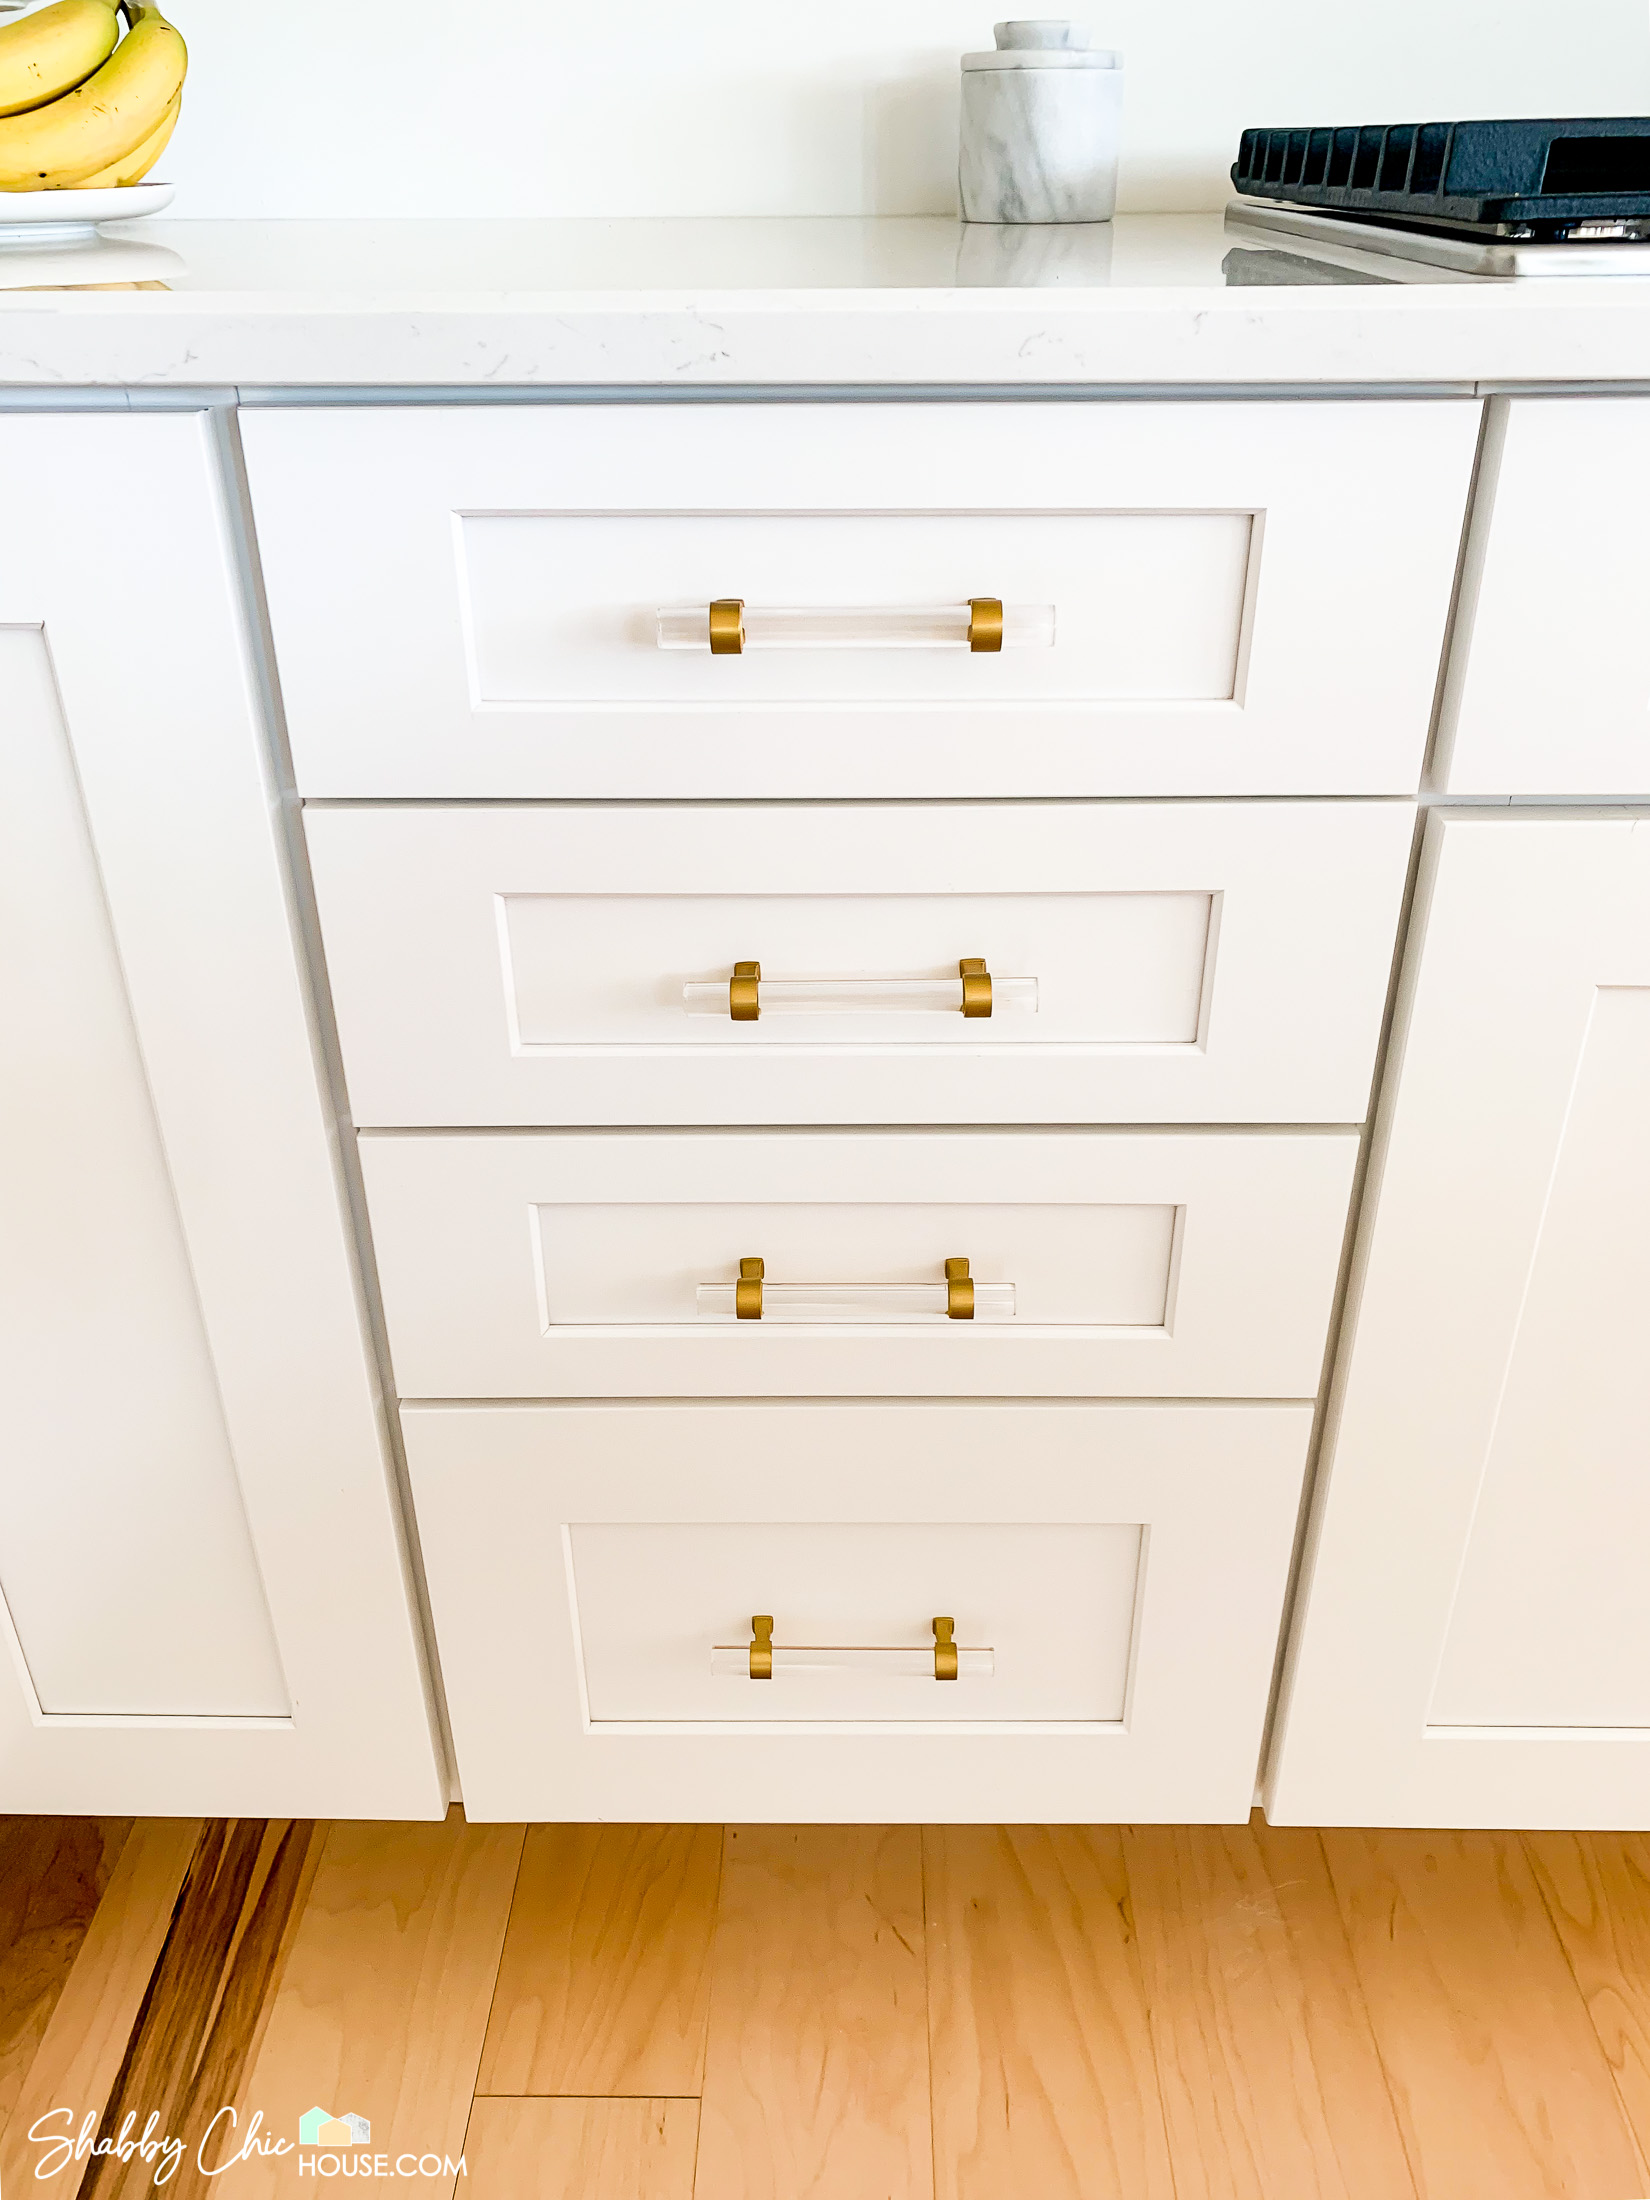
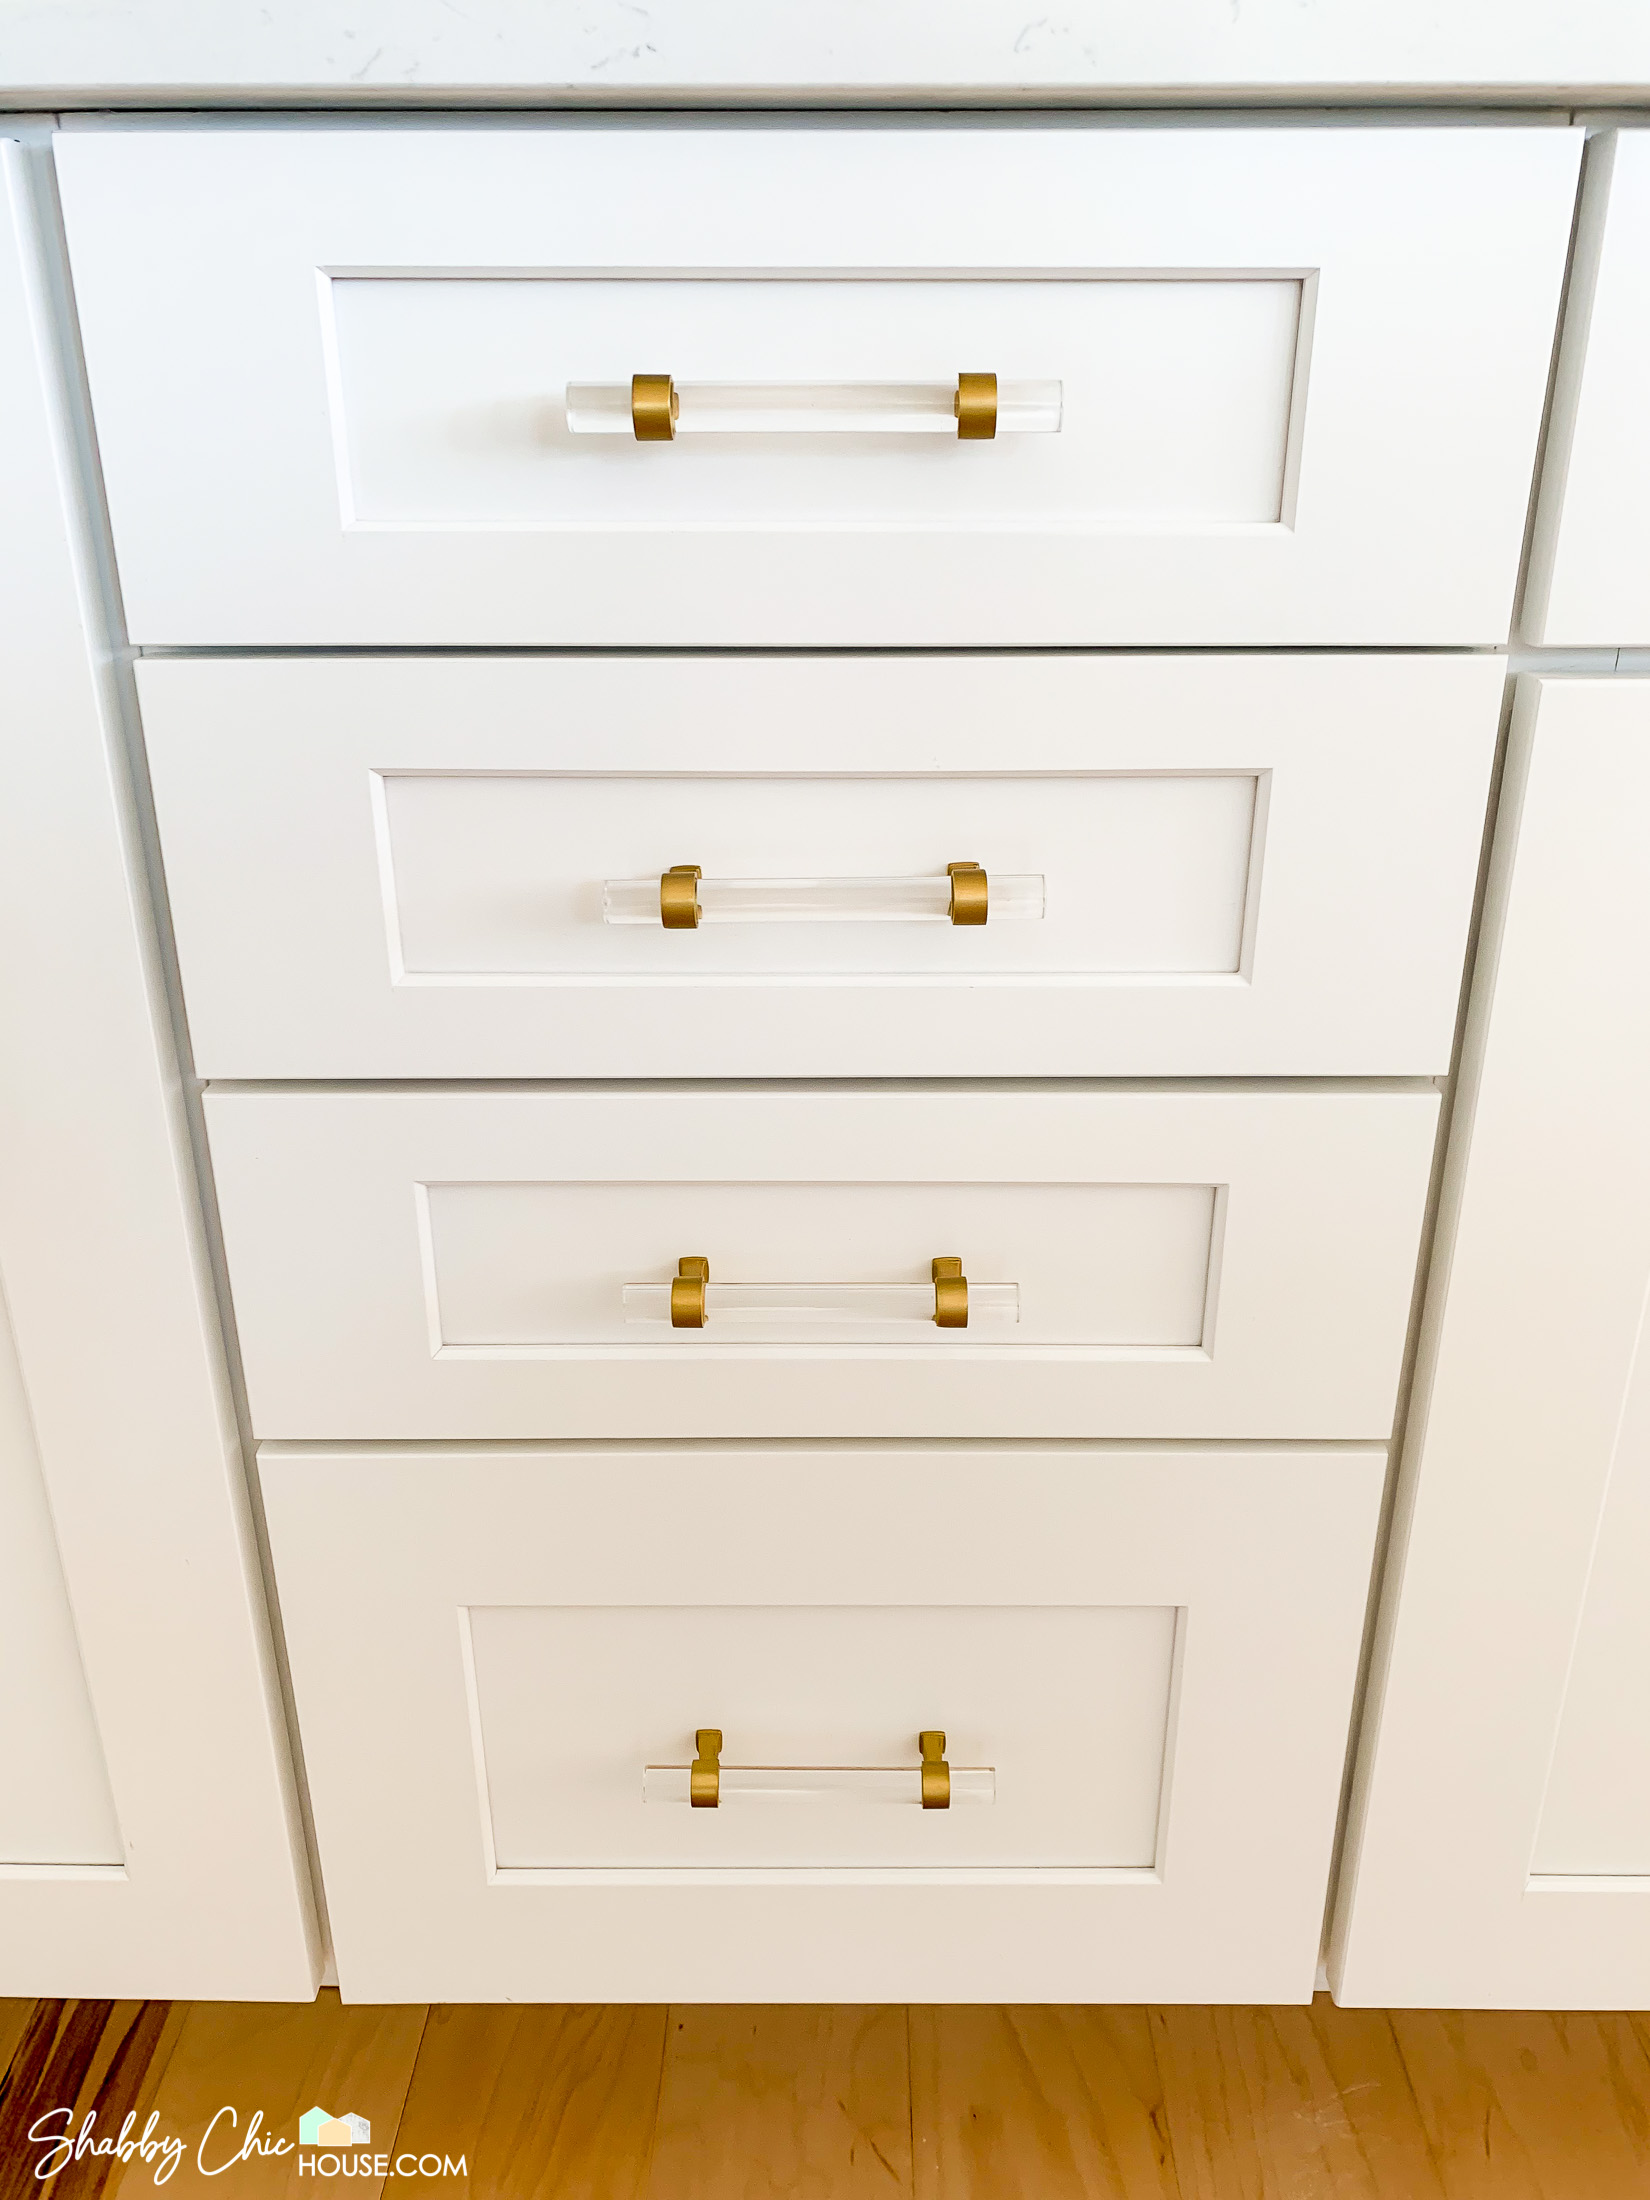
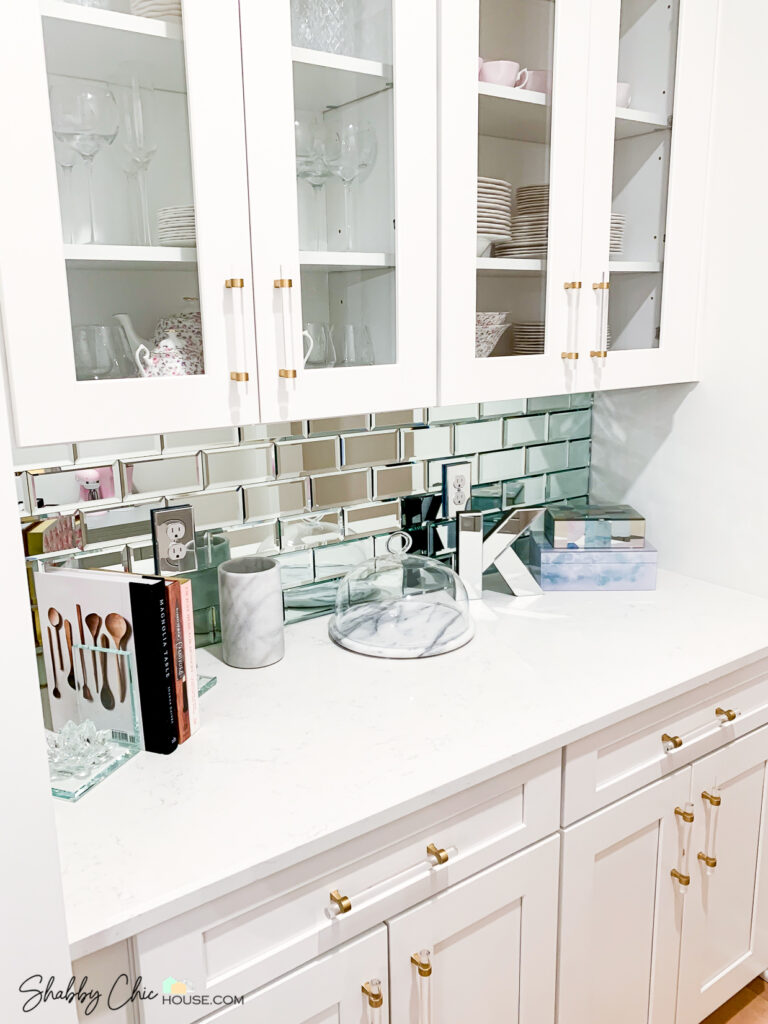
The Finished Product – Kitchen & Butler Pantry Photos
We couldn’t be happier that we decided to wait and install our cabinet handles on our own. While this project took time and patience (due to the sheer number of cabinets), it was worth it to get the look we wanted.
We also installed these same handles in our neighboring Butler’s Pantry which you can see in the top left of the second photo above as well as the photos below.
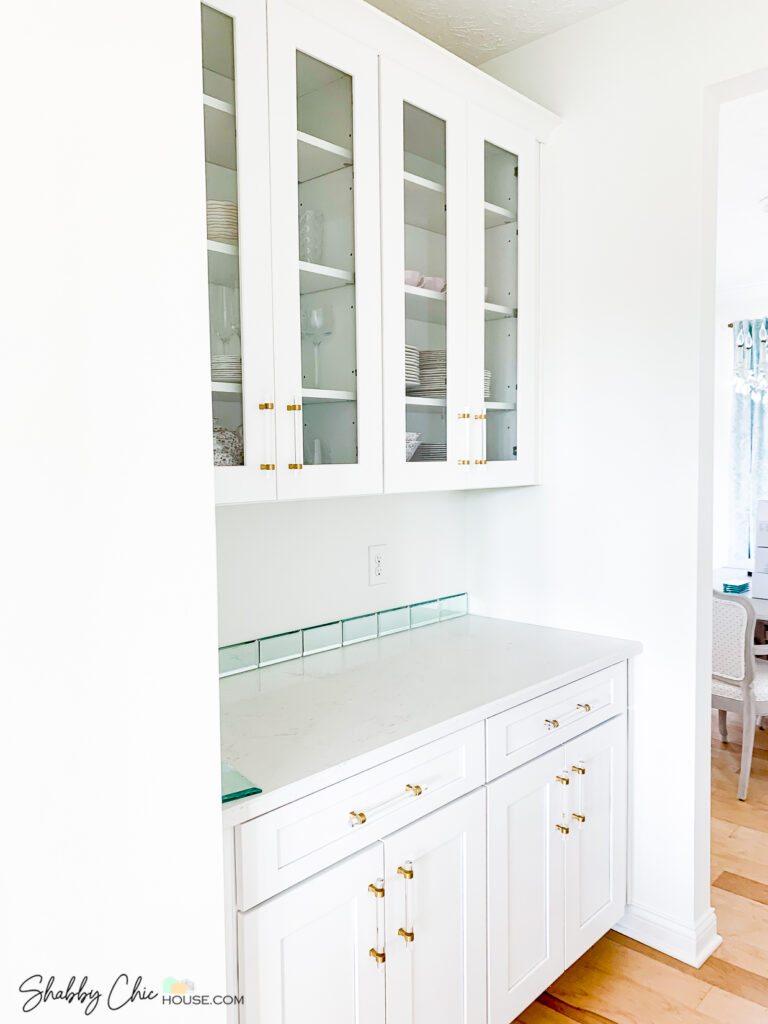

If you found this project interesting, check out my recent post on the new ShabbyChicHouse & 7 upcoming home improvement projects – including the installation of the mirrored backsplash in our Butler’s Pantry featured in the photo above!