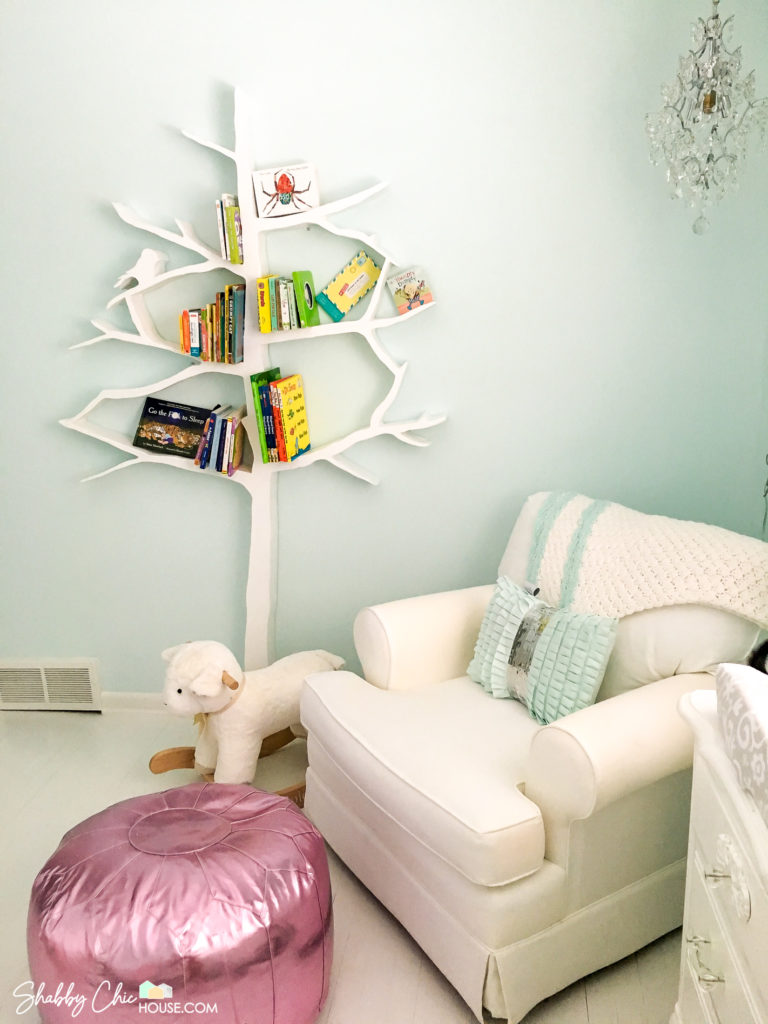
A few years back, my wife found an amazing tree shaped bookshelf that we thought would be the perfect centerpiece for our little one’s bedroom. Problem was, we could only find one person selling them on the internet and they were going for more than $1,100!
In this article, I’m going to show you exactly how to build this tree shaped bookshelf, which requires just over $100 in materials. However, be careful, as every time a mom sees this bookcase, you’ll most likely get a request to build one for their little one.
Some of our posts contain affiliate links. We often share links to the tools & products used in our home improvement projects and if you purchase one of these items using our link, we may earn a small commission (at no additional cost to you).
Materials & Tools You’ll Need
- 4-5 Pieces of 4′ x 8′ Plywood (3/4″ Thick)
- Jig Saw
- Power Drill
- Large Drill Bit – 1/2″ Bit
- Palm Sander
- Router
- Router Bearing & Bit
- Wood Filler
- Stud Finder
- Mounting Brackets
Drawing or Stenciling Your Tree Shaped Bookshelf
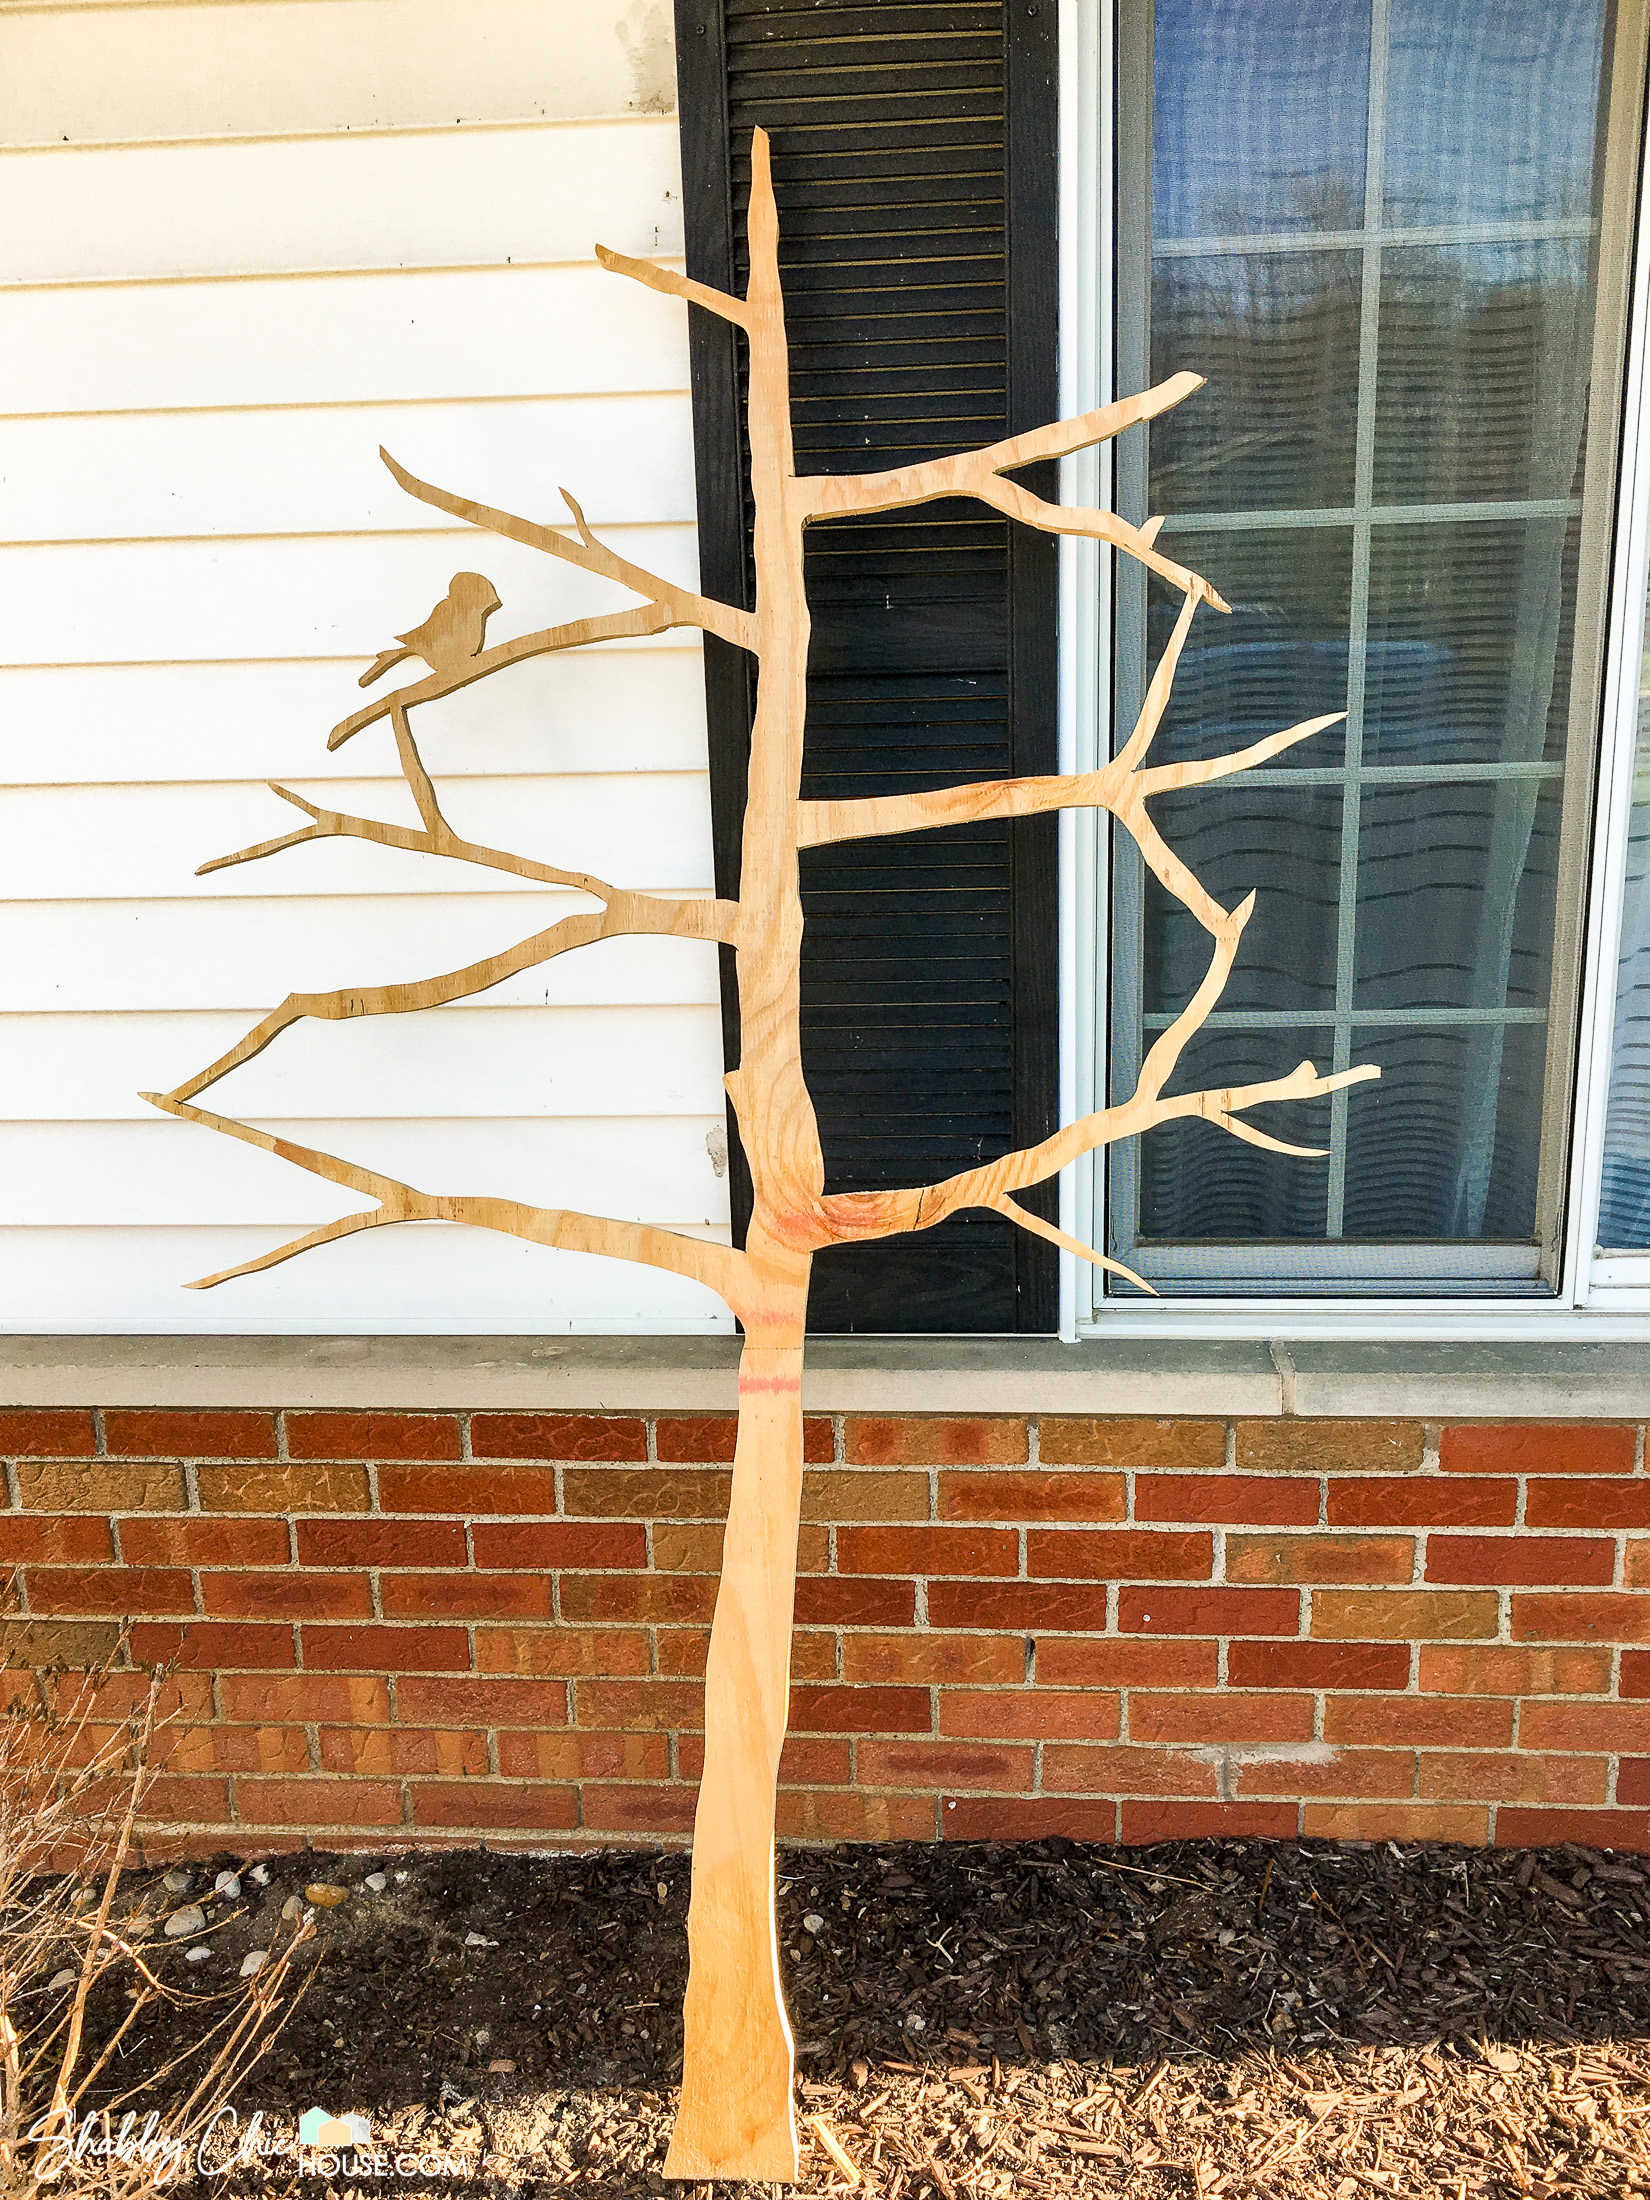
First stencil or draw your tree with a Sharpie on a single piece of your 3/4″ thick 4′ x 8′ plywood. You could consider printing out some sort of stencil, but that’s a tall task as you would need a pretty large piece of paper or would need to piece together 14-15 pieces of paper.
Your best bet is to freehand and draw the tree. While this may seem like an impossible task if you lack drawing skills, it’s actually not that hard. Just know up-front that you’ll eventually be painting over your tree outline and if you mess up, you can fix or redraw the lines until you get it right.
Tips for Drawing Your Tree
- Measure to the center of your piece of plywood (2′) and draw a vertical line from top to the bottom of the plywood. Use that line to center your tree trunk on (see image below).
- Break up drawing the tree into different sections (draw the trunk first, then when completed add your branches).
- Make the trunk width about 4-5 inches at the bottom and slowly taper to a point at the top.
- As you add your branches make sure they get narrower as they go out.
- Don’t worry about messing up. It’s just marker and you’ll be painting over it!
Cutting the First Piece of Plywood
I used this super inexpensive, but awesome Ryobi jigsaw to cut out my tree shape. Surprisingly it was pretty easy and was actually the first time I ever used a jigsaw. I’d recommend using a fine jigsaw blade, which will give you the least amount of splintering as you cut.
For your first cut start at the bottom of your tree trunk and cut out the sections on both the right and the left of trunk below the first branch. Go slow and do your best to stay on your Sharpie line. If you want, you can make the cut in one fell swoop or cut up to the first branch, pause and then cut the bottom of the first branch and meet up where your last cut left off.
In order to cut some of the interior sections of your tree that don’t have an opening, you’ll need to drill a hole first using a large drill bit. I found it’s easiest to drill these holes at the intersection of a branch and the trunk. Once you have that pilot hole just insert your jigsaw blade into the hole and make the interior cut.
Cutting the Next 3-4 Trees
After you get your first tree cut, you can use it as a stencil for the next 3-4 pieces of plywood. I ended building my tree shelf out of 4 pieces of 3/4″ thick plywood and while it can hold most smaller books, 5 pieces of plywood may have been the way to go. I’ll leave that decision up to you!
Stencil your next 3-4 pieces of plywood with a Sharpie and cut out the negative spaces as you did with the first piece of plywood. The goal here is to cut each new piece of plywood as close as you can to the first one. The closer you can get each of these pieces to each other, the better they’ll match up when you screw them all together.
Combining the Plywood & Leveling Your Edges
Once you have your 4-5 trees cut out, you’ll want to make sure that you get all 4 or 5 pieces of plywood as close as you can to identical. The best way to do this is to use a router and a special bearing bit.
To start, screw only your original/first stenciled tree and second cut tree together. When doing so make sure to put your screws in the very center of the trunk or branch and we’ll be trimming the edges with our router and don’t want to hit a screw.
Once they are screwed together you can rest the bearing part of your router bit against the original stencil. The bearing bit allows you to just run/roll your router along the original stencil without cutting it, while cutting the lower second piece of plywood, so it matches the original.
After you’ve routed around the entire tree, screw on your next tree and repeat the process again and again until all 4-5 pieces of plywood are nearly identical.

Sanding & Filling the Gaps Between Trees
After you’ve evened out the sides or your tree with your router you’ll most likely have some rough edges. Sand down these edges using a palm sander. I have this super inexpensive – but awesome – DeWalt palm sander that also has a dust catcher. This palm sander will take care of most of the sanding, but you’ll need to hand sand in most of the tight nooks.
After sanding you’ll want to fill the gaps between the plywood. Filling these gaps will make your tree look like one solid piece of wood once painted.
For my project, I used DAP’s Plastic Wood. This stuff is awesome as it goes on pink and when it’s done drying it turns white. For my project, I needed roughly two tubs. Once your wood filler dries then just smooth out any bumps with sanding paper or a sanding block and you’re ready to paint.
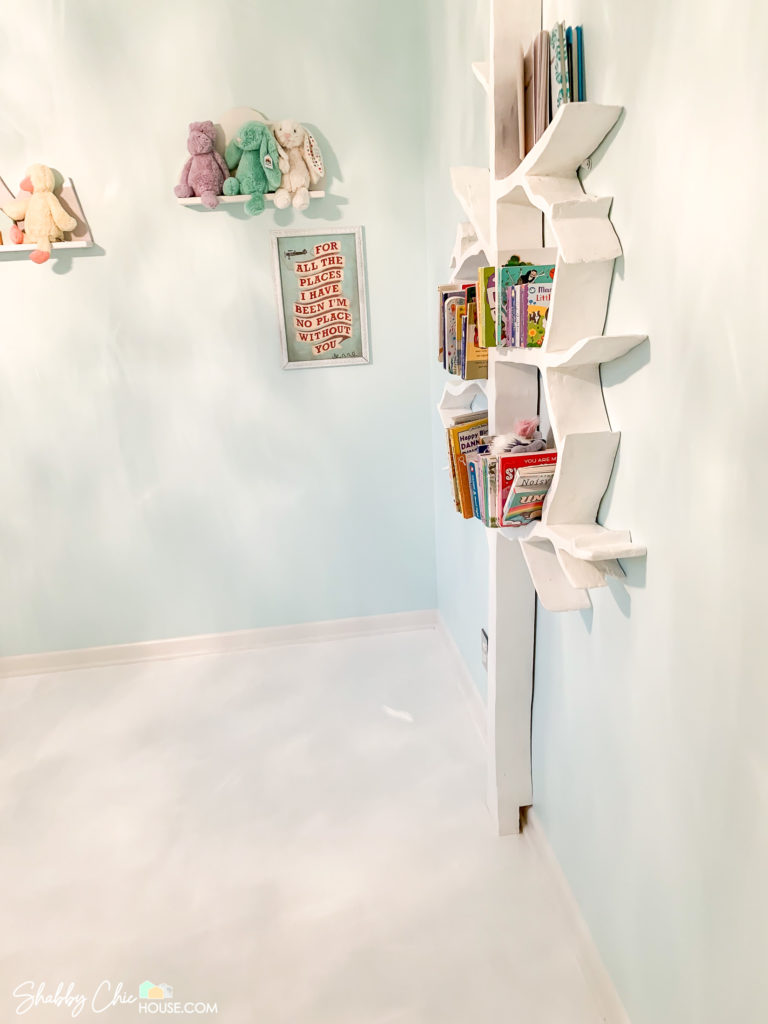
Cutting Your Tree to Fit Flush with Your Baseboards
Before you paint you’ll want to cut roughly 3.5″ off the back two pieces of plywood on the bottom of your tree trunk. This cut will account for the baseboards and quarter round trim in your little one’s room and allow the rest of your tree to sit nice and flush against the wall.
I’d suggest taking the exact measurement of the height of your baseboards, drawing a horizontal line and cutting with something safe and easy, like a hand saw.
If you take a look at base of the tree shelf below you can see exactly what this cut looks like and the purpose it serves.
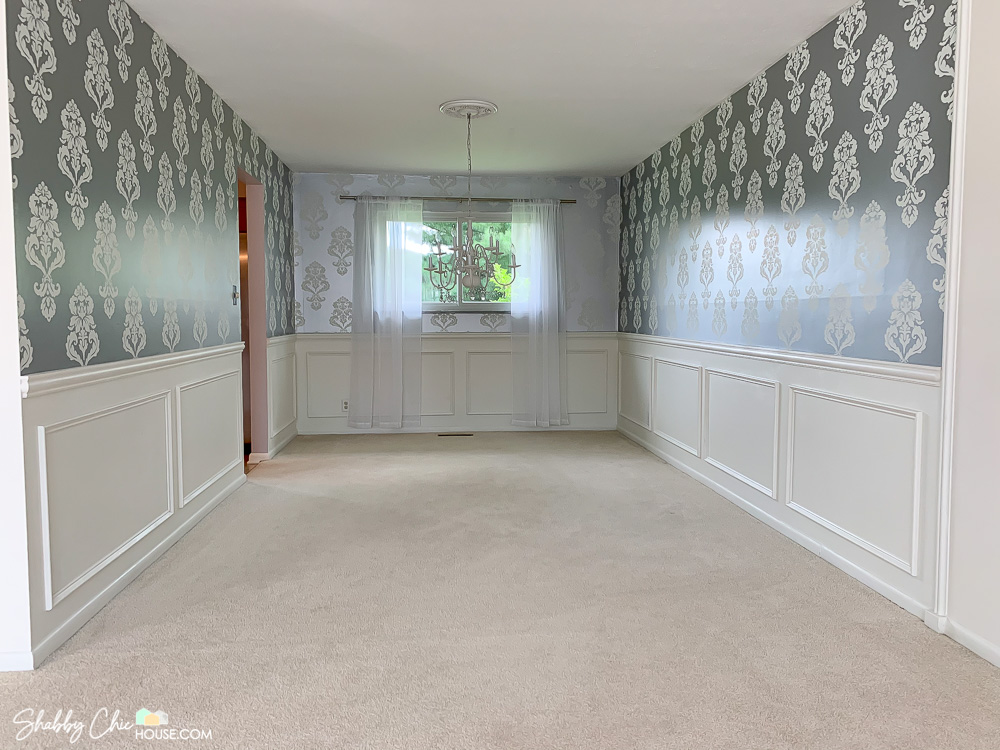
Also, if you love our white floors check out our post here after on how to prep and paint your hardwood floor white.
Painting Your Tree-Shaped Book Shelf
Once you have your tree bookshelf completely sanded you can then paint. There’s not much to this step! Pick an awesome color and put on 2-3 coats of paint.
Securing Your Bookshelf with Wall Anchors
This bookshelf is pretty heavy. With that being the case you’ll want to make 100% certain that it’s secured properly to the wall.
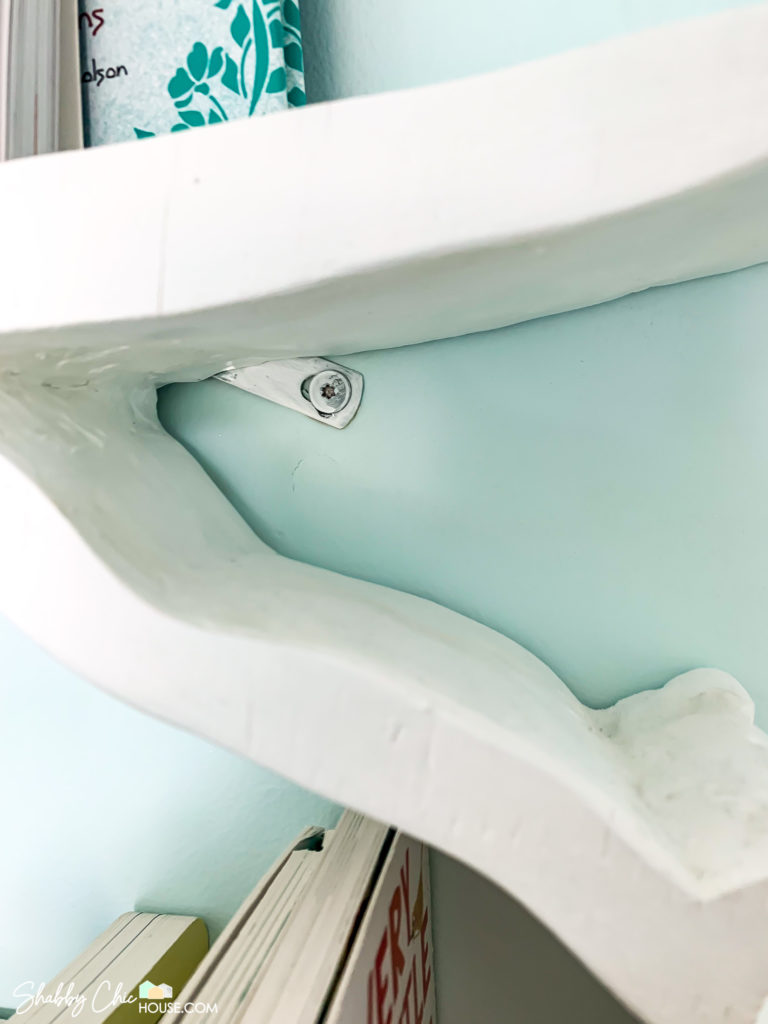
Step One: Place your tree shelf against the wall in your desired location.
Step Two: Use a stud finder to find out where your studs are located. The goal here is to find at least one stud left of the trunk and one stud right of the trunk.
Step Three: Make a mark on your tree branches to notate where the center of your stud is located and where we’ll be attaching our anchors. I’d suggest marking the center of our studs on at least two of the branches on each side of the trunk.
Step Four: Attach your anchors to the back of the tree with a screw making sure the second hole of the anchor will line up with the mark you just made on the wall for the studs.
Step Five: Place your tree up on the wall and use your anchors to attach the bookshelf to your studs.

Tree Shaped Bookshelf Conclusion
This is truly one of the most awesome things I’ve built. Every mom, dad and kid that comes over loves it! Also, it’s been in my daughter’s room for four and a half years and I’m sure will stay for plenty more years to come!

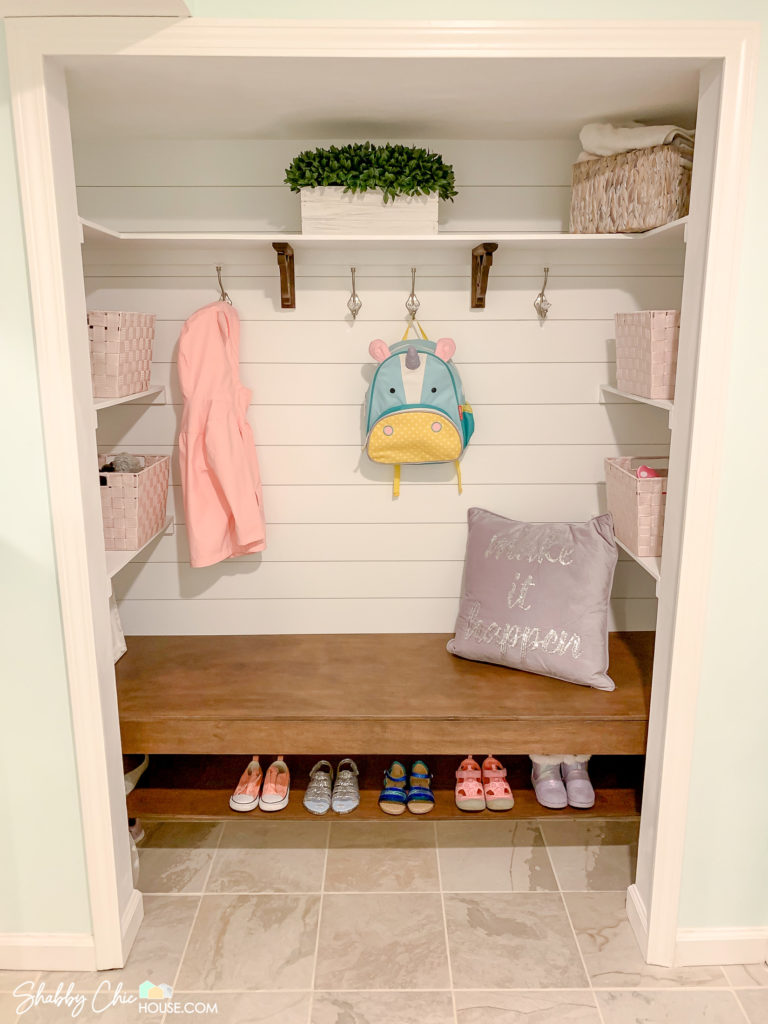
If you loved this post on building the tree shaped bookshelf, check out our post on How to transform your entryway closet into a fun and functional shiplap nook with bench. This is by far one of our most popular posts with over 3,000 social shares.
Or give a gander to one of the easiest and coolest upcycle projects out there – How to Chalk Paint a Chandelier. Back in the day I had a Etsy shop and made some decent money painting and refurbishing old chandees. Check it out!