Did you set up your pre-lit Christmas tree just to find out that half of the bulbs are burnt out? If so, don’t rush to grab your scissors and cut out those lights. Believe it or not, we spoke to two people this year that did so!
Instead, follow along as we’ll walk you through a few potential issues your tree may be running into, the tools to help you troubleshoot the problem, and then the solutions to get your Christmas tree lights back up and running at 100%!
Some of our posts contain affiliate links. We often share links to the tools & products used in our home improvement projects and if you purchase one of these items using our link, we may earn a small commission (at no additional cost to you).

How Traditional Incadencent Christmas Lights Work
Understanding how traditional incandescent Christmas lights work is essential to helping you troubleshoot the potential problem and find a solution. The great part is, it’s not rocket science!
To start, electricity flows through your light strand in a linear fashion. Electricity starts to flow from the outlet plug and then through each individual light creating what is called a circuit. If there’s a problem at any point in the entire circuit (i.e. a single bulb) the entire strand of lights will go out.
Let’s take a look at what might be disrupting your circuit.
Christmas Light Bulb Issues
Missing Bulb Prongs
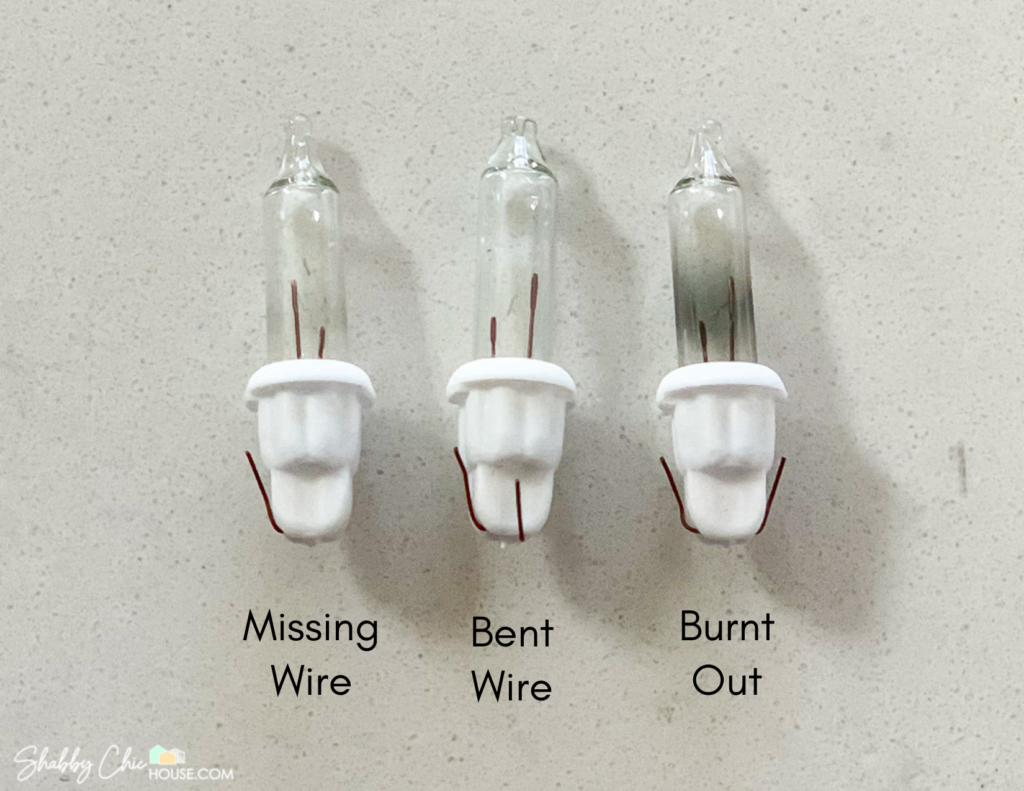
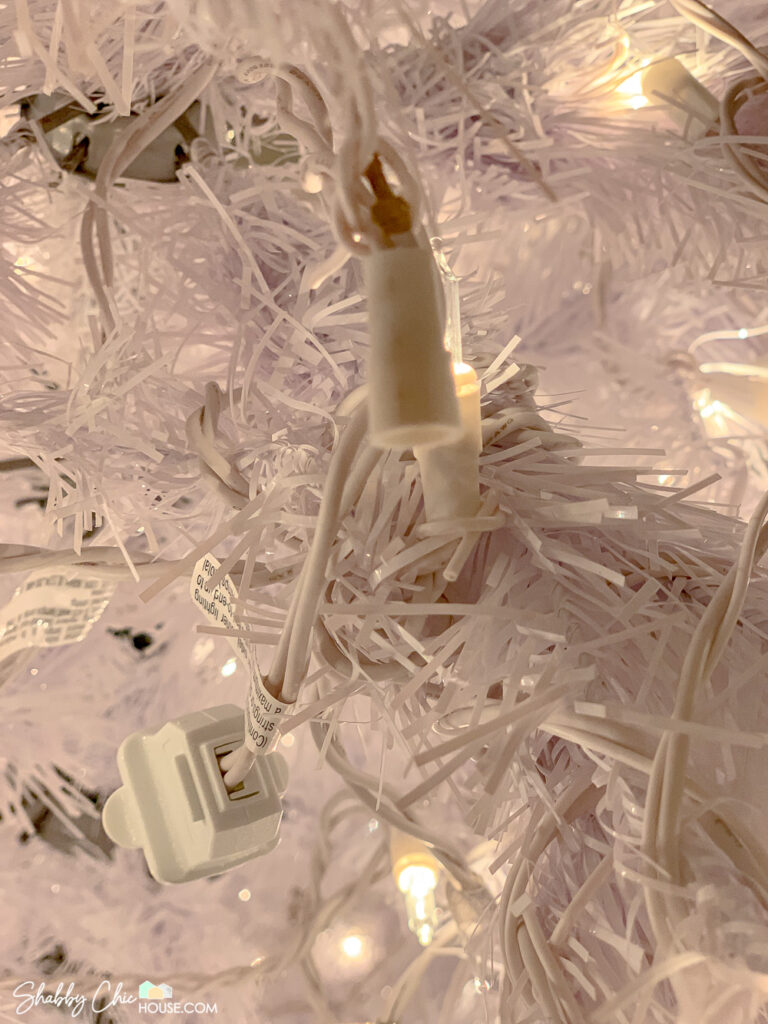
If either of the wire leads on an individual bulb are damaged or missing (Bulb #1 in the photo above) the circuit is broken and electricity can not flow onto the next light.
Bent Bulb Prong
Similarly, even a slightly bent prong can break the circuit. Inside each bulb socket, there are two connector plates. When a bulb is inserted, the two bulb prongs touch these plates connecting the circuit. Bulb #2 in the photo above could have issues as the wire lead is bent out of position and may not touch the connector plates.
Burnt-out Bulbs
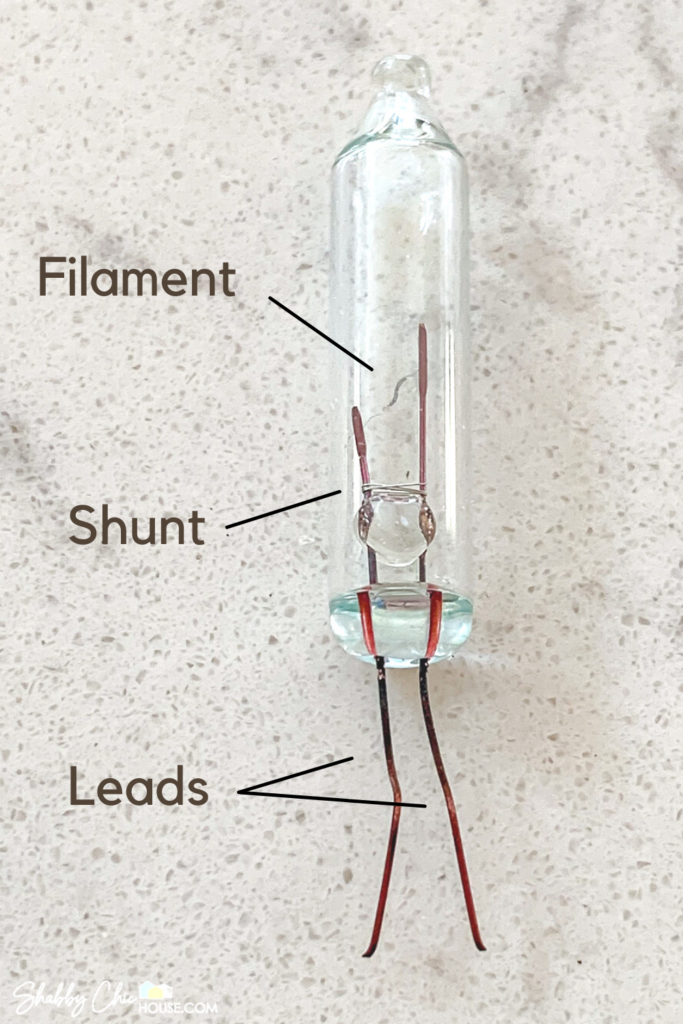
When a bulb burns out the small filament breaks. When this happens, a part of the lightbulb called the shunt is activated. The shunt ensures the circuit is not broken and electricity continues to flow to the next light. These shunts are somewhat delicate and often malfunction causing the circuit to break and the entire strand of lights to go out.
A burnt-out bulb can easily be identified by the black ring on the glass around the filament as shown in bulb #3 in the photo above.
Malfunctioning Bulb Socket
Again, there are two connector plates inside of every bulb socket. Also, each bulb has two prongs that when inserted into the socket touch these plates and help carry on the current. If one of these plates becomes loose, it will break the circuit causing your strand of lights to go out.
This issue can be easily identified if you see the metal plate sticking out of the bottom of the bulb socket as you see in the photo below.
An unseated connector plate may not be this apparent. In that case, you’ll need to remove the bulb and inspect the inside of the socket. Inside of a working socket, you will see both connector plates tightly seated to opposite sides of the socket wall like in the photo below.
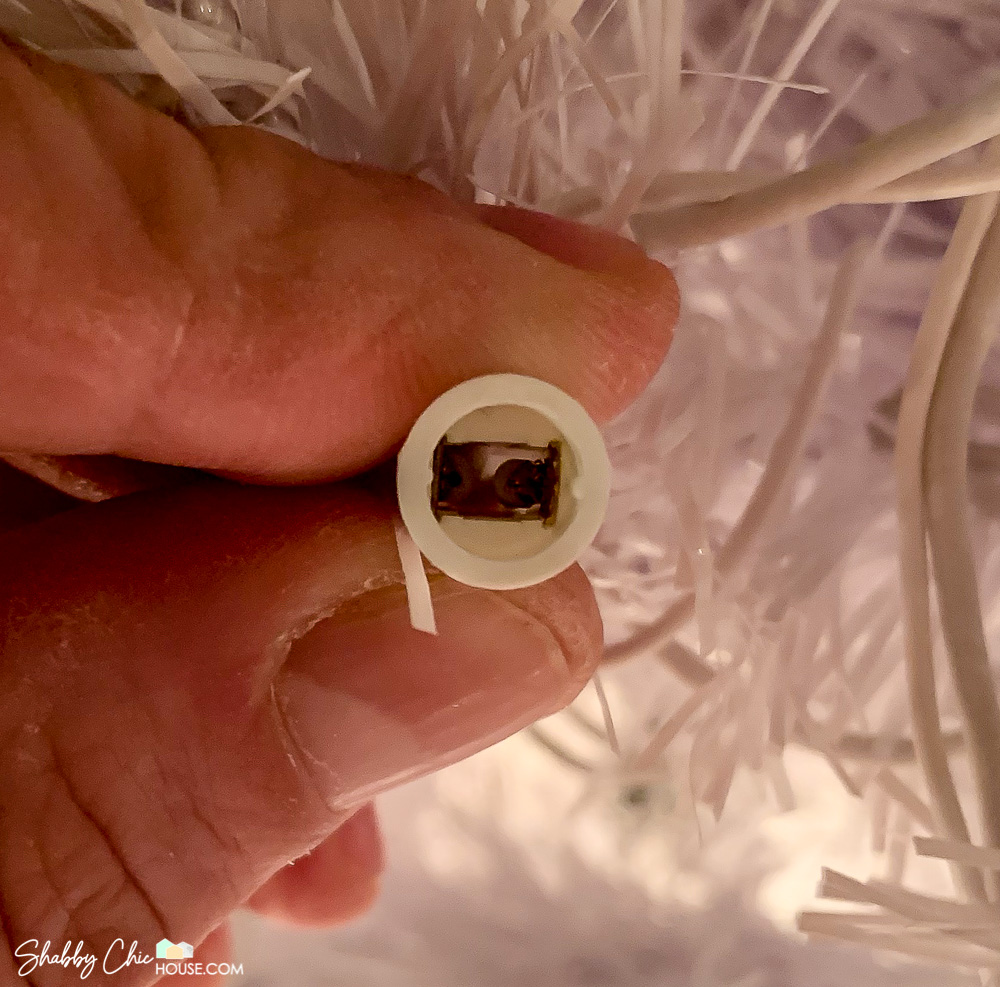
In a malfunctioning socket, you may find one of these connector plates unseated.
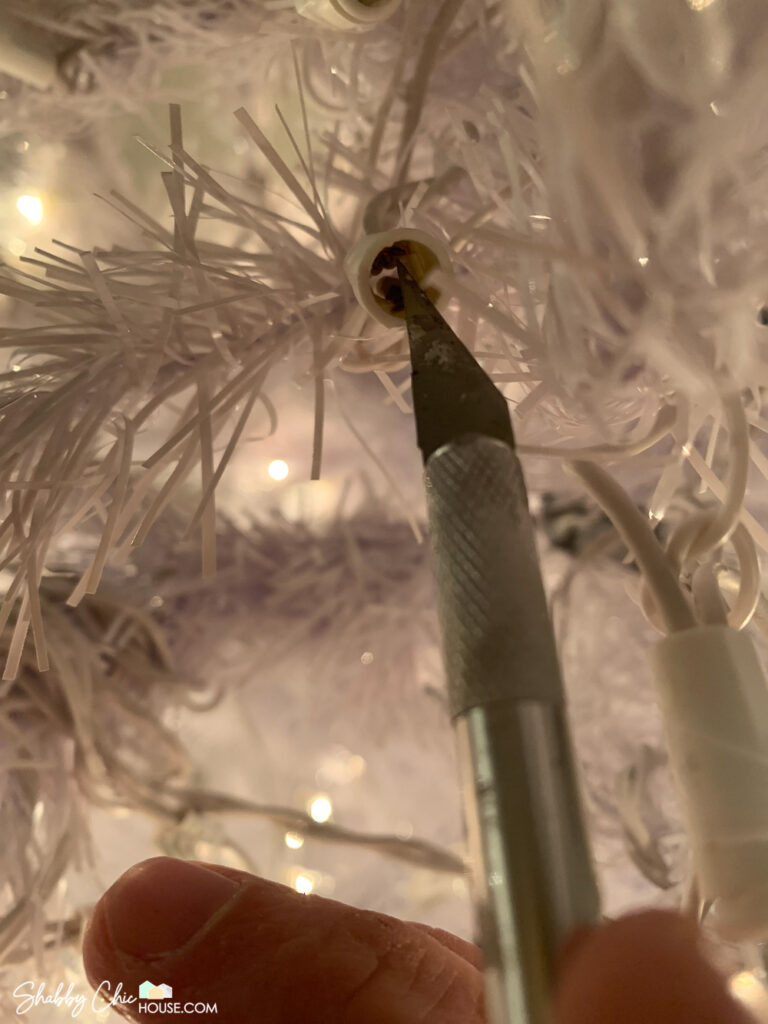
If either of your connector plates (gold part of the green wires in photo #1 below) have become unseated you’ll need to reseat them. Reseat the plate(s) by pulling them towards the bottom of the socket while at the same time applying pressure with a pointed device like an Exacto knife.
CAUTION! When reseating the connector plates make sure to unplug the power to your Christmas tree lights!

Dead Fuse
Another possible issue may be a burnt-out fuse. The fuses are located in the plug(s) of your Christmas lights. To check your fuse, start by unplugging the lights. Next, slide back the fuse cover on the plug and pop out the damaged fuse like a battery. Replace with a new fuse and plug your lights back in.

The Ultimate Troubleshooting Tool to Fix Your Christmas Tree Lights
This year we had a TON of burnt-out lights on our Christmas tree. I began unplugging bulbs one by one and trying to replace them with a new bulb. It was taking forever and I thought “there must be an easier way”, so we searched the web. We came across a tool called the Light Keeper Pro and decided to give it a try.
The Light Keeper Pro is truly a must-have tool to fix your Christmas tree lights and moving forward will be a staple in our Christmas decor arsenal!
Below are some of the awesome features of the Light Keeper Pro.
Failed Bulb Finder
One of the best tools on the Light Keeper Pro is the Failed Bulb Finder. It’s essentially a voltage detector that can tell you if a burnt-out bulb is still passing electricity or not.
- Start by making sure your lights are plugged in.
- Hold down the black button on the top of the Light Keeper Pro and begin scanning the burnt out bulbs. Start out with the lights closest to the plug and work your way through the string of lights. You will hear a continous beeping indicating voltage is being dectected.
- Move bulb to blub and when the continuous beeping has stopped voltage is no longer being detected. Voila! you’ve found the malfuctioning bulb, sockets or wires.
95% of the time you can insert a new bulb and the problem will be fixed.
Bulb Tester
The bulb tester allows you to quickly test a light bulb to see if it works. When a bulb is inserted it will glow if it is still working. This is one of my favorite features as it allows you to quickly eliminate malfunctioning bulbs and ensure you’re only using viable replacement bulbs.
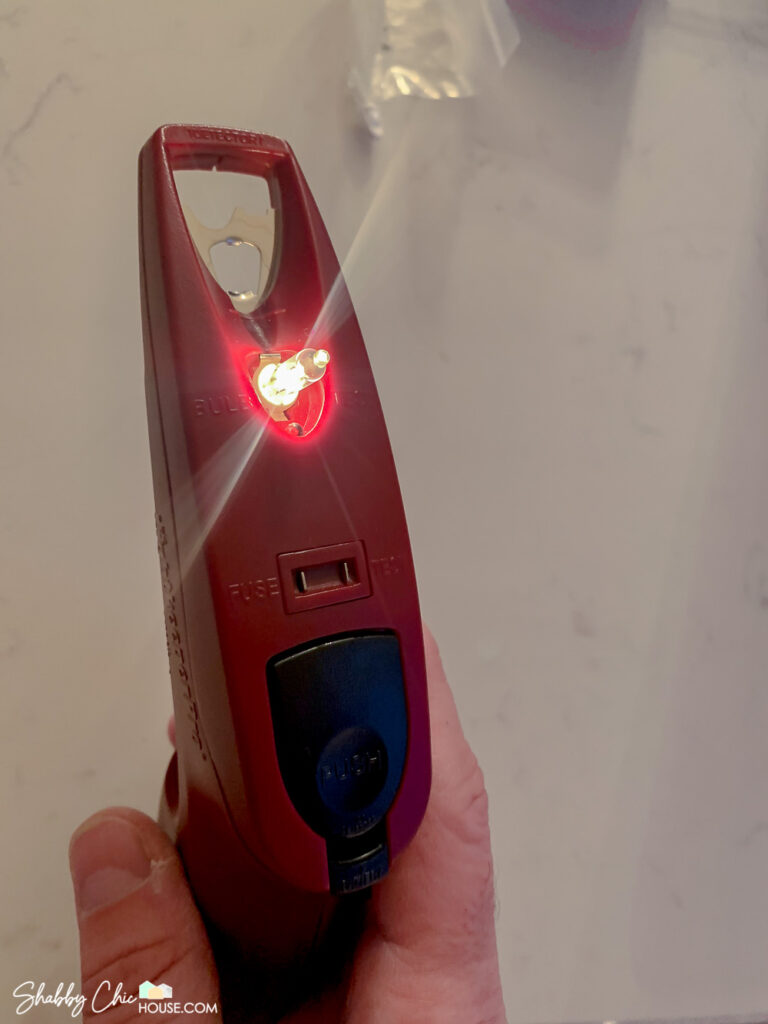
Fuse Tester
On the top of the Light Keeper Pro, is a 3 Amp 125 Volt fuse tester. Simply touch the two metal ends of the fuse on the two metal spots on the top of the Light Keep Pro and if the fuse works, a red light will turn on.
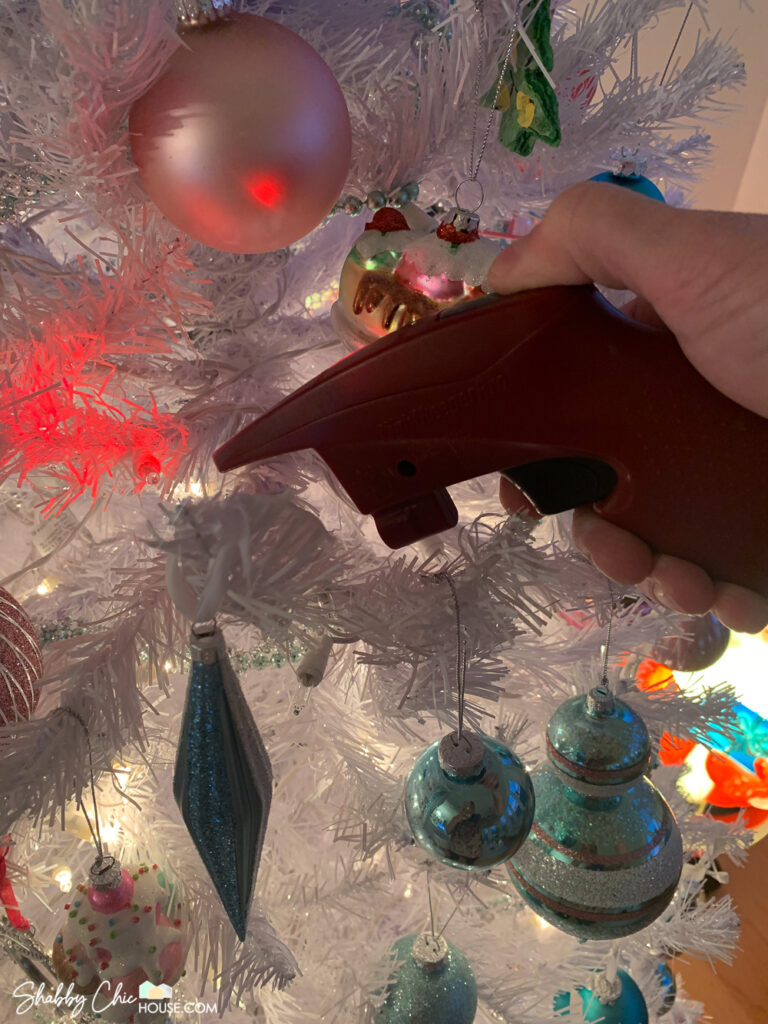
Shunt Repair Tool
As I mentioned above, the shunt of the lightbulb is very fragile and can often get damaged. The Light Keeper Pro has an easy-to-use shunt repair tool. Just slide the bulb socket onto the shut repair tool and pull the trigger 10-30 times (lights must be plugged in). What happens is the shunt tool sends a burst of electricity through the broken shunt helping to activate the non-functioning shunts!
Bulb Popper
Some bulbs are pretty difficult to remove and you nearly lose your figure nails trying. The Light Keeper Pro has a little metal popper on the end (almost like a bottle opener) to make it easy to remove expired light bulbs.
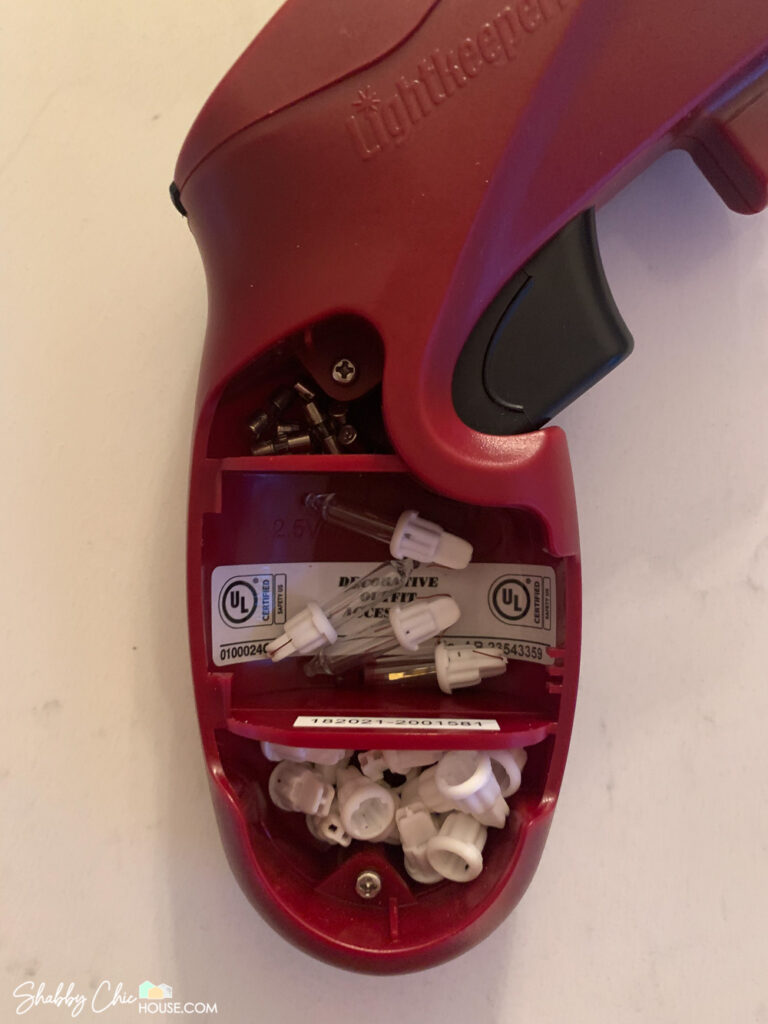
Storage Compartment & Replacement Bulbs
You know your turning into one of your parents like in one of those Progressive Insurance commercials when you get excited about storage. When I first purchased the Light Keeper Pro I didn’t realize there was a storage compartment in the handle. When I found it, I was blown away to find there were 3 sections for storage and also a package of replacement bulbs. Talk about an unexpected bonus!
The three-section storage compartment is great as it allows you to store fuses, bulbs and bases separately!
The Red-Tipped Bulb
Over the years you might have noticed a single red-tipped bulb that typically comes in a small baggie along with a few clear replacement bulbs and fuses. This bulb is what’s called a “Blinker Bulb”. You can insert this bulb anywhere in your strand and the blinker bulb and all the bulbs that follow will blink!
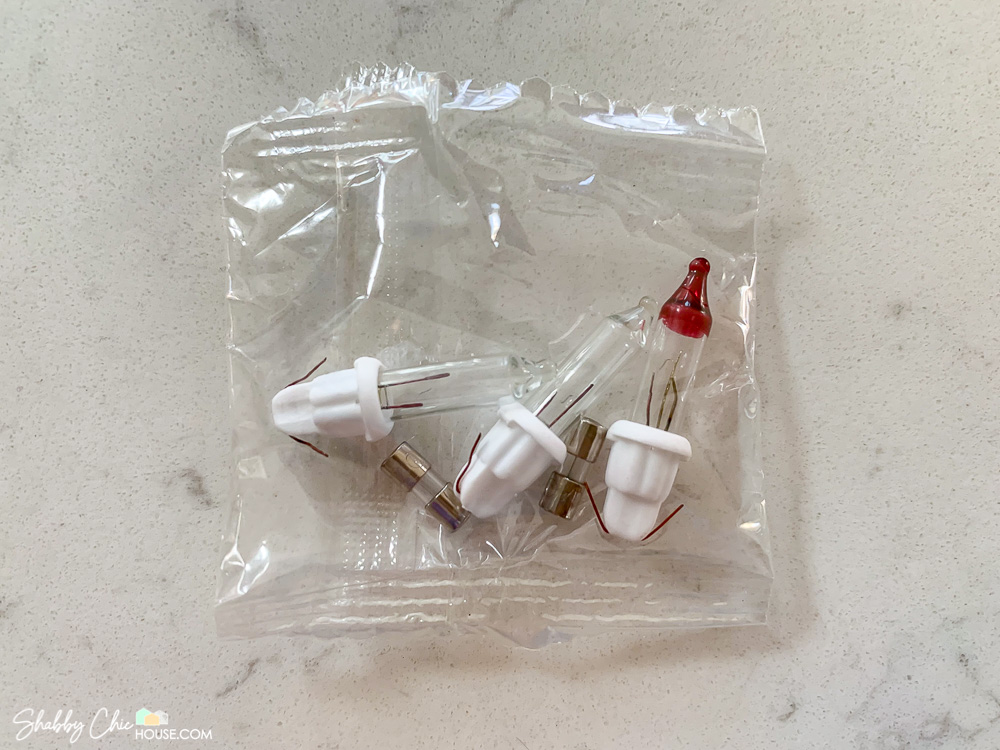
The way these bulbs work is somewhat interesting. They have a small metal/bendable filament. When the filament warms up it bends breaking the circuit and turning the lights off. Once the metal cools, the metal filament bends back, the circuit is reconnected and the light comes back on. This process continues on and off causing the circuit to break/unbreak and all subsequential lights to follow suit.
In Conclusion
I have to admit, it feels pretty awesome to be able to save a Christmas tree that you spent a few hundred dollars on. Also, it’s also always a plus being able to inform your significant other that he/she has married a genius.
Hopefully, you learned a little more about Christmas tree bulbs and were able to save a pre-lit Christmas tree of your own.

While you’re in the holiday mood, check out other blog posts on our Favorite Christmas Decor of 2021 and well as our Christmas Porch Decor Makeover.