In early 2020 during the peak of the Coronavirus shutdown, we put the original Shabby Chic House on the market and wrapped up construction on a brand new house with Drees Homes. While it’s taken several months to get settled in, we can’t wait to start the newest chapter with you here on ShabbyChicHouse.com. We already have a half dozen amazing How-To Articles and DIY Home Improvement projects in the works.
Check out the photos below of the NEW Shabby Chic House and a tiny sampling of some of the fun and exciting DIY Home Improvement Projects posts to come.
Selling the Original Shabby Chic House
While it was sad to part from our starter home, the timing was right. We had slowly outgrown the 1965 split-level and any additional investments we made in the property would no longer provide a return.
We’re wrapping up an extremely helpful post on the Top 10 tips before you list your house for sale – NOW LIVE!
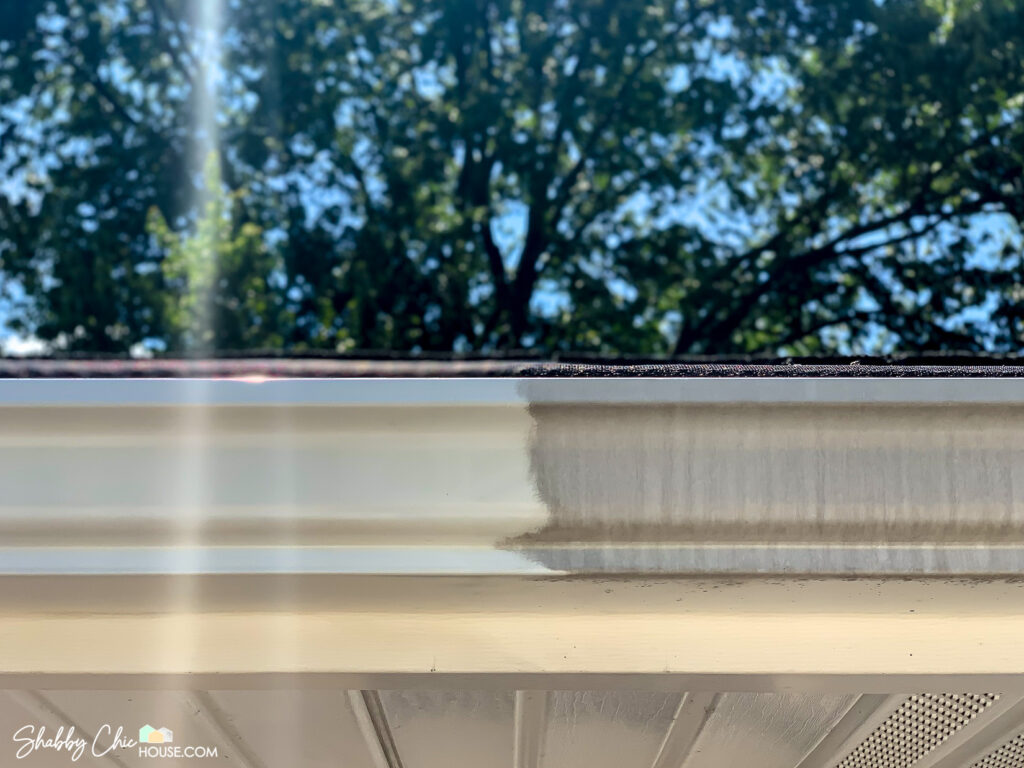
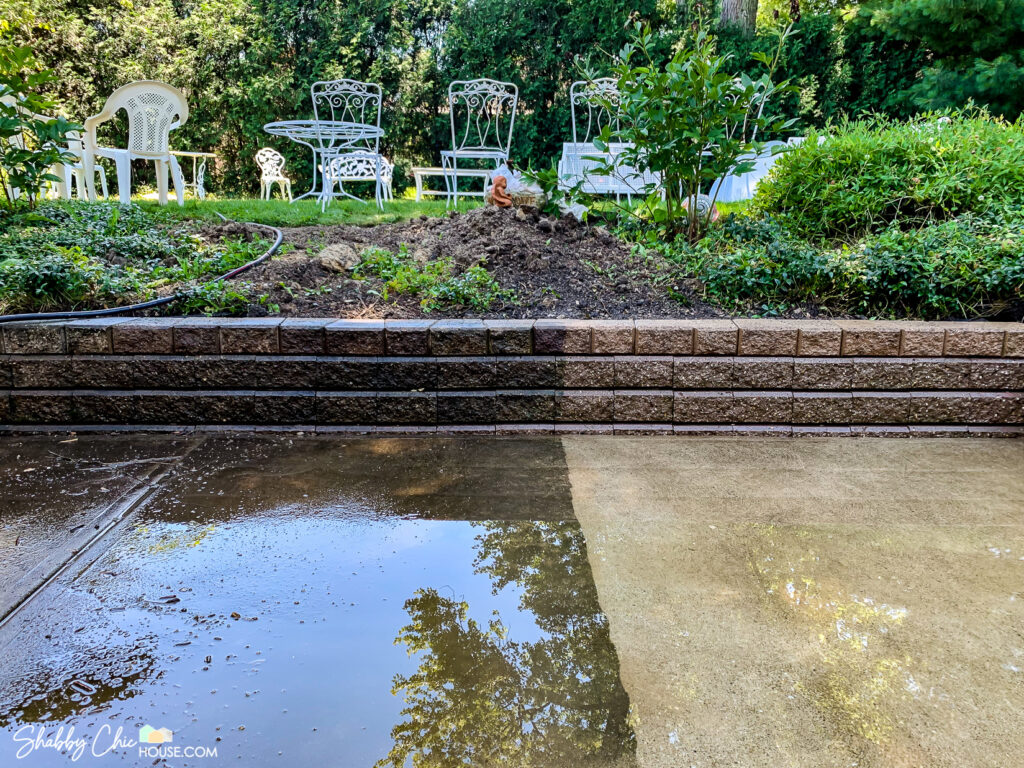
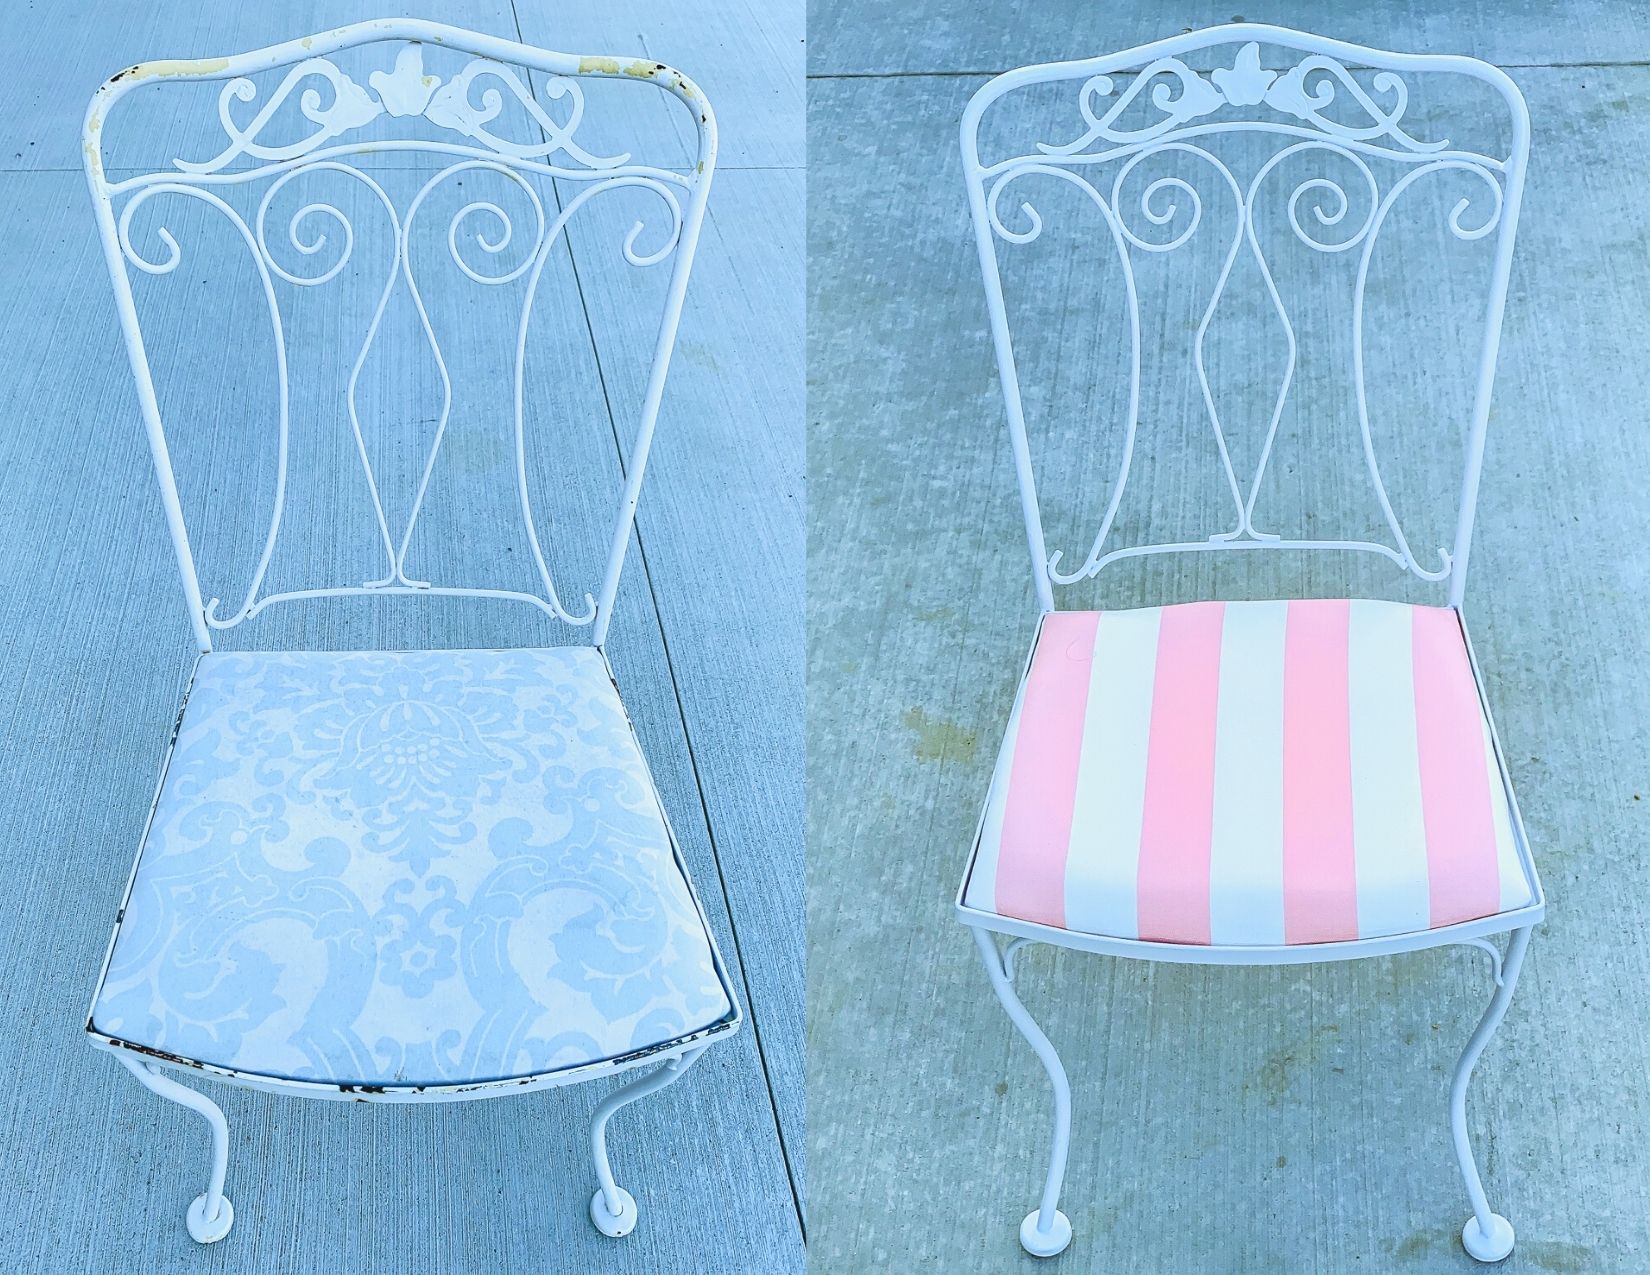
Below are some sneak-peek photos of just two of the tips/tricks we used to get our house ready to show, WOW buyers and ensure we got a top-dollar offer. AND THEY WORKED!
Check out the full post here!
Now Introducing…The New Shabby Chic House
We spent hours meticulously planning and designing each and every room in the new Shabby Chic House. The final product turned out a thousand times better than we could have ever imagined. We can’t wait to take you through each space, share a little bit about our design decisions as well as the upcoming home improvement projects we’ll be blogging about in the near future.
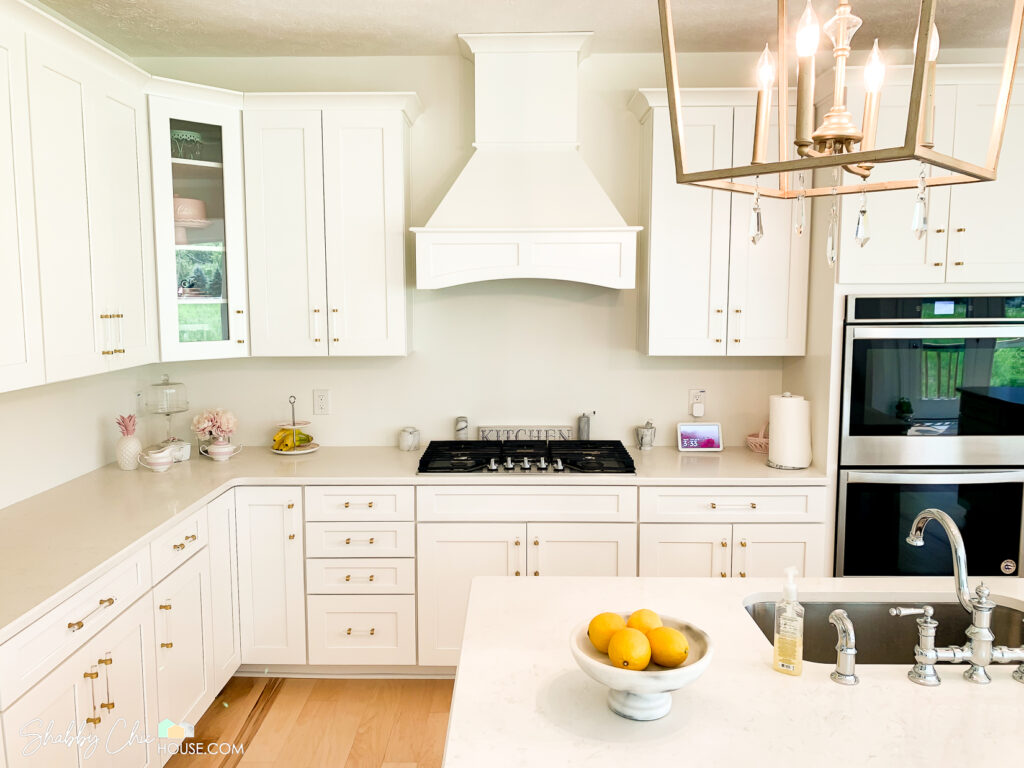
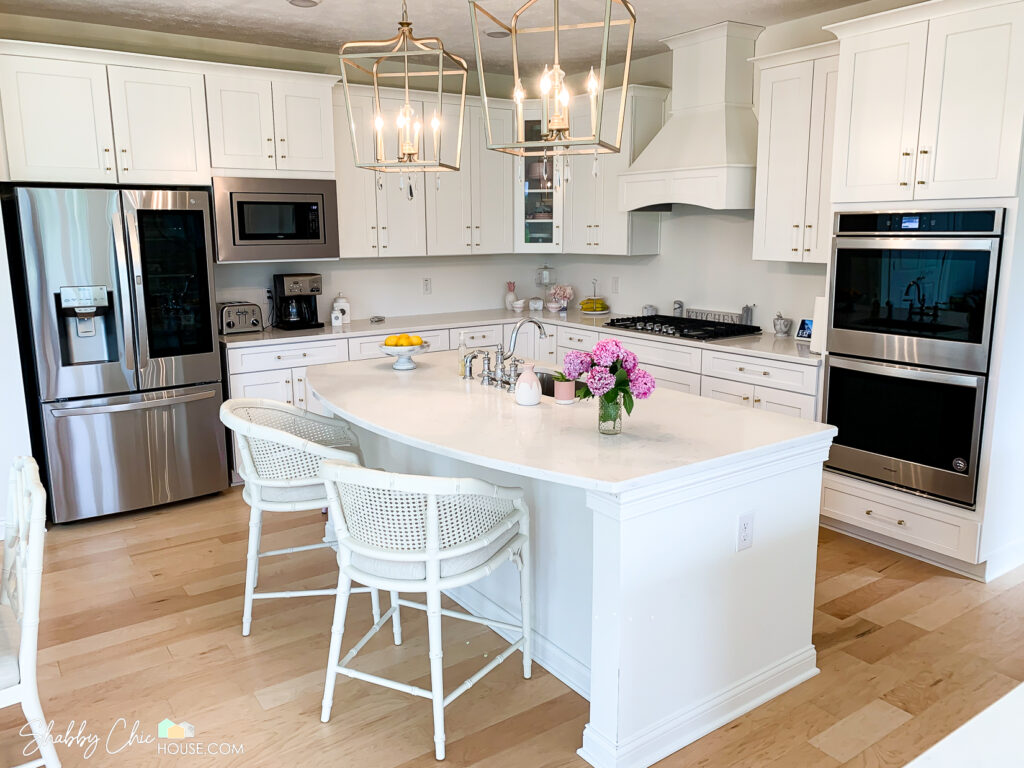
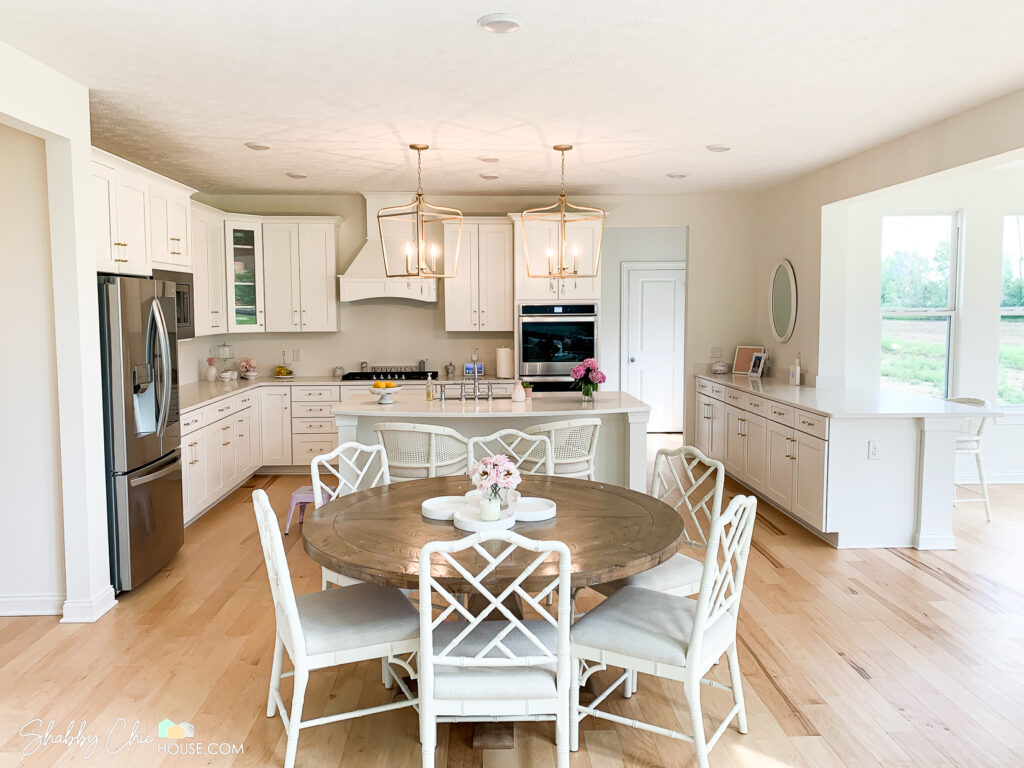
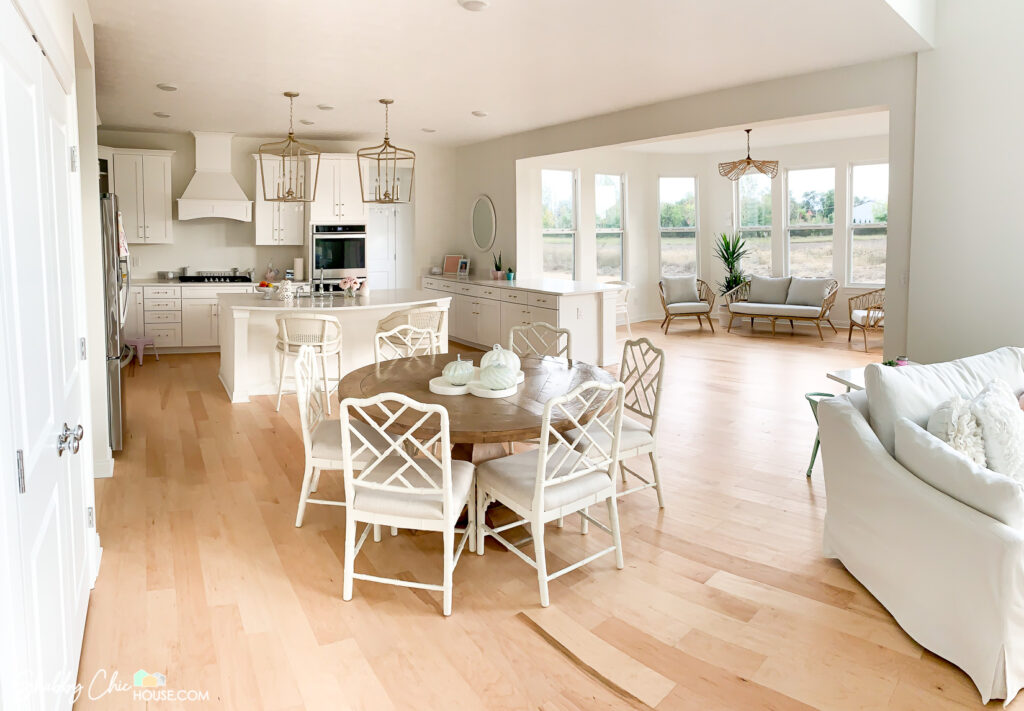
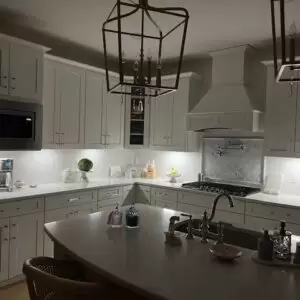
The Kitchen
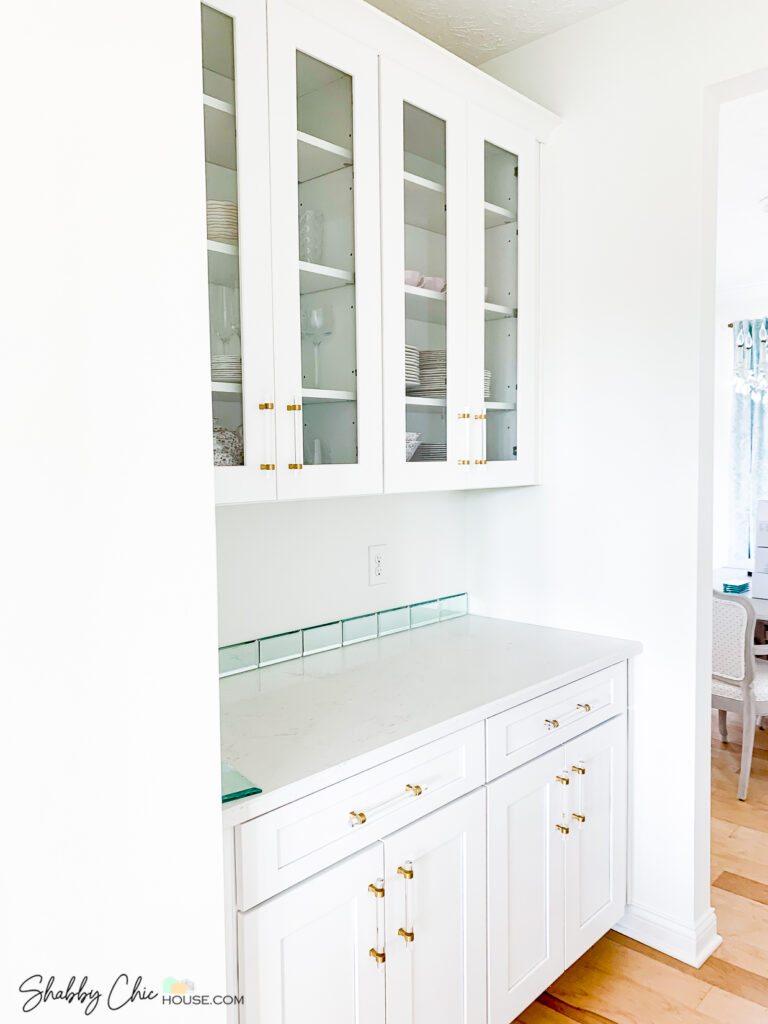
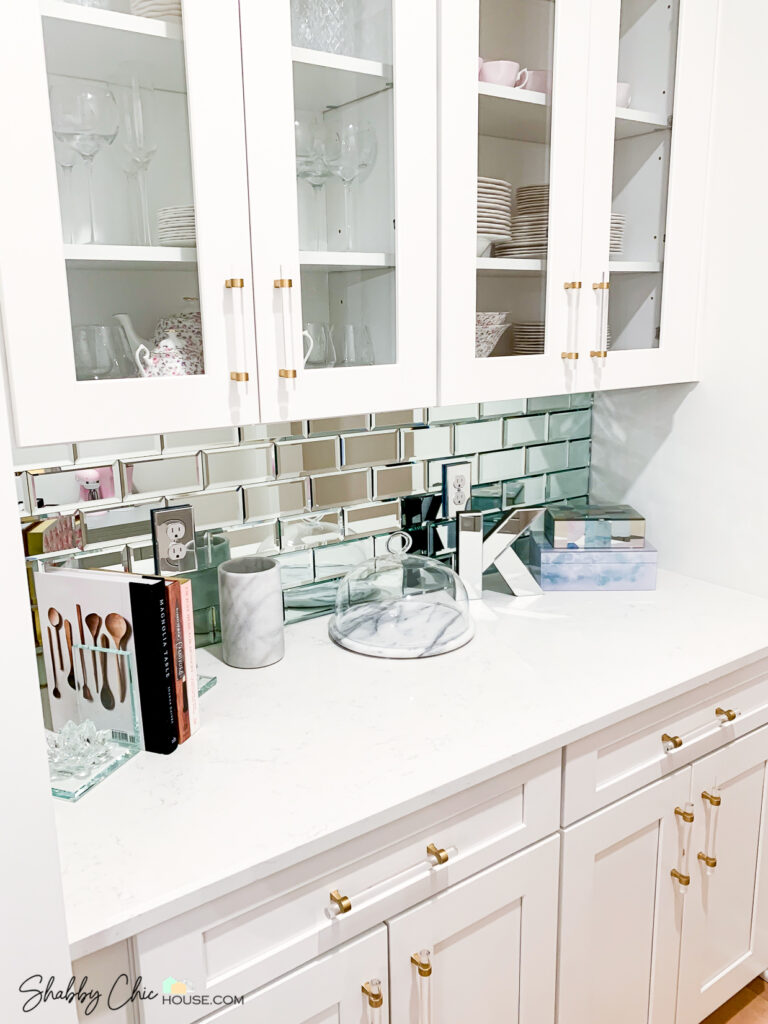
In the kitchen, we chose white shaker cabinets accented with quartz countertops. We loved this look so much we decided to carry it out in the butler’s pantry, buffet area by the sunroom, master bath and second full bath upstairs.
Also, within a few days of moving in we installed these beautiful Minka Lavery Laurel Estate gold lantern pendant lights.
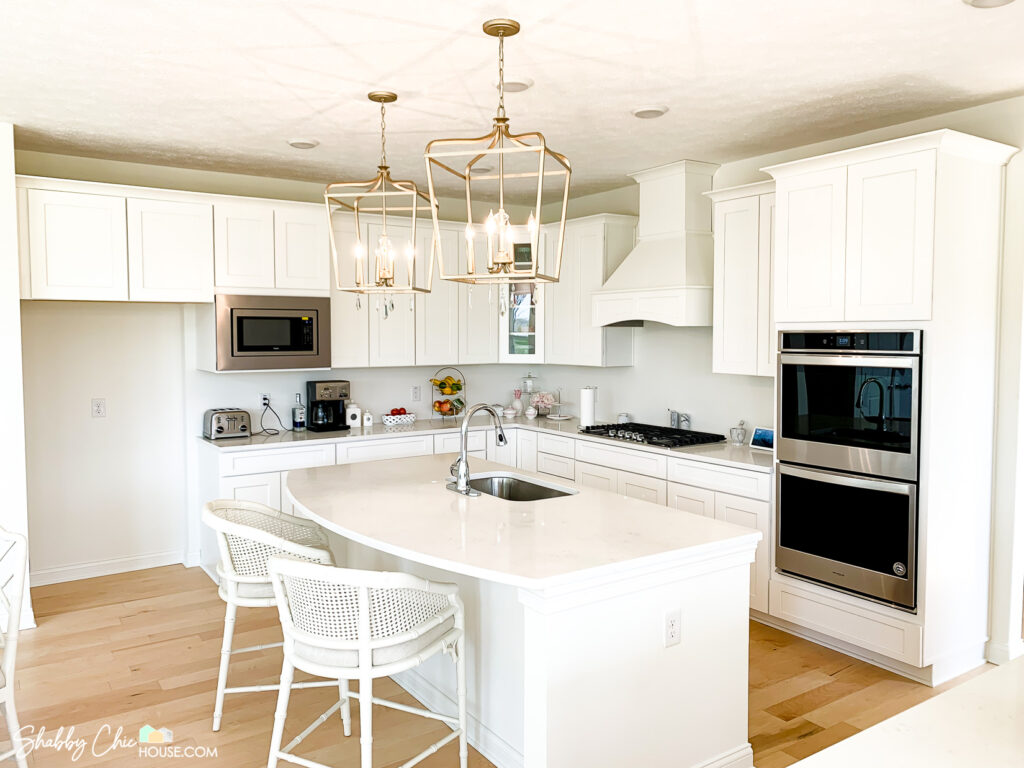
In the corner of the kitchen, we added a glass window/showcase cabinet and complemented it with a matching decorative range hood.

As you were reading this, you might have noticed – something is missing. Although we went all out in the kitchen, our builder didn’t have backsplash options, cabinet hardware or pendent lights that matched our style. We opted to leave those items off our build and add them in later on our own.
For the cabinet handles we went with these gold / bronze and acrylic GlideRite cabinet pulls below. This was somewhat of a scary process as we were drilling into our brand new/expensive shaker cabinets.
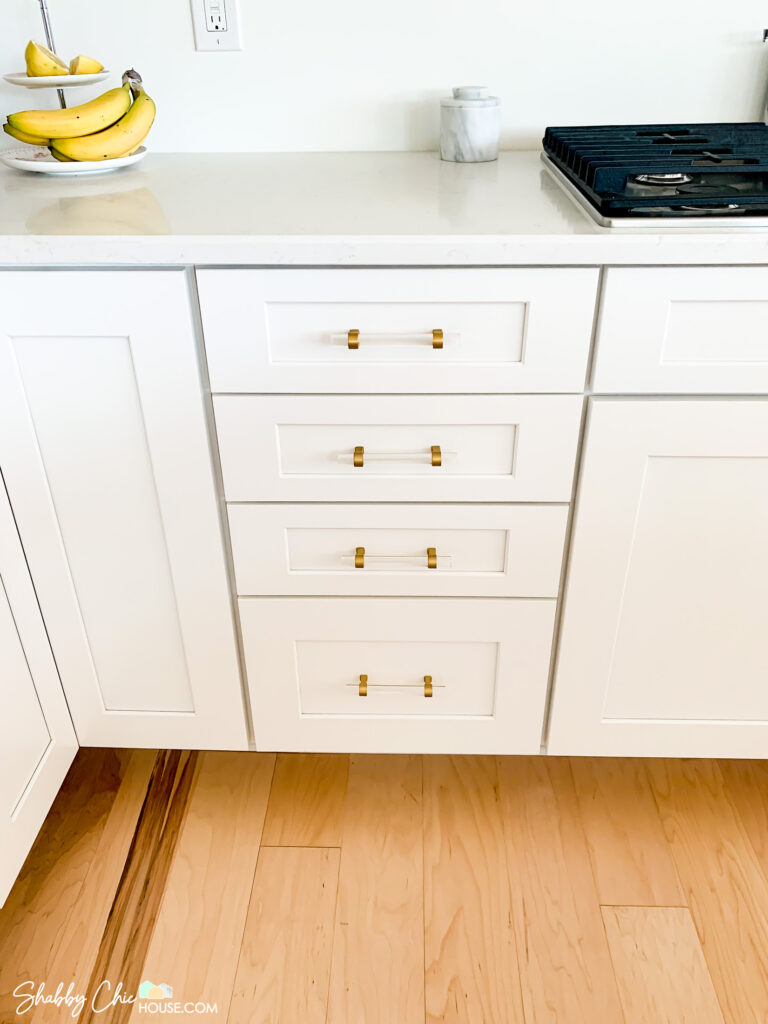
However, in the end things turned things turned out beautifully and we just wrapped up a brand new blog post Installing Cabinet Hardware: Tricks & Tips. Check it out!
If you’d love to see more of our shaker cabinets, gold and acrylic handles as well as the installation process please join our email list below!
Additional features in the kitchen include a double oven and my favorite appliance ever – an LG french door fridge with a see-through door and craft ice for cocktails. I’ll have to share more on that later, but who knew you could love a fridge this much!
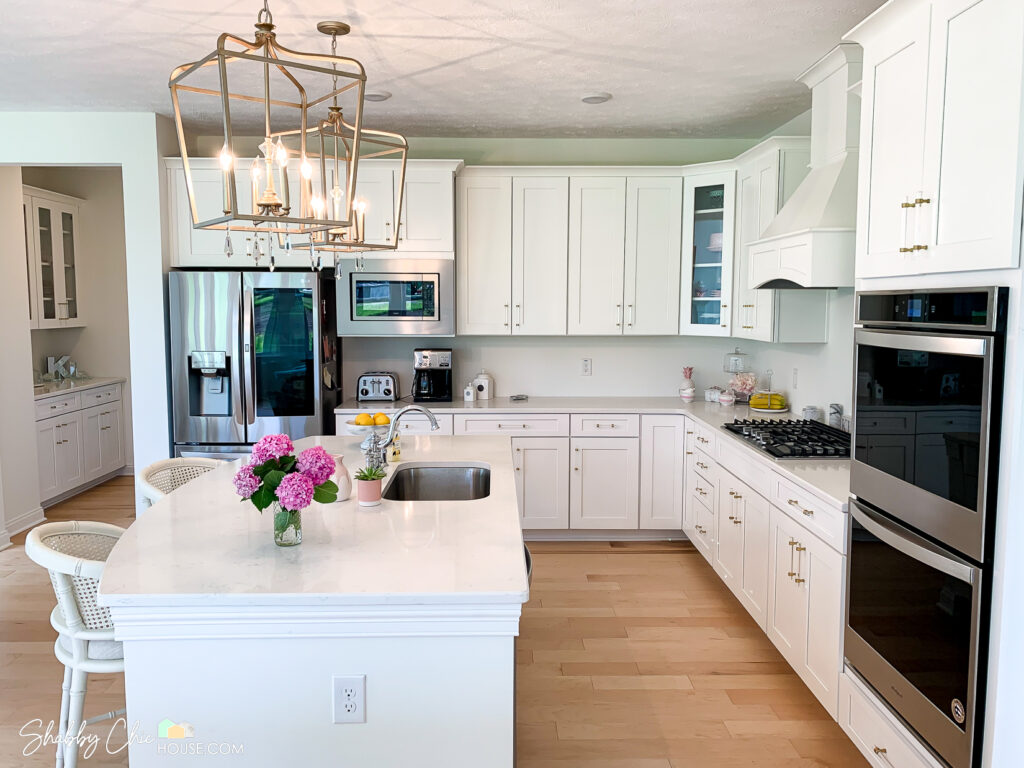
At our kitchen island and back buffet area, we placed these Anna Cane Back Counter Stools from Ballard Designs.
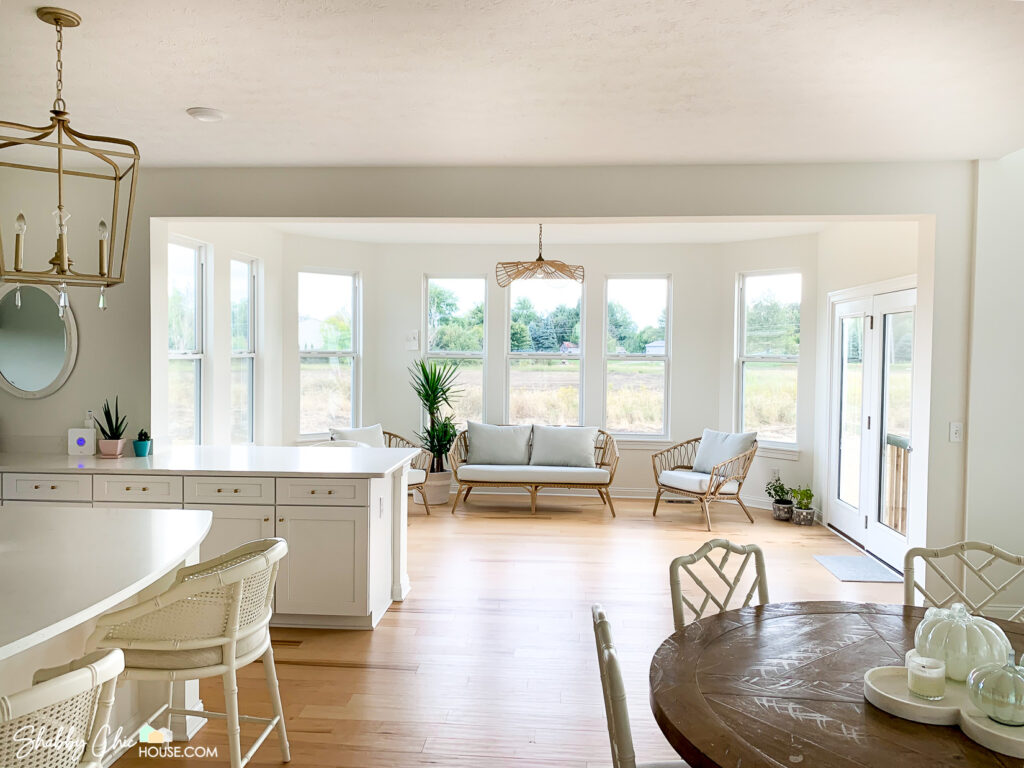
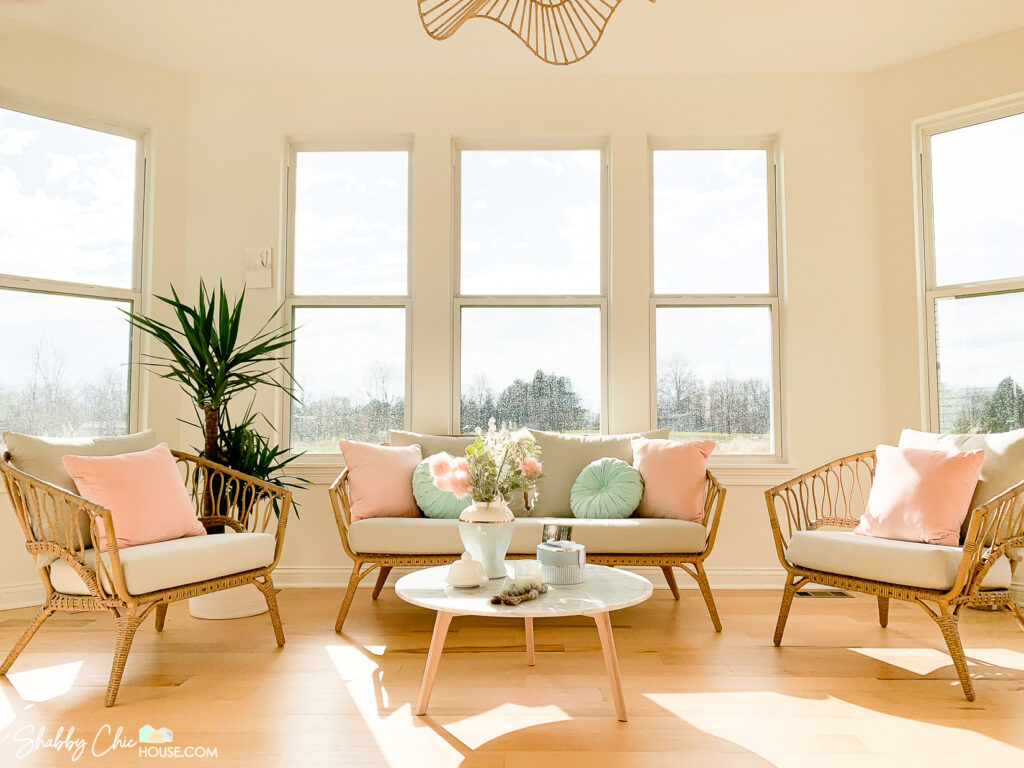
The Sunroom
On the backside of our kitchen, we added six additional cabinets creating a buffet area for entertaining which also opens up into the sunroom. We absolutely love the sunroom as it lets in so much light and makes the first floor seem several times larger.
Shortly after moving in we added this really cool rattan wrapped Lelani Pendant Light as well as these super awesome matching rattan chairs and bench.
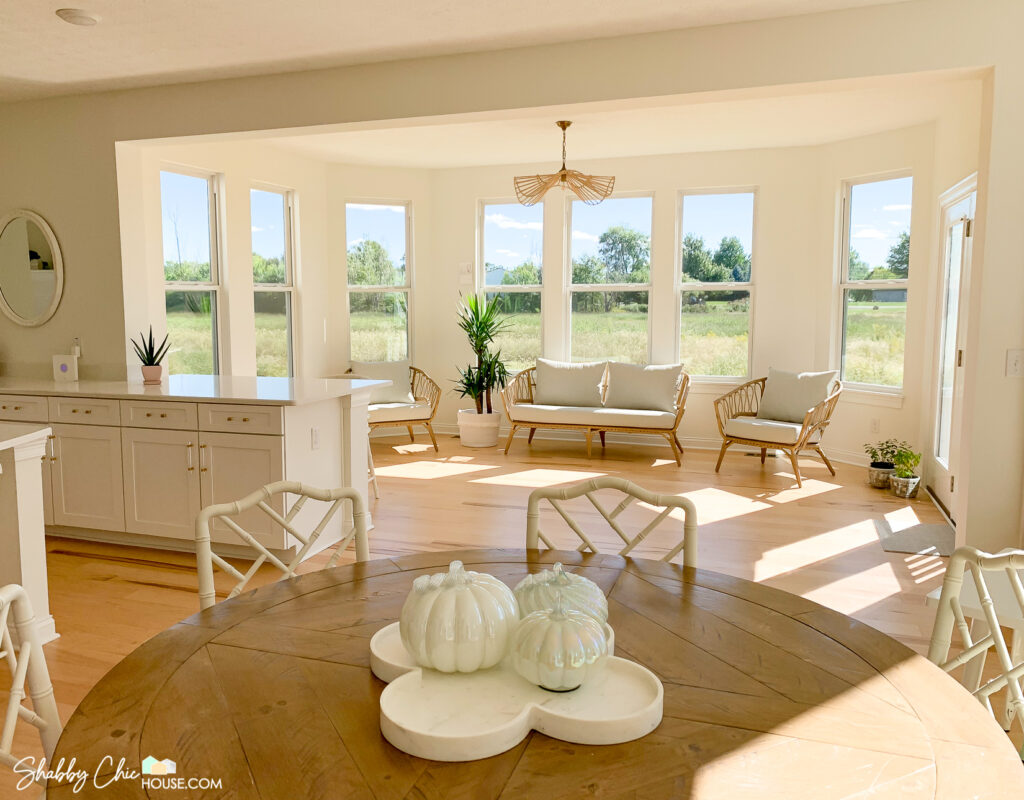
Casual Dinning Area & Butler’s Pantry
Next to the kitchen and sunroom is our casual dining area which also connects to our Butler’s Pantry.
Here we placed a round shabby chic/weathered-looking wooden pedestal dining table and rubbed cream Dayna side chairs from Ballard Designs that match the stools at our island and buffet table.
Our Butler’s Pantry features the same white shaker cabinets, quartz countertop and a mirrored subway tile backsplash we added shortly after moving in.

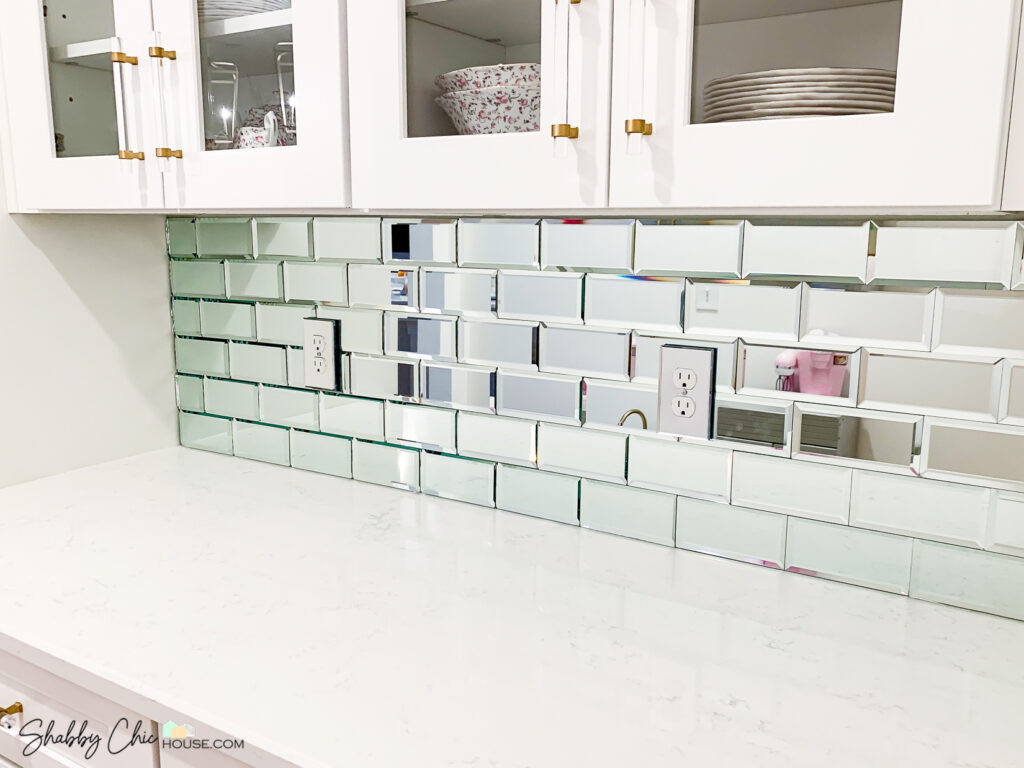
Working with this mirrored and beveled subway tile was quite the challenge. We put together an amazingly awesome blog post on this install with a big focus on sharing how to cut these insanely delicate and difficult to work with mirrored tiles.
Check it out! You won’t be disappointed.
How to Install a Mirrored Subway Tile Backsplash – Now Live!
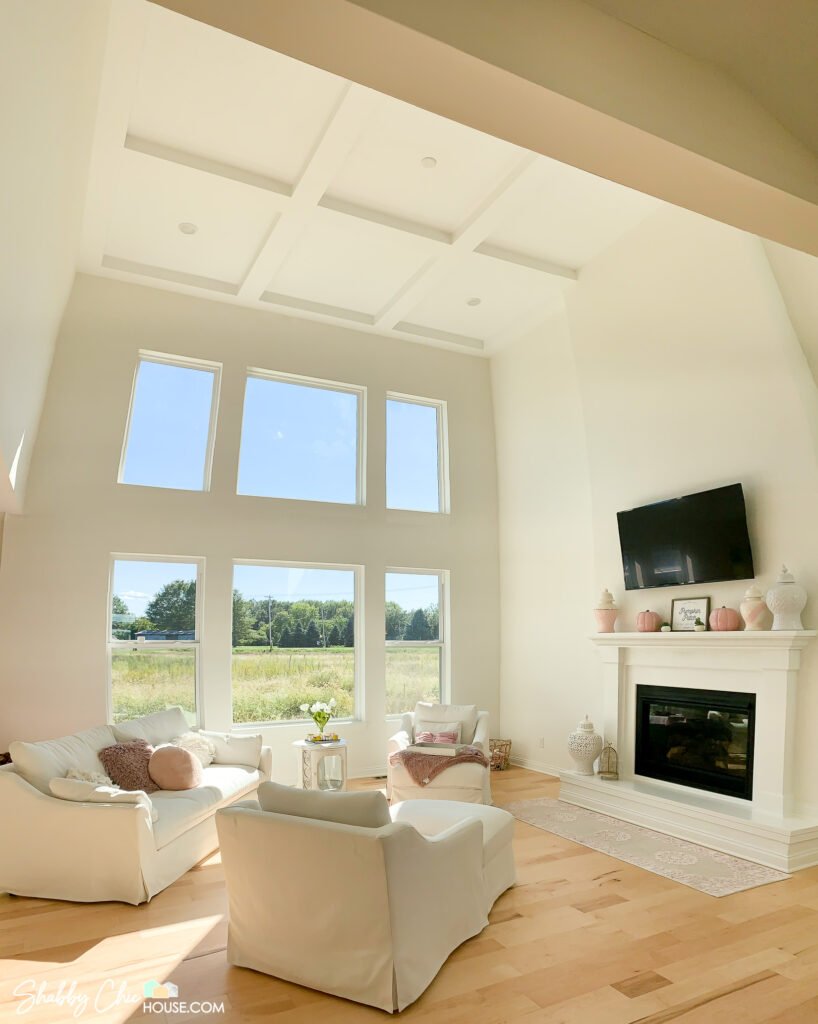
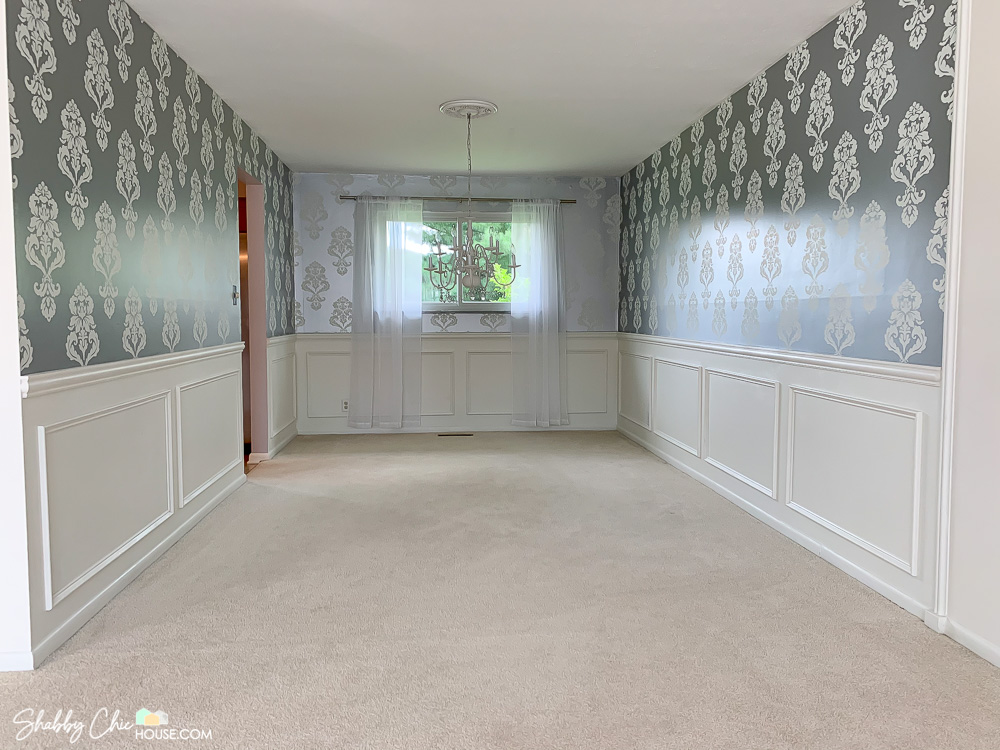
The Great Room
The casual dinning area then opens up to the pride and joy of the first floor – the Great Room. The great room’s nearly 20′ ceilings, exposed staircase and six large windows put the exclamation point on the open floor plan.
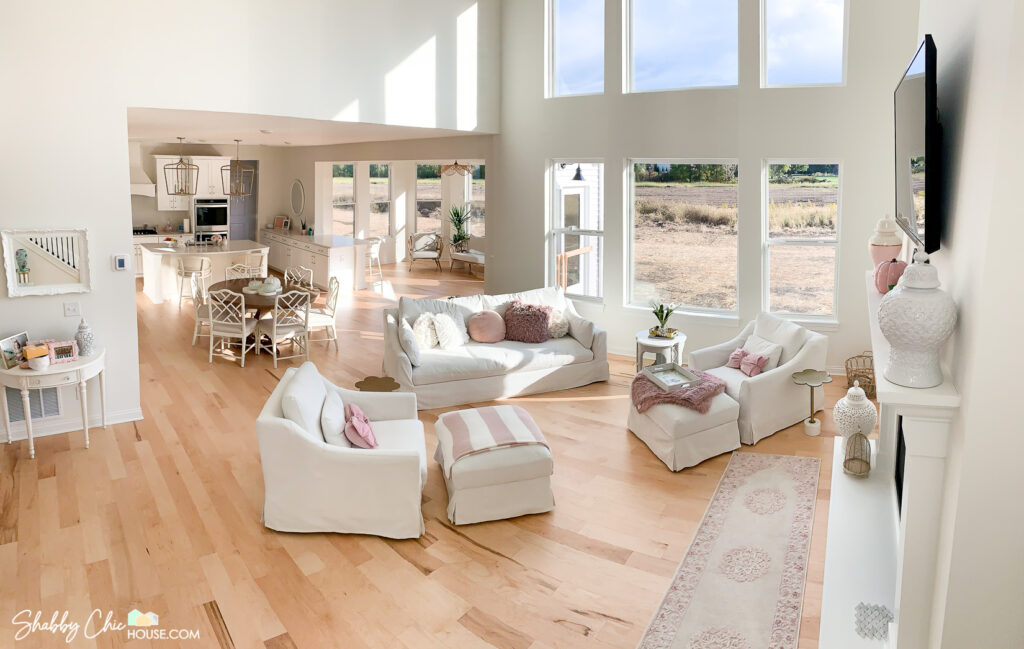
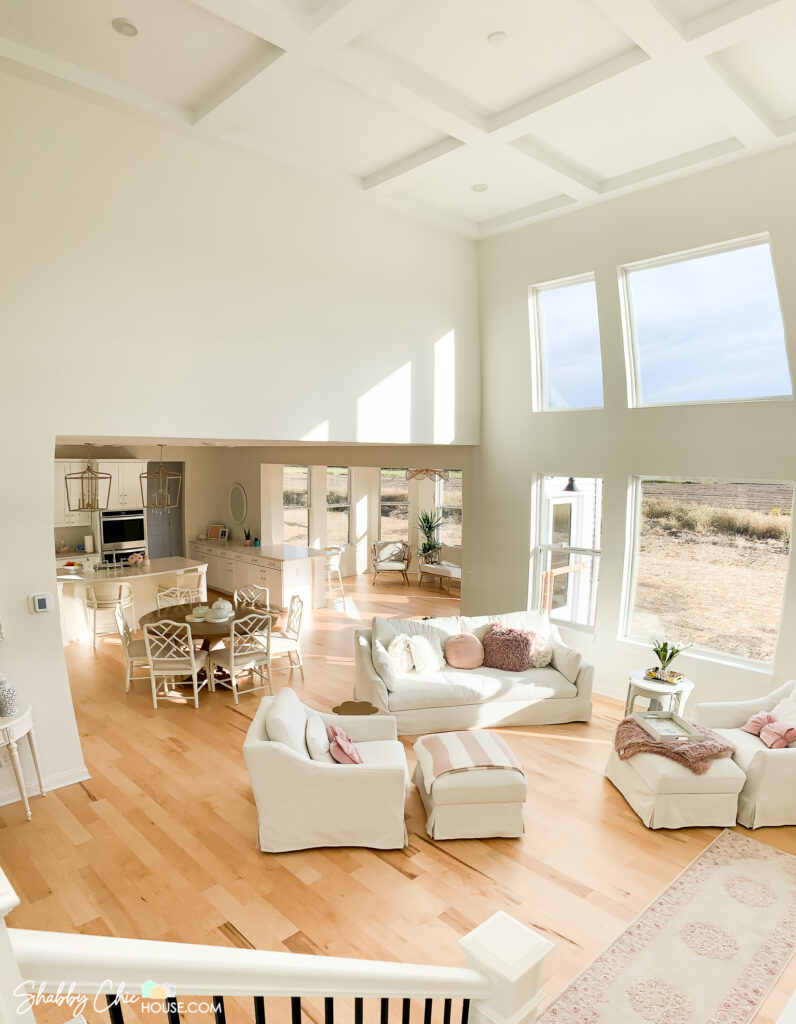
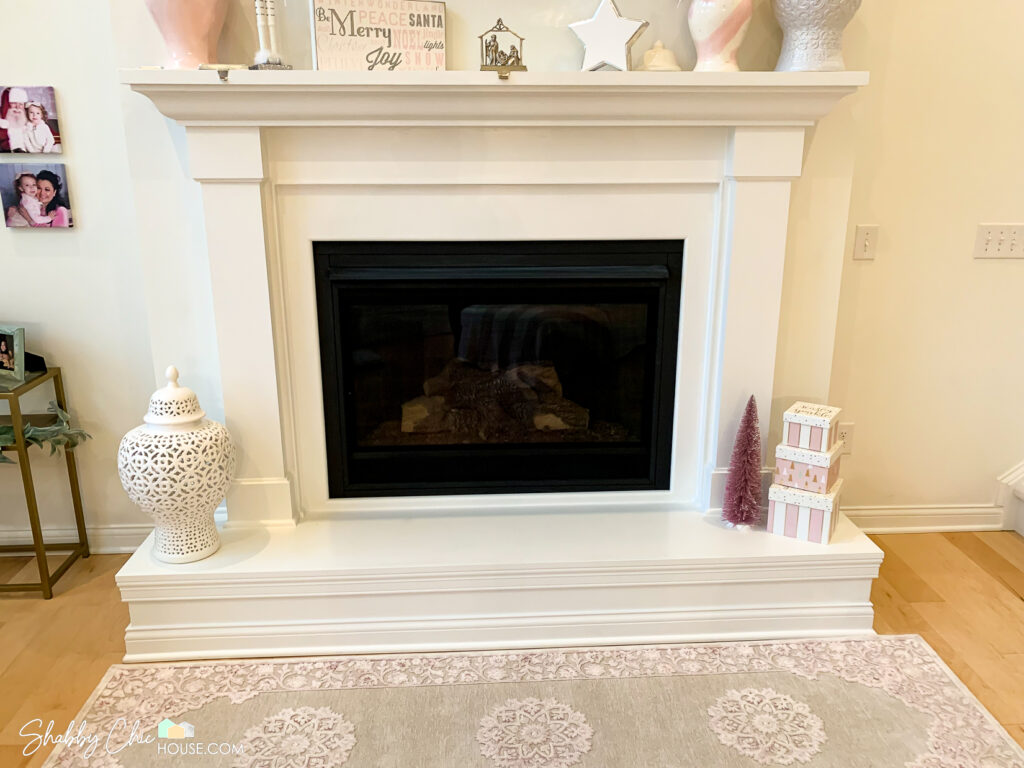
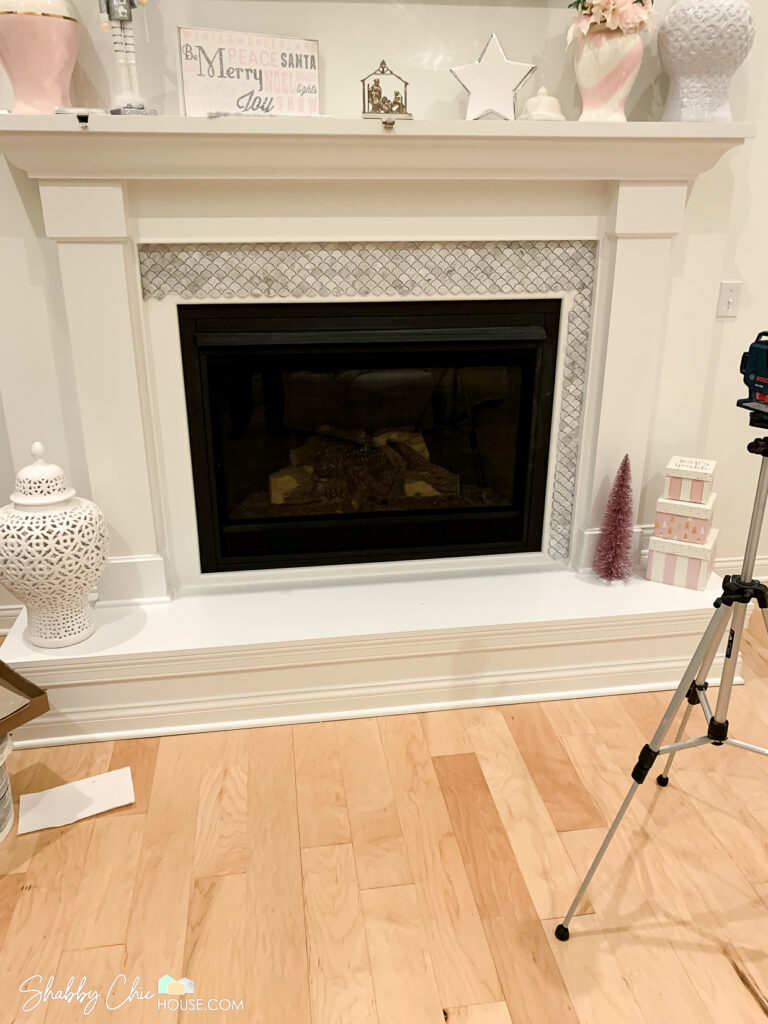
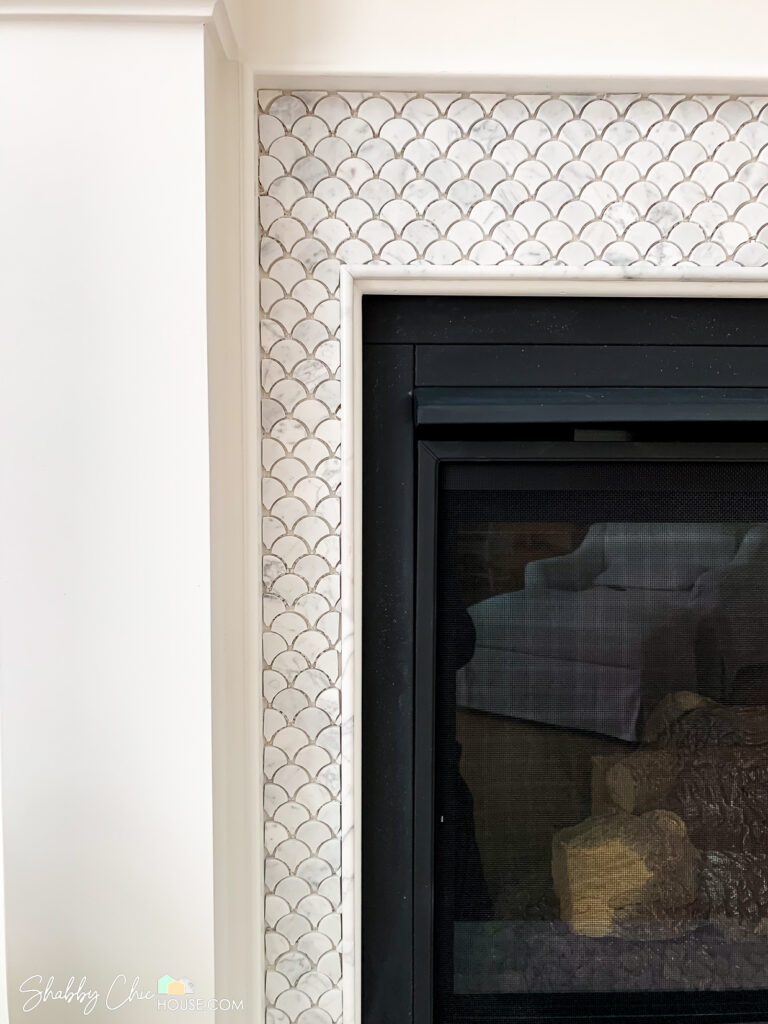
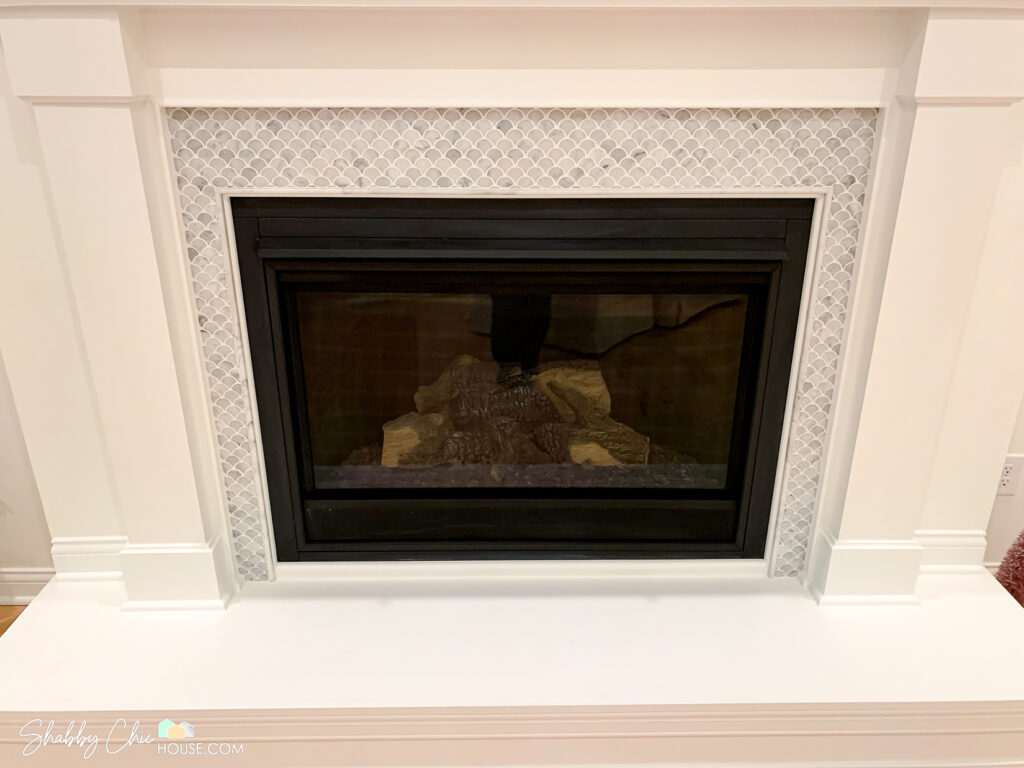
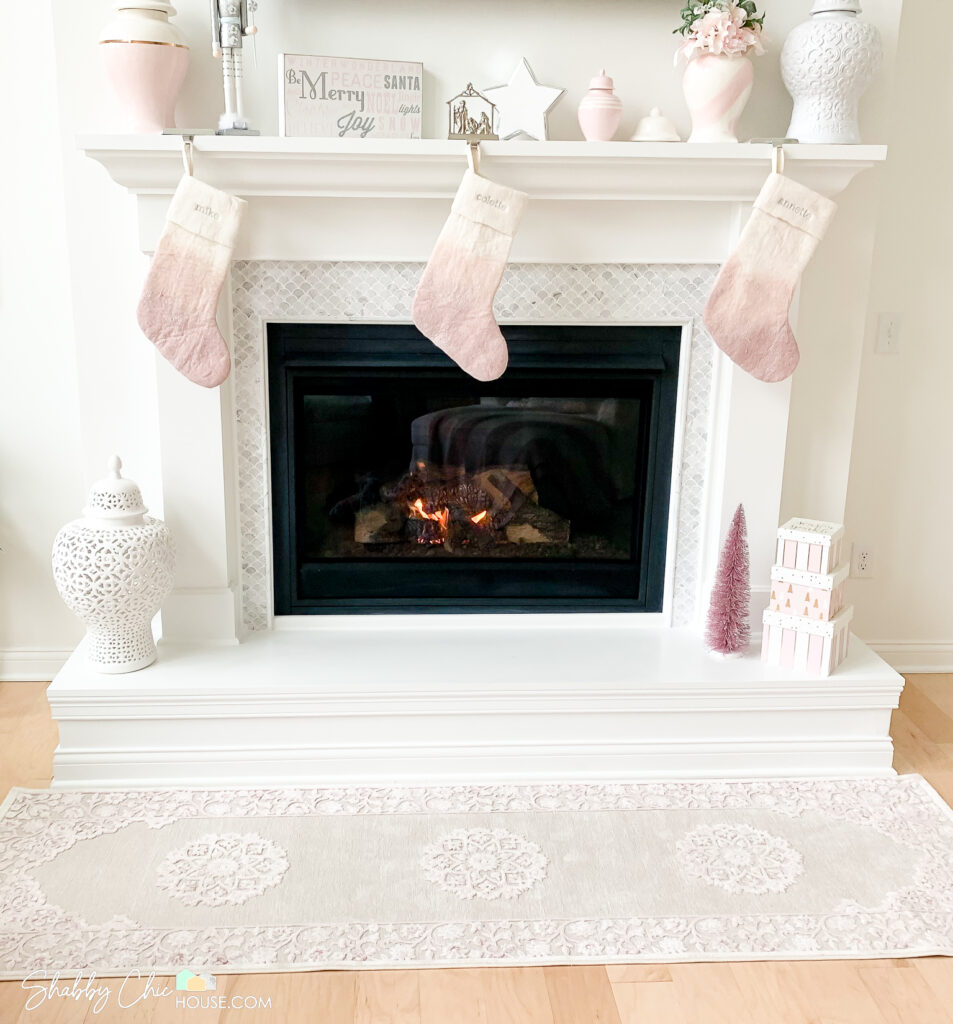
In addition, our great room features a 42″ Heatilator fireplace as well as probably our favorite design decision – a coffered ceiling. Such an awesome design choice that puts a cherry on top of this exclamation point.
In the near future, we’ll be adding an elegant showpiece chandelier in the center of the room as well as wainscoting all throughout. And at the moment we’re wrapping up a scalloped Italian Carrara marble tile surround.
Yet another awesome blog post we’re excited to share in the next few weeks!
Currently the first floor office, foyer and dinning room are in the works. Also, another area near completion that we think will blow your minds is our master suite with designer bath. Hold on to your hats!
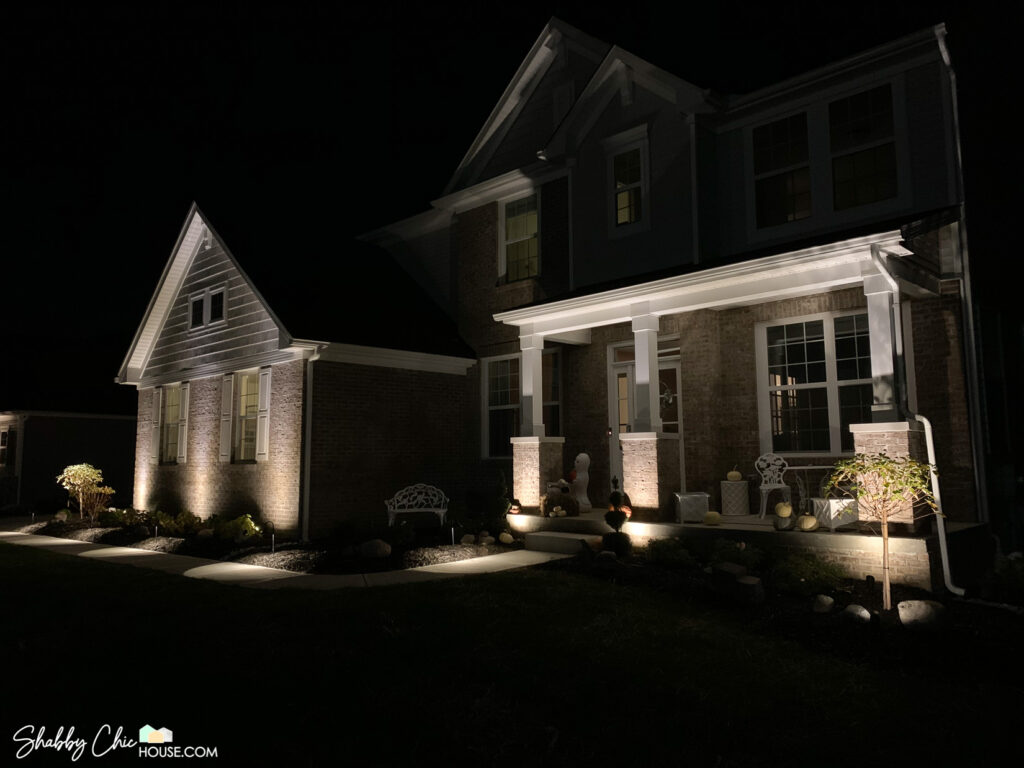
Exterior
Dealing with the exterior of a new house in year one is quite stressful. In addition to getting everything settled inside, we’ve also had to deal with the constant blowing dirt, having our driveway poured, planting new grass as well as power washing/sealing the driveway before winter.
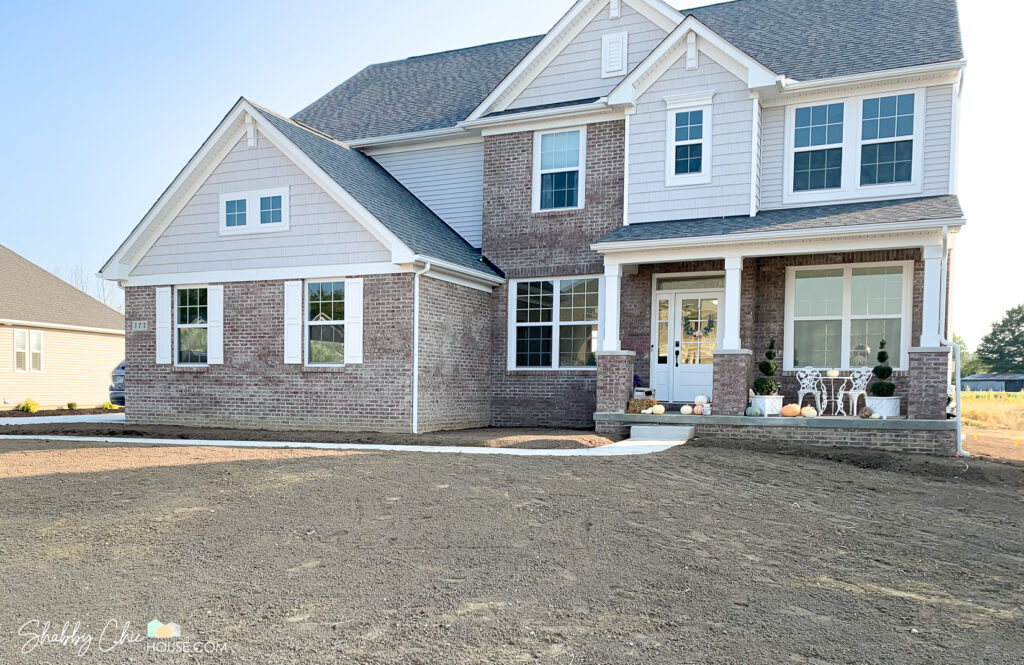
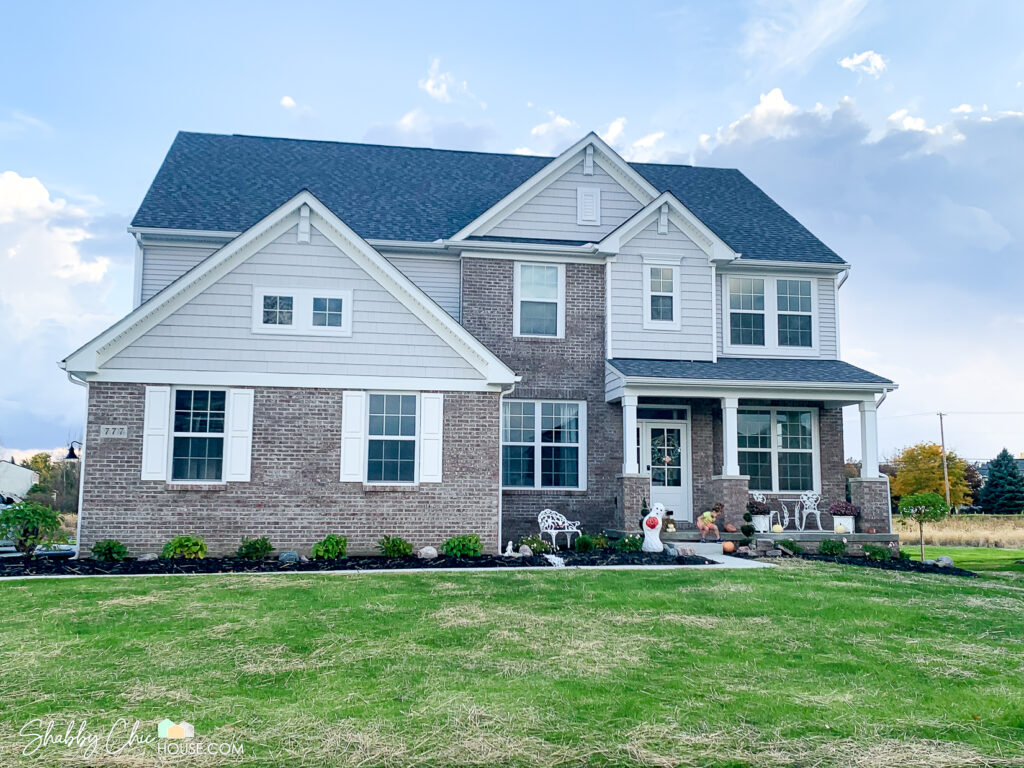
Not only did we tackle all the tasks above, we also installed our front flower beds/landscaping, landscape lighting (Uplighting and Path Lights) as well as a full security system with security cameras and more.
A ton of planning and thought went into these projects, so we decided to create post for each.
Front Yard Landscape Ideas – Tips to help plan & design on your own
How to install your own low voltage landscape lighting (uplighting & pathway lights) – NOW LIVE!
A Complete Review of the Ring Home Security Products– NOW LIVE!

We started with one Ring camera as a test and now have a total of 4 cameras as well as the Ring Security System, Ring Transformer, Ring Bridge, Ring Outdoor Solar Steplight, Ring Outdoor Motion Sensor and Ring Flood & Freeze Sensor.
I had no idea I’d turn into a complete Ring junkie! I absolutely love the Ring product suite and can’t wait to write reviews on each product and share all the cool things Ring can and can’t do.
Tips for Building a New House
Last, if you happen to be starting the process of building a new house or considering building, you might like our three-part blog post coming up that will detail:
- Buying a New Construction Home? See these Top Tips First! – NOW LIVE!
- The Design Process – Things to Consider & How to Plan Ahead
- The Actual Build – Overseeing your builder, tradesman and things to keep an eye out for
Again, we can’t wait to share all the home improvement projects mentioned above and the many yet to come. If you’re as excited as we are, please join our email list below and we’ll be happy to send a heads up your way as new posts go live.


we are building with Drees and I’d love to know the name of your flooring selection here! It’s beautiful!
Hey Julia, Thanks for visiting! That’s super exciting news. Our engineered hardwood floors are by Capella and are called Maple Scrape – Color: Natural. Also here’s the product number you can share with your designer or Google (#EMCH52L01H).
Best of luck with your build! Feel free to ping me if you have any other questions.
Hey Mike,
My husband and I absolutely love the way you guys did your home. We are building with drees too and we are planning to go with engineered wood. Do you guys regret or happy taking the engineered hardwood? Nowadays everyone are choosing luxury vinyl plank over engineered hardwood (cons of engineered hardwood: scratches and dents) (pros of LVP: easily replaceable).
Looking forward for your advise.
Thank you in advance
-Jo
Hey Jo,
Thanks a lot for visiting as well as for the compliments on our home! We love our engineered hardwood floors and have zero regrets. Yes, there are a few very small dings here and there, but you almost have to be on your hands and knees to see them. Overall, our engineered hardwood floors have proved to be pretty durable.
Good luck with your build! Feel free to reach out at any time if you have additional questions.
Mike from the ShabbyChicHouse.com